
Bubuka
This manual provides detailed instructions for the installation, operation, and maintenance of your DB DRIVE A3 2250.5 Okur Series A3 Class AB 1000 Watt 5-Channel Amplifier. Please read this manual thoroughly before attempting installation or operation to ensure proper use and to prevent damage to the unit or your vehicle's audio system.
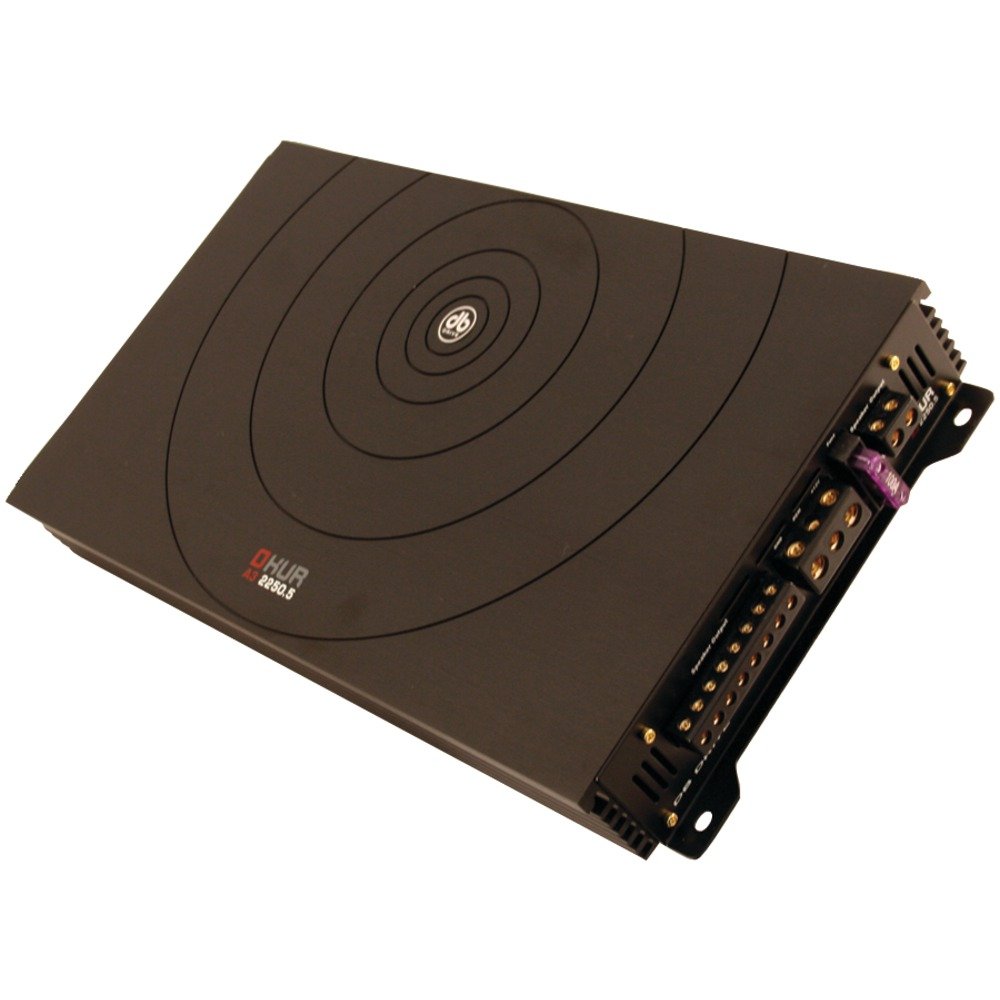
Image: DB DRIVE A3 2250.5 Okur Series A3 Class AB 1000 Watt 5-Channel Amplifier. Gambar ieu nunjukkeun ampluhurna liifier view, highlighting its compact design and branding.
Émbaran Kasalametan
Salawasna perhatikeun pancegahan kaamanan di handap ieu pikeun nyegah tatu atanapi karusakan:
- Disconnect the vehicle's battery negative terminal before making any power connections.
- Ensure all wiring is properly routed and secured to prevent pinching or short circuits.
- Paké wiring gauge luyu pikeun kakuatan sarta sambungan taneuh sakumaha dieusian dina bagian instalasi.
- Pasang éta ampLifier di lokasi anu ngamungkinkeun pikeun ventilasi nyukupan pikeun nyegah overheating.
- Hindarkeun masang amppangleyur di daérah anu kakeunaan kalembaban atanapi geteran anu kaleuleuwihi.
- Taroskeun pamasang audio mobil profésional upami anjeun henteu yakin ngeunaan bagian mana waé tina prosés pamasangan.
Setup sareng Instalasi
1. Unpacking jeung Inspection
Ati-ati ngaleupaskeun amplifier from its packaging. Inspect the unit for any signs of damage that may have occurred during shipping. Contact your dealer immediately if any damage is found.
2. Pamasangan Amppangagung
Choose a mounting location that is dry, well-ventilated, and secure. Common locations include under a seat, in the trunk, or behind a panel. Ensure there is sufficient airflow around the ampheatsink lifier.
- Mark the mounting holes using the amplifier salaku citakan.
- Bor liang pilot upami diperyogikeun, ati-ati ulah ngaruksak komponén kendaraan naon waé.
- Ngamankeun nu amppangiket nganggo sekrup pemasangan anu disayogikeun.
3. Sambungan Wiring
Proper wiring is crucial for performance and safety. Refer to the following guidelines:
- Kakuatan (BATT+): Connect a heavy-gauge wire (e.g., 4 AWG or 8 AWG depending on total power) directly from the positive terminal of the vehicle's battery. Install an inline fuse holder within 18 inches (45 cm) of the battery.
- Taneuh (GND): Connect a heavy-gauge wire of the same size as the power wire to a clean, unpainted metal surface of the vehicle's chassis. Ensure a solid, low-resistance connection.
- Jauh (Rem): Connect a smaller gauge wire (e.g., 18 AWG) from the amplifier's remote terminal to the remote output of your head unit. This turns the amphurungkeun sareng pareumkeun liifier nganggo head unit.
- Masukan RCA: Connect RCA cables from your head unit's pre-amp outputs kana amplifier's RCA input jacks. Ensure correct channel matching (Front L/R, Rear L/R, Sub).
- Kaluaran Speaker: Connect speaker wires from the amplifier's speaker terminals to your speakers. Observe correct polarity (+ to + and - to -). This is a 5-channel amplifier, typically 4 channels for full-range speakers and 1 channel for a subwoofer.
4. Gain, Crossover, and Bass Boost Settings
These settings allow you to fine-tune the amplifier's output to match your audio system and preferences.
- Meunang Kontrol: Adjust the gain to match the output voltage of your head unit. Start with the gain at minimum, then slowly increase it until you hear distortion, then back off slightly. This is not a volume control.
- Crossover (LPF/HPF):
- Low Pass Filter (LPF): For the subwoofer channel, set the LPF to allow only low frequencies to pass (e.g., 80-120 Hz).
- High Pass Filter (HPF): For the full-range channels, set the HPF to block low frequencies from reaching your main speakers (e.g., 80-100 Hz) to prevent distortion and improve sound clarity.
- Naekeun Bass: Use the bass boost sparingly. Excessive bass boost can lead to distortion and speaker damage. Adjust to taste, ensuring sound remains clear.
Parentah Operasi
Sakali dipasang sareng ngonpigurasi, éta amplifier will power on automatically with your head unit via the remote turn-on wire. Adjust volume and tone controls primarily from your head unit. The amplifier's settings (gain, crossover) are set during installation and generally do not require frequent adjustment.
Pangropéa
The DB DRIVE A3 2250.5 amplifier merlukeun pangropéa minimal.
- beberesih: Periodically wipe the ampLap bagian luar ifier ku lawon anu lemes sareng garing pikeun miceun lebu. Entong nganggo bahan kimia anu keras atanapi pembersih anu abrasif.
- Pamariksaan: Occasionally check all wiring connections to ensure they are secure and free from corrosion. Ensure the amplifier's ventilation fins are not obstructed.
Pamérésan masalah
Upami anjeun ngalaman masalah sareng anjeun ampLifier, tingal masalah sareng solusi umum ieu:
| Masalah | Mungkin Cukang lantaranana | Solusi |
|---|---|---|
| Teu aya kakuatan / Amplifier teu hurung |
|
|
| Taya Kaluaran Sora |
|
|
| Sora Distort |
|
|
| AmpPanas teuing (Modeu Protéksi) |
|
|
spésifikasi
| Fitur | Rincian |
|---|---|
| Nomer modél | A3 2250.5 |
| Kaluaran kakuatan maksimum | 1000 Watt |
| Saluran | 5-Channel (4 stereo, 1 mono for subwoofer) |
| Amplifier Kelas | Kelas AB |
| Komponén | Audiophile Grade |
| Ukuran (L x W x H) | 53.59 x 30.48 x 10.92 cm |
| Beurat | 6.53 kg |
| Manajemén panas | DRIVESINK (Okur Series A3 feature) |
Garansi sareng Rojongan
DB Drive products are designed for reliability and performance. This product is covered by a limited warranty. Please refer to the warranty card included with your product or visit the official DB Drive websitus pikeun istilah jeung kaayaan jaminan lengkep.
For technical support, service, or warranty claims, please contact your authorized DB Drive dealer or visit the DB Drive official websitus pikeun inpormasi kontak sareng sumber dukungan.