Masterbuilt: Crafting quality outdoor cooking experiences since 1973.
1. Émbaran Kasalametan penting
Read all instructions carefully before assembling and operating this propane smoker. Failure to follow these instructions could result in property damage, bodily injury, or death. This appliance is for outdoor use only. Do not use in an enclosed area such as a garage, shed, or other building.
Always operate the smoker on a level, non-combustible surface.
Maintain a minimum distance of 10 feet (3 meters) from any combustible materials.
Jauhkeun barudak jeung piaraan ti nu ngaroko sepanjang waktos.
Ulah nyimpen silinder LP cadang handapeun atawa deukeut alat ieu.
Never use charcoal or lighter fluid in the smoker.
Salawasna pastikeun ventilasi anu leres.
Proposisi 65 Peringatan: Produk ieu tiasa ngalaan anjeun ka bahan kimia kalebet karbon monoksida, anu dipikanyaho ku Nagara California nyababkeun cacad kalahiran atanapi cilaka réproduktif sanés. Kanggo inpo nu leuwih lengkep buka www.P65Warnings.ca.gov.
2. Eusi Paket
Verify that all components are present before beginning assembly. If any parts are missing or damaged, do not attempt to assemble or operate the smoker. Contact Masterbuilt customer service for assistance.
Awak Perokok
Leg Assembly (with folding legs)
Two Chrome-Coated Smoking Racks
Kayu Chip Tray
Mangkuk Cai
Dulang gajih removable
Selang propana jeung régulator
Pakét Pakakas
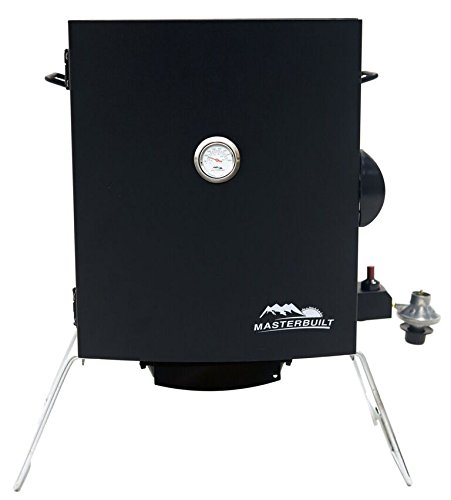
Image: Main components of the Masterbuilt Patio-2-Portable Propane Smoker.
3. Parentah Majelis
Assembly typically requires two people. Ensure all hardware is securely tightened before use.
Pasang suku: Secure the leg assembly to the bottom of the smoker body using the provided hardware. Ensure the folding mechanism operates correctly.
Pasang komponén internal: Place the grease tray, water bowl, and wood chip tray into their designated positions inside the smoker.
Insert Racks: Slide the two chrome-coated smoking racks onto the support brackets within the smoker.
Sambungkeun propana: Attach the propane hose and regulator to the smoker's gas inlet. Ensure a tight connection.
Uji bocor: Before first use, perform a leak test on all gas connections. Apply a soapy water solution to connections; bubbles indicate a leak. Tighten connections or replace parts as necessary.
Image: Fully assembled Masterbuilt propane smoker, ready for use.
4. Parentah Operasi
4.1 Daptar pariksa Pra-Pakéan
Ensure the smoker is on a stable, non-combustible surface outdoors.
Check that the propane tank is full and securely connected.
Fill the water bowl with water, juice, or other liquids for moisture and flavor.
Place desired wood chips (dry or pre-soaked) into the wood chip tray.
Ensure the grease tray is clean and properly positioned.
4.2 Pitunjuk Cahaya
Buka panto roko.
Ensure the burner control knob is in the "OFF" position.
Slowly open the valve on the propane cylinder fully.
Turn the burner control knob to "HIGH".
Press and hold the push-button ignitor. You should hear a clicking sound and see a flame.
If the burner does not light within 5 seconds, turn the control knob to "OFF", wait 5 minutes, and repeat the lighting procedure.
Once lit, close the smoker door.
4.3 Prosés roko
Allow the smoker to preheat to the desired temperature, typically 225-275°F (107-135°C), as indicated by the built-in temperature gauge.
Place food on the chrome-coated smoking racks. Distribute food evenly for consistent cooking.
Monitor internal food temperature with a separate meat thermometer for safety and doneness.
Replenish wood chips as needed to maintain smoke flavor. The wood chip tray slides out for easy access.
Check water bowl levels periodically and refill to maintain moisture.
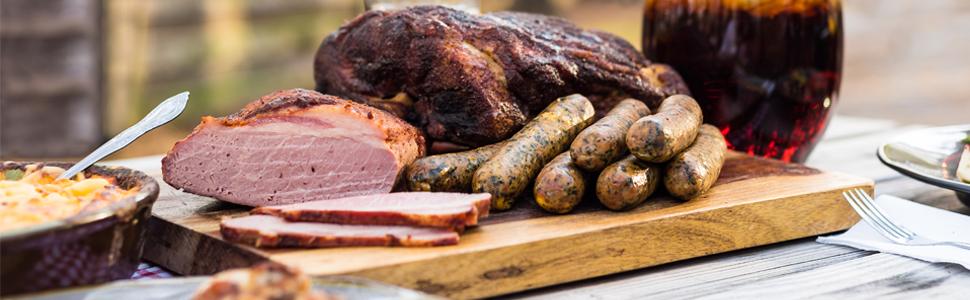
Image: Various foods being smoked on the racks inside the Masterbuilt smoker.
4.4 Temperature and Smoke Control
The regulator knob adjusts the flame for desired temperature. Turn clockwise to decrease heat, counter-clockwise to increase.
Hawa damper on top of the smoker allows for control of moisture, temperature, and smoke intensity. Open to release heat/smoke, close to retain.
Wind conditions can affect temperature stability. Position the smoker to minimize direct wind exposure.
Gambar: Example of various smoked foods prepared using the Masterbuilt smoker.
5. Pangropéa jeung beberesih
Regular cleaning and maintenance ensure optimal performance and longevity of your smoker.
Sanggeus Unggal Pamakéan: Allow the smoker to cool completely. Remove and clean the water bowl, wood chip tray, and grease tray. These can be washed with warm, soapy water.
Smoking Racks: Clean chrome-coated racks with a grill brush or warm, soapy water.
Interior: Ngusap handap surfaces interior jeung damp lawon. Ngahindarkeun cleaners abrasive.
Luar: Clean the exterior with mild soap and water.
Manajemén gajih: The removable grease tray catches food drippings, making cleanup easier. Empty and clean regularly to prevent flare-ups.
6. Panyimpenan
Proper storage protects your smoker from the elements and extends its lifespan.
Ensure the smoker is completely clean and dry before storing.
Disconnect the propane cylinder and store it in a well-ventilated area, away from direct sunlight and heat sources.
Fold the legs under the smoker for compact transport and storage.
Store the smoker in a dry, protected location. Using a Masterbuilt smoker cover (sold separately) is recommended for outdoor storage.
Image: Masterbuilt smoker with a protective cover for storage.
7. Cara ngungkulan
Masalah
Mungkin Cukang lantaranana
Solusi
Burner does not light after pressing ignitor button.
Low or no gas flow; Vapor lock at coupling nut to LP cylinder.
Turn burner control and gas cylinder valve knob to OFF. Disconnect regulator from cylinder to relieve vapor lock. Reconnect and slightly open the gas cylinder valve slowly, then open further by turning one full turn. Turn the burner control knob to HIGH and light with ignitor.
Suhu handap teuing.
Insufficient gas flow; Air damper closed too much; Cold ambient temperature; Wind.
Increase gas flow with regulator knob. Open air damper slightly. Allow more preheat time. Position smoker away from direct wind or use a wind block.
Excessive smoke or flare-ups.
Too many wood chips; Grease accumulation.
Reduce amount of wood chips. Ensure wood chips are not flaming. Clean grease tray regularly.
8. Spésifikasi
Fitur
Rincian
merek
Masterbuilt
Ngaran modél
Patio-2-Portable Propane Smoker
Nomer modél
20050116
Sumber Daya
Propane (Liquefied Petroleum Gas)
Warna
Hideung
Bahan Luar
Beusi sténless
Item Beurat
22.2 Pon (10.07 kg)
Ukuran produk (L x W x H)
15.91 x 23.62 x 23.15 inci (40.4 x 60.0 x 58.8 cm)
BTU Burner
5,000 BTU Stainless Steel Burner
Rak
Two Chrome-Coated Smoking Racks
Ignition
Push-button ignition
UPC
094428270909
9. Garansi jeung Rojongan
Masterbuilt products are designed for quality and durability. For specific warranty information, please refer to the warranty card included with your product or visit the official Masterbuilt websitus.
If you require technical assistance, have questions about assembly, operation, or need to order replacement parts, please contact Masterbuilt Customer Service:
Telepon: Refer to the Masterbuilt websitus pikeun nomer kontak ayeuna.
Ask a question about this manual
Ask about setup, troubleshooting, compatibility, parts, safety, or missing instructions. Manuals+ will review the question and use this page’s manual context to help answer it.