
Blackmagic Desain CINECAMPOCHDEF6K2
Blackmagic Design Pocket Cinema Camera 6K G2 Instruction Manual
Model: CINECAMPOCHDEF6K2
1. Bubuka
This manual provides essential information for the setup, operation, and maintenance of your Blackmagic Design Pocket Cinema Camera 6K G2. Please read this manual thoroughly before using the camera to ensure proper handling and optimal performance. This camera is designed for professional digital film production, offering advanced features for high-quality video capture.
2. Émbaran Kasalametan
- Sasayogian tanaga: Use only the specified power supply and battery. Incorrect power sources can damage the camera or cause fire.
- Cai sareng Uap: Do not expose the camera to water or high humidity. This camera is not waterproof.
- Suhu: Operate the camera within the recommended temperature range (typically 0°C to 40°C / 32°F to 104°F). Avoid extreme heat or cold.
- Penanganan: Ati-ati dina ngurus kaméra. Ulah nepi ka murag atawa kakeunaan dampak anu kuat.
- Lens Attachment: Always ensure the camera is powered off when attaching or detaching lenses to prevent damage to the sensor or lens mount.
- beberesih: Use a soft, dry cloth for cleaning. For the sensor, use specialized cleaning kits and follow manufacturer guidelines.
3. Eusi Paket
Pastikeun yén sadaya item aya dina pakét anjeun:
- Blackmagic Design Pocket Cinema Camera 6K G2 Body
- DaVinci Resolve Studio Activation Key
- Lens Turret Dust Cap
- kaméra tali
- 30W Power Supply with Locking Connector and International Adapters
- Batré NP-F570
- NP-F Series Battery USB Charger
4. Kaméra Langkungview
The Blackmagic Design Pocket Cinema Camera 6K G2 features a compact design with a Super 35 sensor and an active EF/EF-S lens mount. It includes a large, bright adjustable tilt 5-inch LCD display for monitoring and menu navigation.

Gambar 4.1: Angled hareup view of the Blackmagic Design Pocket Cinema Camera 6K G2, showing the lens mount and grip.

Gambar 4.2: Hareupeun view of the camera, highlighting the EF/EF-S lens mount and Super 35 sensor.
4.1. Sambungan sareng Port
The camera offers various connectivity options for audio, video output, and data transfer.

Gambar 4.3: Detil view of the camera's side panel, showing various input/output ports.
- Input mikropon: Connect consumer microphones or a timecode master clock.
- Kaluaran Headphone 3.5mm: Supports consumer headphones for audio monitoring.
- Full Size HDMI Connector: Outputs 1080p up to 60fps as clean feed or with camera data.
- USB Expansion Port (USB-C): For recording to external SSD storage or connecting focus demands.
- Kakuatan DC 12V: Main power supply input or for external batteries.
- XLR Audio Connection: Two professional balanced Mini XLR audio inputs with phantom power support.

Gambar 4.4: Sisi view of the camera, illustrating the arrangement of the various ports.
4.2. Rear Panel and Controls
The rear panel features the tilting LCD touchscreen and essential control buttons.

Gambar 4.5: Tukangeun view of the camera displaying the menu interface on the 5-inch LCD screen.

Gambar 4.6: Angled pungkur view showing the camera's LCD screen tilted for flexible viewdina sudut.
5. Setélan
5.1. Pamasangan Batré sareng Ngecas
- Buka panutup kompartemen batré anu aya di handapeun kaméra.
- Insert the NP-F570 battery, ensuring correct orientation. Close the cover securely.
- To charge, connect the included NP-F series battery USB charger to a power source and attach the battery. Alternatively, connect the camera to the 30W power supply with the battery installed.
5.2. Kantétan lénsa
- Pastikeun kaméra dipareuman.
- Remove the lens turret dust cap from the camera body and the rear cap from your EF/EF-S compatible lens.
- Sejajarkeun tanda indéks beureum atanapi bodas dina lénsa sareng tanda anu saluyu dina dudukan lénsa kaméra.
- Gently selapkeun lénsa kana Gunung tur muterkeun saarah jarum jam nepi ka clicks kana tempat.
5.3. Media Card Insertion
The camera supports SD/UHS-II and CFast 2.0 cards, as well as external SSDs via USB-C.
- Locate the SD card slot and CFast 2.0 card slot on the camera body.
- Insert the appropriate card into its slot until it clicks. Ensure the card is correctly oriented.
- For external SSD recording, connect a compatible SSD to the USB-C port.
5.4. Powering on / Pareum
Press and hold the power button located on the top of the camera until the screen illuminates or turns off.
6. Ngoperasikeun kaméra
6.1. Rekaman Dasar
To begin recording, press the red record button on the top of the camera. Press it again to stop recording.

Figure 6.1: Camera menu displaying recording settings such as project frame rate and preferred media.
- Frame Rates and Resolution: Navigate the menu on the LCD to select desired frame rates (e.g., 24 fps, 60 fps) and resolutions (up to 6K).
- File Bentuk: The camera supports industry-standard formats like Apple ProRes (up to 4K) and 12-bit Blackmagic RAW. Select your preferred format in the recording settings.
6.2. Fokus sareng Paparan
- fokus: Use the lens's manual focus ring or electronic focus controls if available. The LCD offers focus assist tools.
- ISO: Adjust the dual gain ISO up to 25,600 to manage sensitivity in various lighting conditions.
- Aperture and Shutter Speed: Control these settings via the camera's physical dials or the touchscreen interface to achieve desired exposure and depth of field.
6.3. Ngarekam Audio
The camera includes a built-in stereo microphone. For professional audio, utilize the mini XLR or 3.5mm inputs for external microphones.
6.4. Ngawaskeun
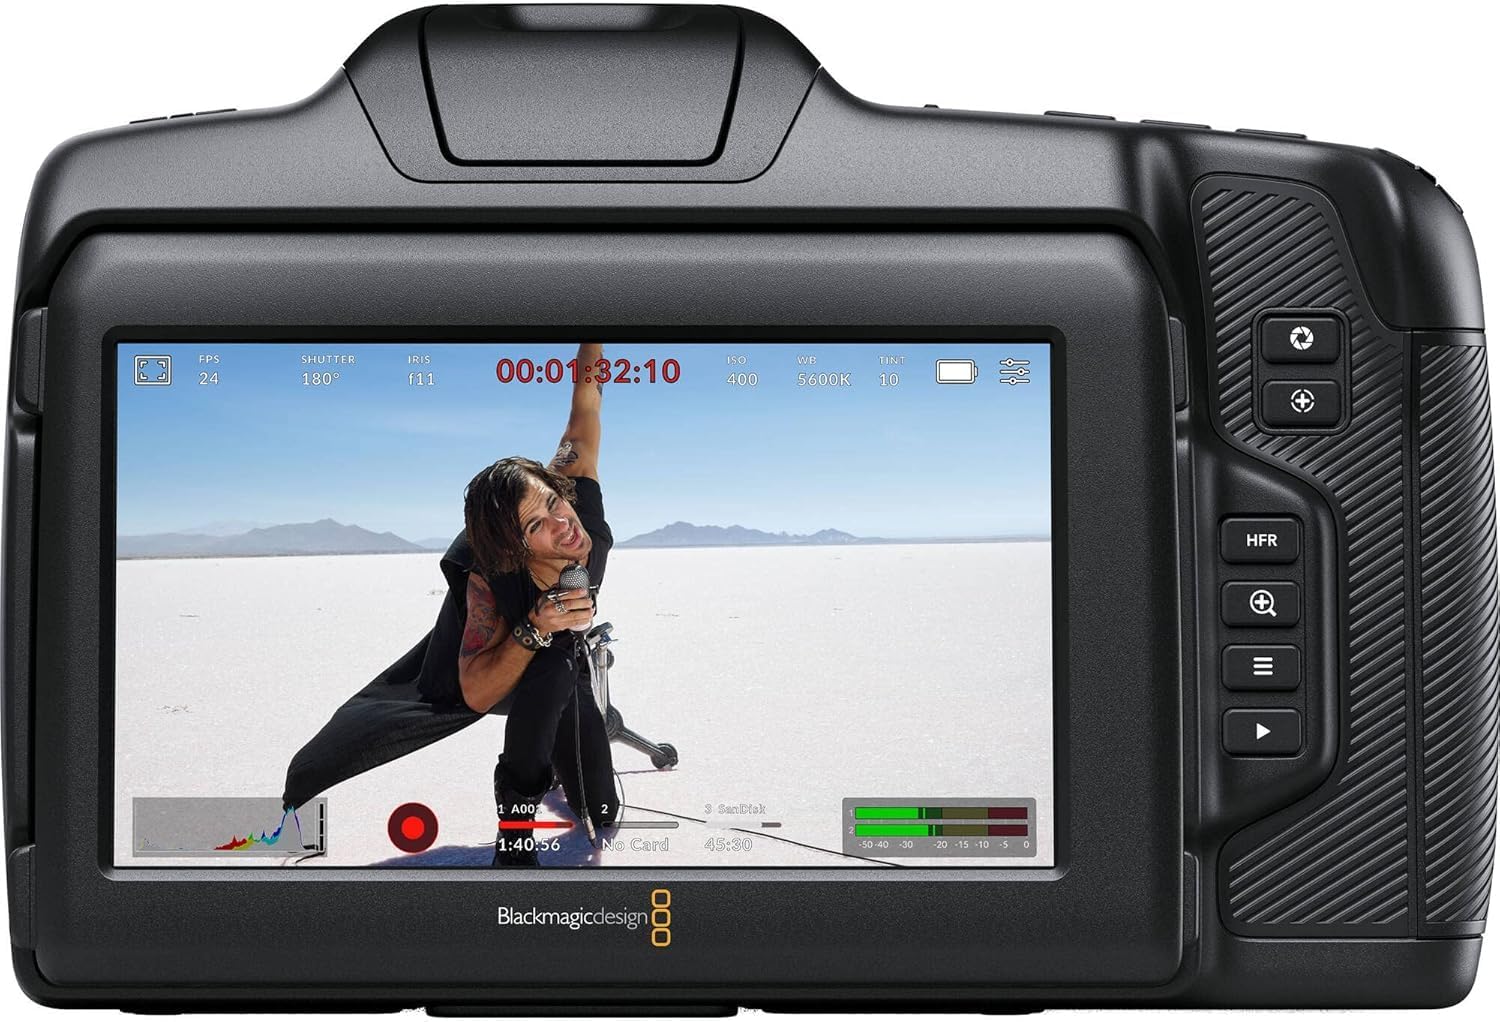
Gambar 6.2: Tukangeun view of the camera displaying live footage with overlays on the LCD screen.
Layar LCD 5 inci nyadiakeun tampilan anu jelas view tina dahareun anjeuntage and camera settings. It can be tilted for better viewing angles. An external monitor can be connected via the HDMI port.

Figure 6.3: The camera's tilting LCD screen in an operational setup, demonstrating its flexibility.
6.5. DaVinci Resolve Studio
Your camera includes an activation key for DaVinci Resolve Studio. This software is a comprehensive solution for editing, color correction, visual effects, and audio post-production. Install and activate it on your computer to process your Blackmagic RAW and ProRes footage.
7. Pangropéa
7.1. beberesih
- Awak kaméra: Wipe with a soft, dry, lint-free cloth. Do not use harsh chemicals or solvents.
- Lensa: Use a lens brush or air blower to remove dust, then gently clean with a lens cleaning solution and microfiber cloth.
- Sénsor: Sensor cleaning should be performed with extreme care using a specialized sensor cleaning kit. If unsure, consult a professional.
7.2. Apdet firmware
Periodically check the Blackmagic Design website for firmware updates. Updates can improve performance, add features, and fix bugs. Follow the instructions provided by Blackmagic Design carefully during the update process.
7.3. Panyimpenan
When not in use, store the camera in a cool, dry place, away from direct sunlight and extreme temperatures. Use a protective case to prevent dust and physical damage.
8. Cara ngungkulan
| Masalah | Mungkin Cukang lantaranana | Solusi |
|---|---|---|
| Kaméra teu hurung | Battery depleted or incorrectly installed; power cable loose. | Charge battery, ensure correct installation. Check power cable connection. |
| Rekaman eureun teu disangka-sangka | Media card full or too slow; battery low. | Use a faster card (UHS-II, CFast 2.0), free up space, or replace/charge battery. |
| Kualitas gambar henteu saé | Incorrect exposure settings; dirty lens/sensor. | Adjust ISO, aperture, shutter speed. Clean lens or sensor. |
| Taya rékaman audio | Microphone not connected or configured correctly; audio levels too low. | Check microphone connections and camera audio settings. Adjust input levels. |
9. Spésifikasi
Key technical specifications for the Blackmagic Design Pocket Cinema Camera 6K G2:
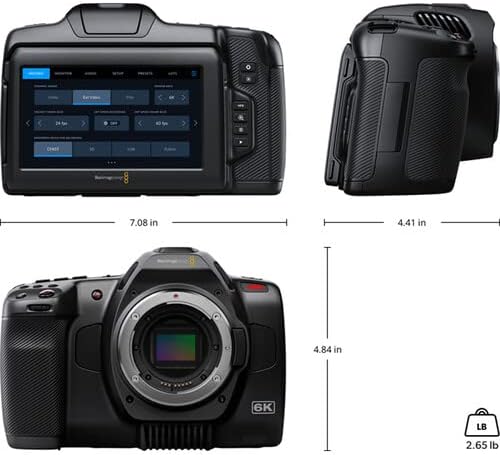
Figure 9.1: Dimensions of the Blackmagic Design Pocket Cinema Camera 6K G2.
| Fitur | Rincian |
|---|---|
| Nomer modél | CINECAMPOCHDEF6K2 |
| Ukuran sénsor | Super 35 |
| Resolusi pribumi | 6144 x 3456 |
| Rentang dinamis | 13 Eureun |
| Dual Gain ISO | Nepi ka 25,600 |
| Pasang Lensa | Active EF/EF-S |
| Ukuran layar | 5 Inches (Adjustable Tilt LCD) |
| Média Panyimpenan | SD/UHS-II, CFast 2.0, External SSD via USB-C |
| Resolusi Capture Video | 6K |
| Format Capture Video | Apple ProRes, Blackmagic RAW |
| Format Audio | WAV, BWF |
| Konektipitas | HDMI, USB-C, 3.5mm Audio, Mini XLR Audio, 12V DC |
| Item Beurat | 3.8 pon |
| Dimensi produk | 9.1 x 9.1 x 9.1 inci |
| Batré | 1 Lithium Ion (NP-F570 included) |
10. Garansi jeung Rojongan
For detailed warranty information and technical support, please refer to the official Blackmagic Design websitus atanapi ngahubungan layanan palanggan maranéhna. Simpen bukti pameseran anjeun pikeun klaim garansi.
Sumberdaya Online: Nganjang www.blackmagicdesign.com/support for drivers, manuals, and FAQs.
Ask a question about this manual
Ask about setup, troubleshooting, compatibility, parts, safety, or missing instructions. Manuals+ will review the question and use this page’s manual context to help answer it.