
1. Bubuka
Thank you for choosing the DEPSTECH DS650-DL Dual-Lens Articulating Industrial Endoscope. This device is designed for detailed visual inspection in hard-to-reach areas, featuring a dual-lens system with 210° bidirectional rotation, a 4.5-inch IPS monitor, and 1080P high-definition imaging. It is an essential tool for home maintenance, vehicle inspection, and machinery checks.
Please read this manual thoroughly before use to ensure proper operation and to maximize the product's lifespan.
2. Émbaran Kasalametan
- Do not use the endoscope in environments with flammable or explosive gases.
- The probe is IP67 waterproof, but the main unit is not. Avoid exposing the main unit to water or excessive moisture.
- Ulah nyobian ngabongkar atanapi ngarobih alat. Ieu bakal ngabatalkeun garansi sareng tiasa nyababkeun karusakan.
- Jauhkeun alat tina jangkauan barudak.
- Hindarkeun panon langsung tina lampu LED.
- The device features overheat protection. If the temperature exceeds 70°C, a warning will display. If it exceeds 80°C, the device will automatically shut down to prevent damage. Allow the device to cool down before resuming operation.
3. Eusi Paket
Pastikeun yén sadaya barang aya sareng dina kaayaan anu saé nalika muka bungkusan.
- DEPSTECH DS650-DL Endoscope Unit
- Panyimpenan Case
- Manual pamaké
- Kabel Ngecas Tipe-C
- Kartu Mémori 32GB (parantos dipasang atanapi kalebet nyalira)

Image: Contents of the DEPSTECH DS650-DL package.
4. Setélan
4.1 Ngecas Alat
Before first use, fully charge the endoscope unit. Connect the provided Type-C charging cable to the charging port on the device and to a suitable USB power adapter (not included).
4.2 Nyelapkeun Kartu Memori
If the 32GB memory card is not pre-installed, locate the TF card slot on the side of the monitor unit. Insert the memory card with the contacts facing down until it clicks into place.
4.3 Powering on / Pareum
Press and hold the power button (usually located near the monitor) for a few seconds to turn the device on or off. The IPS monitor will display the startup screen.
5. Operasi
5.1 Understanding the Controls

Gambar: Leuwihview of the endoscope controls and ports.
- Tombol OK/Konfirmasi: Konfirmasi pilihan dina ménu.
- Up/Zoom In Button: Navigates up in menus or zooms in on the image.
- Down/Zoom Out Button: Navigates down in menus or zooms out on the image.
- 180° Rotation Button: Rotates the real-time image on the screen by 180 degrees.
- Lens Switch Button: Toggles between front camera, side camera, and dual-view modus.
- Tombol Poto/Video: Short press to take a photo, long press to start/stop video recording.
- Power Button/LED Adjustment: Short press to adjust LED brightness (3 levels), long press to power on/off.
- Articulating Angle Dial: Controls the 210° bidirectional rotation of the probe tip.
- Slot Kartu TF: Pikeun nyelapkeun kartu mémori.
- Tipe-C Port: Pikeun ngecas sareng mindahkeun data.
- Tombol Reset: Resets the device (use a pin to press).
5.2 Using the Dual-Lens and Articulation
The DS650-DL features both a front camera and a side camera, allowing for a wider inspection range. The probe tip can be articulated up to 210° in two directions for comprehensive viewing.
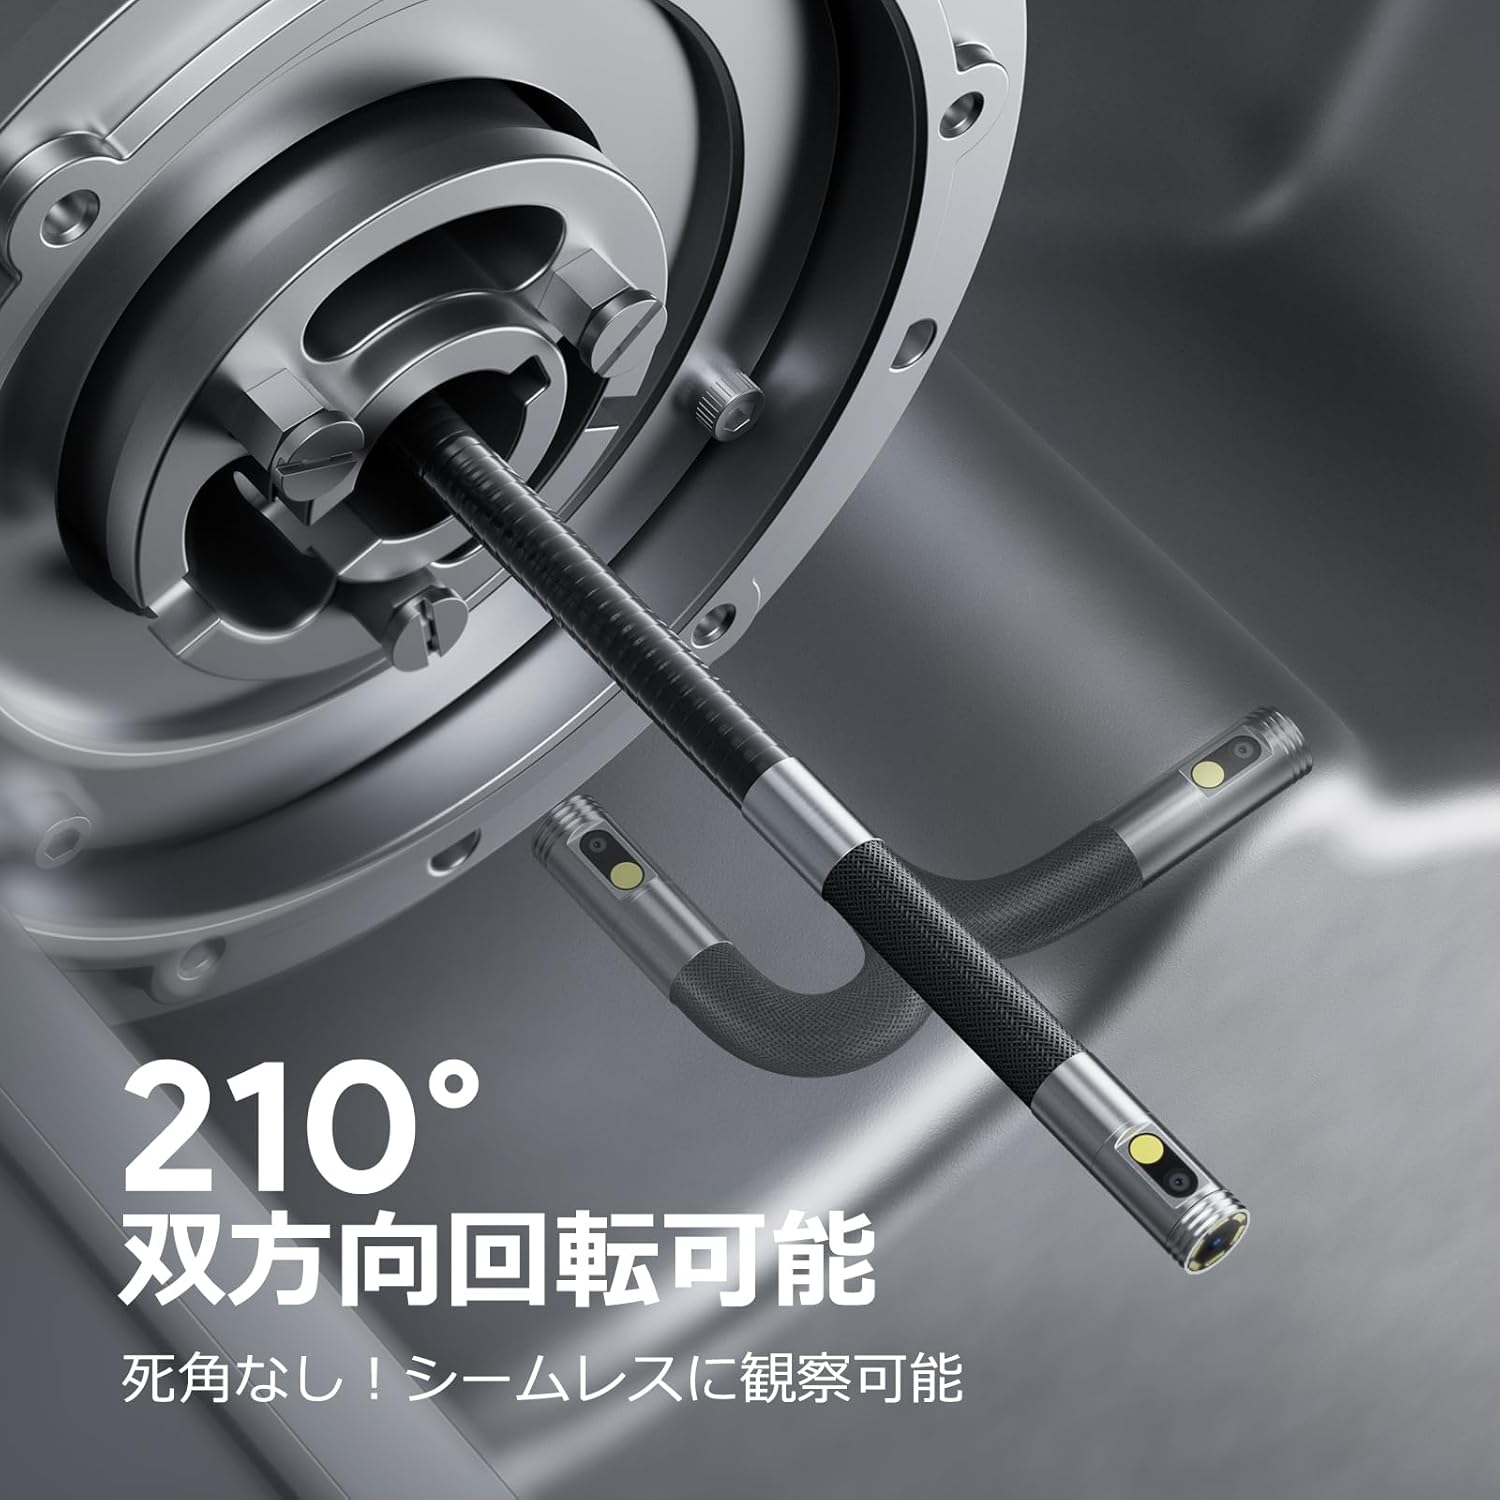
Image: Endoscope probe demonstrating 210° bidirectional articulation.
- Ngagunakeun éta Tombol Pindah Lénsa to cycle between the front camera, side camera, or a split-screen dual-view modus.
- Puterkeun Articulating Angle Dial to precisely adjust the direction of the probe tip. This allows you to navigate around obstacles and view areas from multiple angles without repositioning the entire cable.
5.3 Ngarekam Gambar sareng Pidéo
The device supports capturing both still images and video recordings directly to the inserted 32GB memory card.

Image: Monitor display showing photo and video capture features.
- Pikeun nyandak poto: Pencét pondok Tombol Poto / Pidéo.
- Pikeun ngarekam video: Pencét panjang Tombol Poto / Pidéo to start recording. Long press again to stop recording.
- Ditéwak files are saved to the 32GB memory card. You can store approximately 10,000 images or 50 videos.
5.4 Nyaluyukeun Kacaangan LED
The probe is equipped with high-brightness LED lights to illuminate dark inspection areas. Short press the Power Button/LED Adjustment button to cycle through 3 levels of LED brightness.

Image: IP67 waterproof probe with adjustable LED illumination.
5.5 Mindahkeun Data
You can transfer captured images and videos to a computer via the Type-C cable or by directly accessing the memory card.

Image: High-speed data transfer from endoscope to PC.
6. Pangropéa
- Ngabersihan Probe: After use, especially in dirty or wet environments, gently wipe the probe with a soft, damp cloth. Ensure no debris remains on the camera lenses.
- Ngabersihkeun Monitor: Use a soft, dry cloth to clean the IPS monitor. Avoid abrasive cleaners or solvents.
- Panyimpenan: Store the endoscope in its provided storage case in a cool, dry place, away from direct sunlight and extreme temperatures. This prevents damage from improper storage and moisture.
- Perawatan batré: Pikeun manjangkeun umur batré, ulah sering ngosongkeun batré alat sacara total. Cas alat sacara rutin, sanaos henteu dianggo kanggo waktos anu lami.
7. Cara ngungkulan
| Masalah | Mungkin Cukang lantaranana | Solusi |
|---|---|---|
| Alat teu hurung. | Batré lemah; alatna teu jalan. | Cas alatna nepi ka pinuh. Upami masalahna terus-terusan, hubungi dukungan. |
| Taya gambar dina layar. | Cable not connected properly; camera lens obstructed. | Ensure the probe cable is securely connected. Check for obstructions on the lens. |
| Gambar kabur atanapi teu jelas. | Lens is dirty; focus distance incorrect. | Clean the camera lens. Ensure the object is within the optimal focal range (3-10cm). |
| Teu tiasa ngarekam poto/video. | Kartu mémori pinuh atanapi henteu leres diselapkeun. | Check if the 32GB memory card is inserted correctly. Delete old files atawa ngaganti kartu lamun pinuh. |
| Device shuts down automatically. | Perlindungan overheat diaktipkeun. | Allow the device to cool down. Avoid using in excessively hot environments. |
8. Spésifikasi
| Fitur | Rincian |
|---|---|
| merek | DEPSTECH |
| Nomer modél | DS650DJ |
| tampilan | 4.5-inch IPS LCD Monitor |
| Resolusi kaméra | 1080P |
| Diaméter Probe | 8.5 mm |
| Sudut Artikulasi | 210° Bidirectional |
| Tipe Kabel | 1.5M Semi-rigid |
| Peunteun waterproof | IP67 (Probe hungkul) |
| cahayaan | Lampu LED adjustable |
| Panyimpenan | 32GB Micro SD Card (kaasup) |
| Batré Kaasup | Sumuhun |
| Ukuran Paket | 43.1 x 21.4 x 7.4 cm |
| Beurat pakét | 1.33 kg |
9. Jaminan & Dukungan
9.1 Garansi Produsén
This DEPSTECH product comes with a 24-bulan jaminan produsén urang. Your order number serves as your proof of purchase for warranty claims. Please retain it.
9.2 Rojongan Palanggan
For any questions, technical assistance, or warranty inquiries, please contact our professional support team:
Surélék: support.jp@depstech.com
We aim to respond to all inquiries within 24 hours (excluding weekends and public holidays, where responses will be provided on the next business day).

Image: DEPSTECH customer support and warranty information.