1. Bubuka
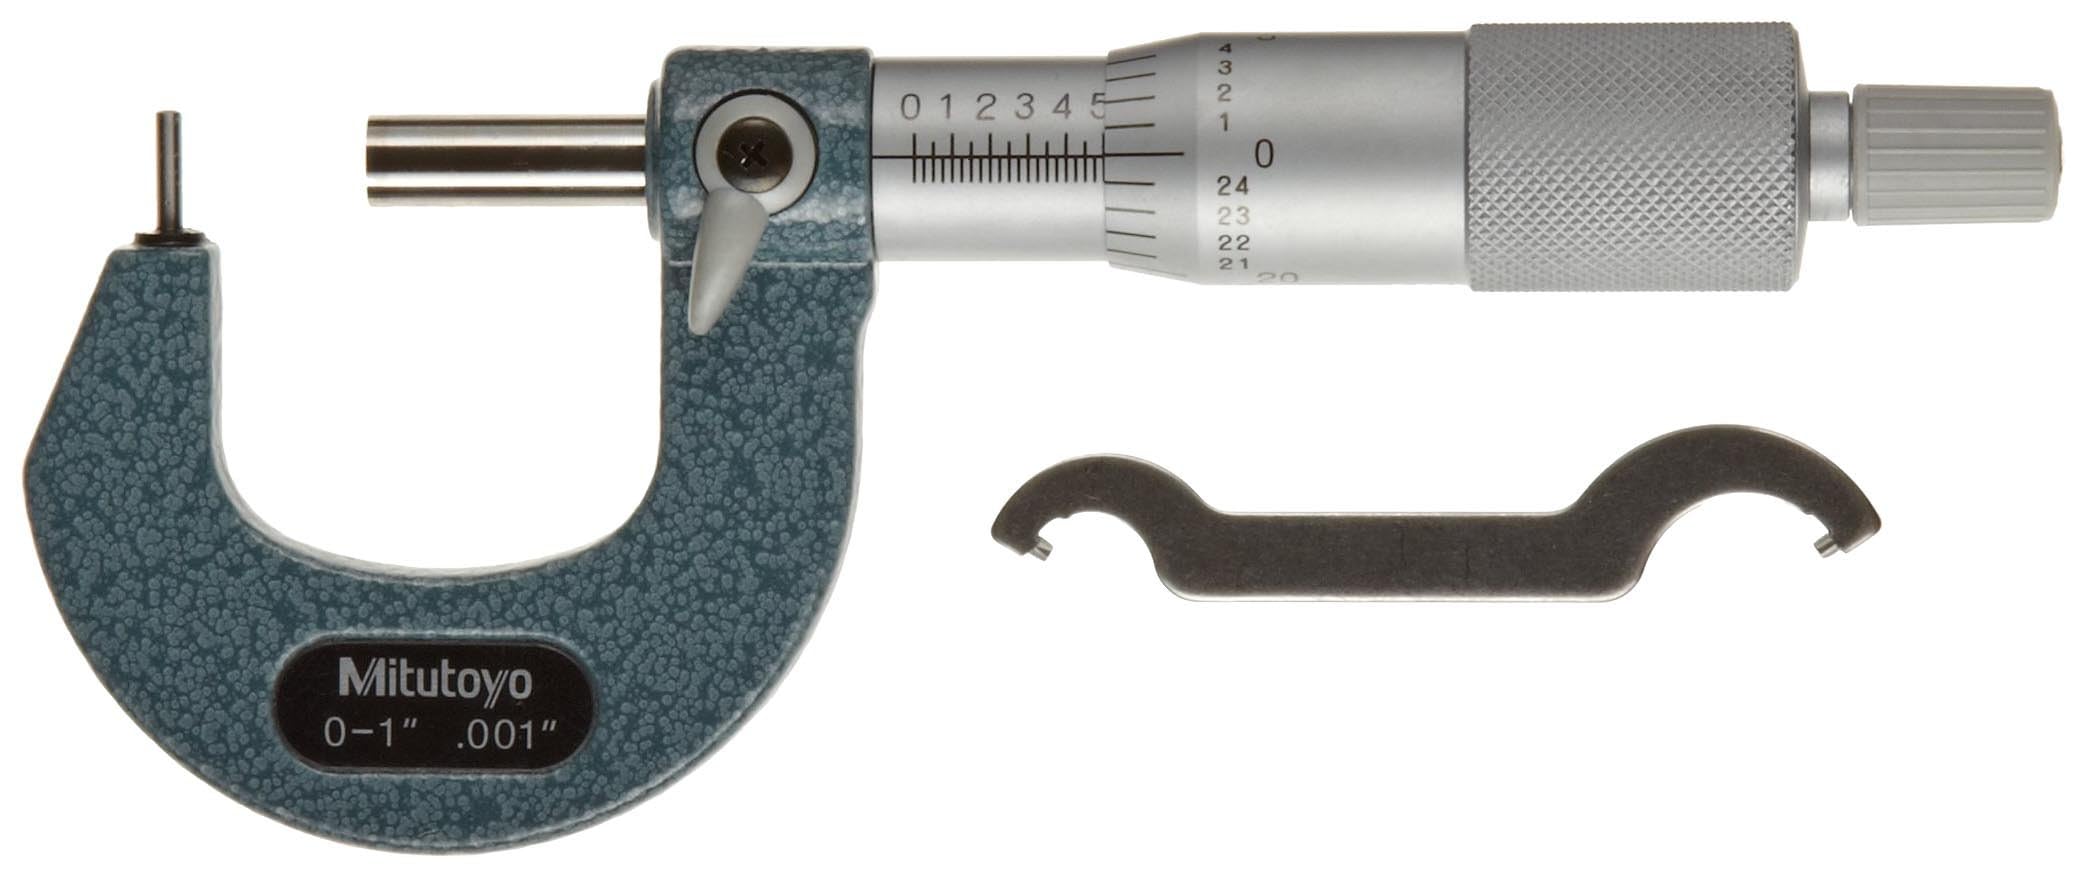
The Mitutoyo 115-305 Tube Micrometer is a precision measuring instrument designed for accurately determining the wall thickness of various tubing. This micrometer features a cylindrical anvil and a ratchet stop mechanism to ensure consistent measuring force, contributing to high accuracy. It has a measuring range of 0-1 inch with a graduation of 0.001 inch and an accuracy of +/-0.00015 inch. This manual provides essential information for the proper use, care, and maintenance of your micrometer.
2. Komponén produk
Familiarize yourself with the main components of the Mitutoyo 115-305 Tube Micrometer.

Gambar 1: Mitutoyo 115-305 Tube Micrometer shown in its protective plastic case. The micrometer consists of a frame, cylindrical anvil, spindle, thimble, sleeve, and ratchet stop.

Gambar 2: A ngadeukeutan view of the Mitutoyo 115-305 Tube Micrometer, highlighting the cylindrical anvil and the measuring faces. The cylindrical anvil is designed to fit inside tubing for accurate wall thickness measurements.
- Pigura: The main body of the micrometer.
- Cylindrical Anvil: The fixed measuring face, specifically shaped for internal tube measurements.
- Spindle: The movable measuring face, which advances or retracts when the thimble is rotated.
- Jilid: The rotating part used to adjust the spindle, marked with graduations.
- leungeun baju: The stationary part with the main scale (datum line and graduations).
- Ratchet Stop: Ensures constant and repeatable measuring force by slipping when the correct pressure is applied.
- Konci Clamp: Used to secure the spindle in position after a measurement.
3. Setélan
- Ngabongkar bungkusan: Carefully remove the micrometer from its protective case. Inspect for any visible damage.
- beberesih: Before first use, gently wipe all measuring surfaces with a clean, lint-free cloth. Avoid using harsh solvents.
- Aklimatisasi Suhu: Allow the micrometer to acclimate to the ambient temperature of the measurement environment for at least 15-20 minutes to ensure accurate readings.
- Nol adjustment:
- Close the measuring faces by rotating the thimble using the ratchet stop until it clicks 2-3 times.
- Check if the zero line on the thimble aligns perfectly with the datum line on the sleeve.
- If not aligned, use the supplied wrench to rotate the sleeve until the zero lines match. For micrometers with a lock clamp, ensure it is loosened before adjustment and tightened afterward.
4. Parentah Operasi
Follow these steps for accurate measurement of tube wall thickness:
- Nyiapkeun workpiece nu: Ensure the tubing to be measured is clean and free from burrs, oil, or debris that could affect accuracy.
- Position the Micrometer:
- Open the micrometer jaws slightly wider than the expected wall thickness.
- Carefully insert the cylindrical anvil into the tube opening.
- Position the flat measuring face of the spindle against the outer surface of the tube wall, and the cylindrical anvil against the inner surface of the tube wall.
- Candak pangukuran:
- Rotate the thimble using the ratchet stop until the spindle gently contacts the workpiece.
- Continue rotating the ratchet stop until it clicks 2-3 times. This ensures a consistent measuring force.
- Do not overtighten, as this can lead to inaccurate readings and potential damage to the micrometer or workpiece.
- Baca pangukuran:
- Sleeve Scale: Read the largest visible whole number on the sleeve, which represents inches. Each major line represents 0.100 inch, and each minor line represents 0.025 inch.
- Thimble Scale: Read the line on the thimble that aligns with the datum line on the sleeve. Each graduation on the thimble represents 0.001 inch.
- Total Reading: Add the readings from the sleeve and the thimble to get the total measurement.
- Lock the Spindle (Optional): If desired, use the lock clamp to secure the spindle position before removing the micrometer from the workpiece to prevent accidental changes to the reading.
- Pangukuran Ulangan: For critical applications, take multiple measurements at different points on the tube wall to ensure consistency and accuracy.
5. Pangropéa
Proper maintenance ensures the longevity and accuracy of your Mitutoyo Tube Micrometer.
- beberesih: After each use, wipe the micrometer clean with a soft, lint-free cloth. For stubborn grime, a small amount of instrument cleaning fluid can be used, applied to the cloth, not directly to the micrometer.
- Lubrication: Periodically apply a thin film of light machine oil to the spindle threads to ensure smooth operation and prevent corrosion. Avoid over-lubrication.
- Panyimpenan: Store the micrometer in its original protective case when not in use. Keep it in a dry, temperature-controlled environment, away from direct sunlight, dust, and corrosive substances.
- Kalibrasi: Regular calibration by a qualified technician is recommended to maintain accuracy, especially for professional or critical applications.
- Penanganan: Avoid dropping or subjecting the micrometer to impact, as this can damage its precision components.
6. Cara ngungkulan
If you encounter issues with your micrometer, refer to the following common problems and solutions:
| Masalah | Mungkin Cukang lantaranana | Solusi |
|---|---|---|
| Bacaan teu akurat |
|
|
| Spindle Movement is Stiff/Rough |
|
|
| Ratchet Stop Not Functioning |
|
|
7. Spésifikasi
| Fitur | Rincian |
|---|---|
| Nomer modél | 115-305 |
| Rentang Ukur | 0-1 inci |
| wisuda | 0.001 inci |
| Akurasi | +/-0.00015 inch |
| Tipe Anvil | Silinder |
| Pin Tip Diameter | 2 mm |
| Measuring Faces | Carbide-tipped (spherical-flat type, spherical-spherical type) |
| Measuring Force Mechanism | Ratchet Stop |
| Karataan | 0.6 micrometer / 0.000024 inch |
| Dimensi produk | 3.35 x 4.17 x 5.24 inci |
| Item Beurat | 0.16 ons |
| Produsén | Mitutoyo |
8. Garansi jeung Rojongan
For warranty information, technical support, or service inquiries, please contact Mitutoyo customer service directly or visit their official website. Retain your purchase receipt for warranty claims.
Mitutoyo Resmi Websitus: www.mitutoyo.com


