Bubuka
The Zeta Geeetech Prusa I3 M201 STM32 is an advanced FDM (Fused Deposition Modeling) 3D printer designed for versatile and high-quality 3D printing. This model features a unique 2-in-1 hot end, enabling mixed-color and gradient printing, offering enhanced creative possibilities. It is equipped with a self-developed control system based on the STM32 processor, ensuring stable and efficient performance.
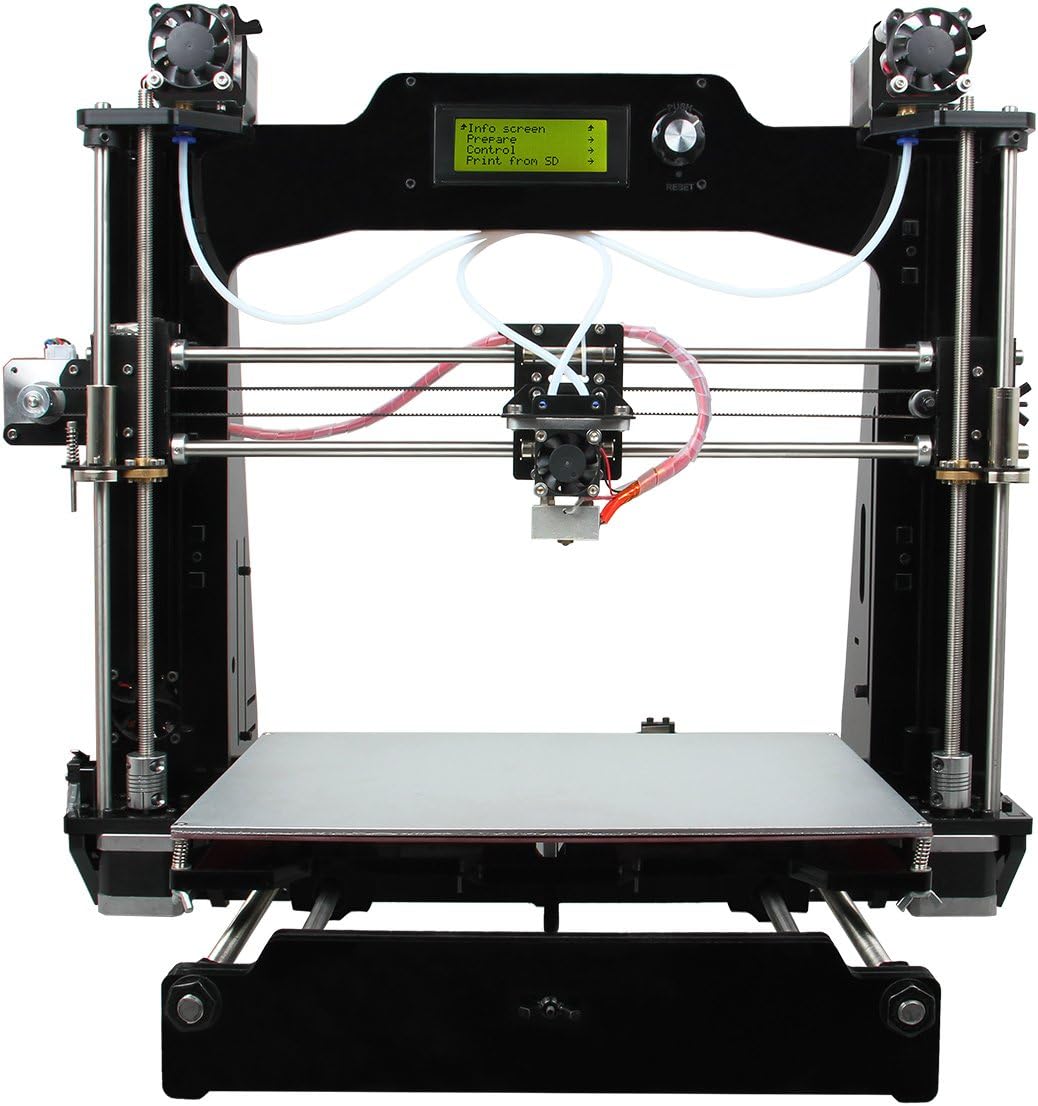
Gambar 1: Hareupeun view of the Zeta Geeetech Prusa I3 M201 STM32 3D Printer, showcasing its sturdy black acrylic frame and the dual-extruder setup.
Fitur konci:
- STM32 Control System: Utilizes an ARM Cortex M3 processor with a 72 MHz frequency for improved printing performance.
- Optimized Firmware: Allows adjustment of feed rate ratios for two extruders, enabling mixed or gradient color prints.
- 2-in-1 Switchable Hot End: Functions as a color palette for printing items in two distinct colors or gradients.
- Large Print Volume: Offers a build volume of 280 x 210 x 200 mm.
- High Printing Precision: Achieves up to 0.1 mm printing accuracy.
Guide Setup
This section provides general guidelines for setting up your 3D printer. For detailed assembly instructions, please refer to the specific assembly manual provided with your printer or the manufacturer's official wiki.
1. Unpacking jeung Inspection
- Sacara saksama miceun sadaya komponén tina bungkusan.
- Pariksa yén sadaya bagian anu didaptarkeun dina daptar bungkus aya sareng henteu ruksak.
- Report any missing or damaged parts to the manufacturer immediately.

Gambar 2: Angled view of the Geeetech Prusa I3 M201 3D Printer, showing the overall structure and components before assembly.
2. Perakitan (upami aya)
If your printer is a kit or partially assembled, follow the provided assembly guide. Ensure all screws are tightened and connections are secure. Pay close attention to the wiring of stepper motors, endstops, and the hot end/heated bed.
3. Sambungan Daya
- Pastikeun saklar kakuatan dina posisi OFF.
- Sambungkeun kabel daya kana input daya printer.
- Plug the power cable into a suitable electrical outlet. Verify the voltage setting on the power supply matches your local mains voltage (115V atawa 230V).

angka 3: Tutup-up view of the printer's power supply unit, showing the power input, switch, and wiring connections. Note the "NOTICE" label regarding the built-in fan control circuit.
4. Pamasangan parangkat lunak
Install the necessary software on your computer. The recommended control software includes Repetier-Host and Printrun. These are compatible with Windows, Mac, and Linux operating systems. You will also need a slicing software to convert 3D models (STL files) into G-code for printing.
Parentah Operasi
1. Loading Filamén
- Ensure the hot end is preheated to the appropriate temperature for your filament type (e.g., 200-220°C for PLA).
- Selapkeun filamén kana liang input extruder.
- Push the filament through until it is gripped by the extruder gears and begins to feed through the Bowden tube towards the hot end.
- Continue feeding until molten filament extrudes from the nozzle, indicating it is properly loaded.
2. Ranjang Leveling
Accurate bed leveling is crucial for successful prints. Use the manual leveling screws under the print bed to adjust the distance between the nozzle and the bed at multiple points (typically 4 or 5 points). A piece of paper should slide with slight friction between the nozzle and the bed.
3. Ngamimitian Nyetak
- Prepare your 3D model (STL file) using slicing software to generate G-code.
- Simpen G-kode file to an SD card or connect the printer to your computer via USB.
- From SD Card: Insert the SD card into the printer's slot. Navigate the printer's menu to "Print from SD" and select your file.
- Ngaliwatan USB: Connect the printer to your computer. Use Repetier-Host or Printrun to connect to the printer and initiate the print.
- Monitor the first layer of the print to ensure proper adhesion and adjust as needed.

Figure 4: The Geeetech Prusa I3 M201 3D Printer in operation, demonstrating its capability to print objects with mixed or gradient colors, as shown by the orange and yellow vase on the print bed.
4. Color Mixing and Gradient Printing
The M201's optimized firmware (version 1.0.0 or later) allows for advanced color mixing. You can customize gradient templates to achieve various color effects. This involves setting the gradient start percentage, end percentage for two filaments, and the start and end heights. There are 6 customizable templates available under the "Mixer > Customizable" menu option. Refer to the manufacturer's wiki for detailed instructions on configuring these settings.
Pangropéa
Pangropéa rutin mastikeun umur panjang sareng kinerja optimal printer 3D anjeun.
- Bersihkeun Ranjang Cetak: After each print, clean the print bed to remove any residue. Use isopropyl alcohol for glass beds.
- Nozzle beberesih: Periodically clean the nozzle to prevent clogs. A brass brush can be used for external cleaning, and cold pulls or needle cleaning for internal clogs.
- Lubricate Bagian Pindah: Apply a small amount of lithium grease or similar lubricant to the smooth rods and lead screws every few months to ensure smooth movement.
- Pariksa Sabuk sareng Katrol: Ensure that the timing belts are properly tensioned and that pulleys are securely fastened.
- Pariksa Wiring: Periodically check all electrical connections for any loose wires or signs of wear.
Pamérésan masalah
Bagian ieu alamat masalah umum Anjeun bisa sapatemon salila operasi.
- Problem: Filament not extruding or inconsistent extrusion.
- Alesan anu mungkin: Clogged nozzle, tangled filament, incorrect temperature, extruder motor issue.
Solusi: Clean the nozzle, check filament path, verify hot end temperature, inspect extruder gears and motor connection. - Problem: Poor first layer adhesion.
- Alesan anu mungkin: Unlevel print bed, incorrect nozzle height, dirty print surface, wrong bed temperature.
Solusi: Re-level the print bed, adjust Z-offset, clean the print surface, ensure heated bed is at optimal temperature for filament type. - Problem: Prints detaching from the bed mid-print.
- Alesan anu mungkin: Similar to poor first layer adhesion, drafts, insufficient bed adhesion.
Solusi: Ensure proper bed adhesion (e.g., glue stick, hairspray), avoid drafts, check bed temperature consistency. - Problem: Layer shifting.
- Alesan anu mungkin: Loose belts, motor skipping steps, obstruction in movement path.
Solusi: Tighten X and Y axis belts, check motor drivers and current, ensure smooth rod movement.
spésifikasi
Detailed technical specifications for the Zeta Geeetech Prusa I3 M201 STM32 3D Printer.

Gambar 5: Sisi view of the Geeetech Prusa I3 M201 3D Printer, illustrating its physical dimensions and the placement of the power supply unit.
| Fitur | Rincian |
|---|---|
| Téhnologi percetakan | FDM (Fused Deposition Modeling) |
| Jilid ngawangun | 280 x 210 x 200 mm |
| Resolusi nyitak | 0.1 – 0.3 mm |
| Laju percetakan | 60-110 mm / s |
| Diaméter filamén | 1.75 mm |
| Nozzle diaméterna | 0.4 mm |
| Tipe Filamén | PLA, ABS |
| Fitur | Rincian |
|---|---|
| Sistem operasi | Windows/Mac/Linux |
| Software kontrol | Repetier-Host, Printrun |
| File Formatna | STL, G-kode |
| Konektipitas | USB, SD Card (supports standalone printing) |
| Fitur | Rincian |
|---|---|
| Max Heated Bed Temperature | ~110 °C |
| Max Extruder Suhu | 275 °C |
| Input catu daya | 115 V/1.5 A atanapi 230 V/0.75 A |
| Kaluaran Suplai Kakuatan | 24 V DC, 0 - 15 A |
| Fitur | Rincian |
|---|---|
| Pigura | 8 mm thick laser-cut acrylic plate |
| Platform | Super-flat aluminum alloy + heatbed |
| XYZ Rods | Wear-resistant, stainless steel |
| Stepper Motor | 1.8 ° sudut hambalan kalawan 1/16 mikro-stepping |
| Dimensi Mesin | 510 x 450 x 450 mm |
| Beurat bersih | 9.5 kg |
Garansi sareng Rojongan
For information regarding warranty coverage, technical support, and service, please refer to the official Zeta or Geeetech website, or contact their customer service directly. Keep your purchase receipt as proof of purchase for warranty claims.
Additional resources such as firmware updates, software downloads, and detailed assembly guides can often be found on the manufacturer's official wiki or support pages.


