1. Bubuka
This manual provides essential information for the safe and effective operation, maintenance, and troubleshooting of your Crown CT21056LBMC 18V Cordless Drill Driver. Please read these instructions carefully before using the tool and keep them for future reference. This drill driver is designed for drilling into wood, metal, and plastics, and for driving screws.
2. Parentah Kasalametan
Salawasna turutan pancegahan kaamanan dasar pikeun ngirangan résiko seuneu, kejutan listrik, sareng tatu pribadi nalika ngoperasikeun alat listrik.
- Kasalametan Area Gawé: Jaga wewengkon gawé anjeun beresih jeung cahayana alus. Wewengkon nu pabalatak atawa poek ngondang kacilakaan. Ulah ngajalankeun parabot kakuatan dina atmosfir ngabeledug, kayaning ku ayana cair kaduruk, gas, atawa lebu.
- Kasalametan listrik: Hindarkeun kontak awak sareng permukaan anu dibumikeun atanapi dibumikeun sapertos pipa, radiator, kompor, sareng kulkas. Ulah ngantepkeun alat-alat listrik ka hujan atanapi kaayaan baseuh.
- Kasalametan Pribadi: Salawasna maké panyalindungan panon. Paké panyalindungan dédéngéan nalika operasi pikeun période nambahan. Pakéan anu leres; ngahindarkeun pakéan atawa perhiasan leupas. Ngamankeun buuk panjang.
- Pamakéan sareng Perawatan Alat: Ulah maksakeun alat kakuatan. Anggo alat kakuatan anu leres pikeun aplikasi anjeun. Pegatkeun sambungan batré tina alat kakuatan samemeh nyieun sagala pangaluyuan, ngaganti asesoris, atawa nyimpen parabot kakuatan.
- Kaamanan Pack Batré: Ngecas ukur nganggo carjer anu ditunjuk ku produsén. Ulah insinerate pak batré sanajan geus ruksak parna.
3. Eusi Paket
Bungkus sadaya barang kalayan ati-ati teras parios kana daptar di handap. Upami aya bagian anu leungit atanapi ruksak, hubungi padagang anjeun.
- 1 x Crown CT21056LBMC Cordless Drill Driver
- 2 x Batré Litium-Ion 18V (1.5 Ah)
- 1 x Carjer Batré
- 1 x Manual Instruksi (Dokumén ieu)
- 1 x Mawa Kasus

Image 1: The complete Crown CT21056LBMC kit, showing the drill driver, two batteries, charger, and the durable carrying case.
4. Produk Langkungview
Familiarize yourself with the components of your drill driver before operation.
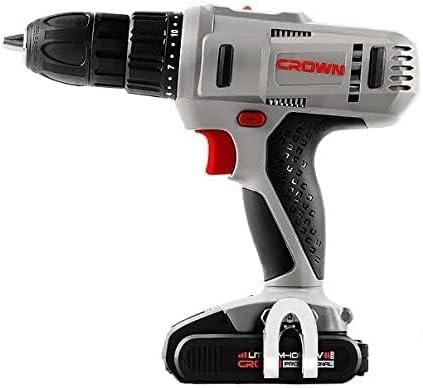
Gambar 2: Sisi view of the drill driver, illustrating key components such as the chuck, torque adjustment collar, speed selector switch, and trigger.
- Chuck tanpa konci: Pikeun parobahan bit gancang jeung gampang.
- Kerah adjustment torsi: Selects the desired torque setting for driving screws or drill mode.
- Switch Pamilih Speed: Allows selection between two mechanical speed ranges.
- Saklar Maju/Mundur: Ngarobah arah rotasi cuk.
- Saklar pemicu: Ngaktipkeun bor sareng ngontrol kecepatan.
- Lampu Gawé LED: Illuminates wewengkon gawé.
- Paket batré: Nyadiakeun kakuatan ka alat.
- Tombol Leupaskeun Batré: Pikeun nyoplokkeun pak batré.
5. Setélan
5.1. Ngecas Batré
The battery pack is not fully charged at the time of purchase. It must be fully charged before first use.
- Sambungkeun carjer ka stopkontak standar.
- Slide the battery pack onto the charger base. Ensure it clicks into place.
- The charging indicator light on the charger will show the charging status. A full charge takes approximately 45 minutes for a 1.5 Ah battery.
- Saatos dicas pinuh, cabut batré tina carjer teras cabut colokan carjer tina stop kontak.
5.2. Masang sareng Cabut Batré Pack
- Pikeun Pasang: Align the battery pack with the base of the drill driver and slide it in until it clicks securely into place.
- Pikeun ngahapus: Press the battery release button and slide the battery pack out from the tool.

Image 3: The drill driver with a fully installed battery pack, ready for use.
5.3. Masang sareng Nyabut Bit Bor / Bit Supir
- Rotate the keyless chuck counter-clockwise to open the jaws.
- Insert the drill bit or driver bit into the chuck, ensuring it is centered.
- Rotate the keyless chuck clockwise to tighten the jaws firmly around the bit. Do not overtighten.
- To remove, rotate the chuck counter-clockwise until the bit can be pulled out.
6. Parentah Operasi
6.1. Milih Speed
The drill driver features two mechanical speed settings:
- Speed 1 (Low Speed, 0-350 RPM): Ideal pikeun ngebor sekrup, diaméter pangeboran anu langkung ageung, atanapi aplikasi anu meryogikeun torsi anu langkung luhur.
- Speed 2 (High Speed, 0-1350 RPM): Suitable for smaller drilling diameters and faster drilling.
To change speed, slide the speed selector switch located on top of the drill. Ensure the tool is stopped before changing speeds.
6.2. Nyaluyukeun torsi
The torque adjustment collar has 18 torque settings plus a drill mode (indicated by a drill bit symbol).
- Setélan Torsi (1-18): Use these settings for driving screws. Lower numbers are for smaller screws or softer materials, higher numbers for larger screws or harder materials. The clutch will disengage when the set torque is reached, preventing overtightening or stripping.
- Drill Mode (Drill Bit Symbol): Provides maximum torque for drilling applications without the clutch disengaging.
Rotate the torque adjustment collar to select the desired setting.
6.3. Maju / Mundur Rotasi
The forward/reverse switch is located above the trigger. Push it to the left for forward rotation (for drilling and driving screws) and to the right for reverse rotation (for removing screws or freeing jammed bits). Position the switch in the center to lock the trigger and prevent accidental starting.
6.4. Operating the Trigger Switch and LED Light
Squeeze the trigger switch to start the drill. The speed is variable depending on how far the trigger is pressed. The integrated LED work light will illuminate when the trigger is pressed, providing visibility in dimly lit areas.
7. Pangropéa
Pangropéa rutin ngajamin kinerja optimal sareng manjangkeun umur alat anjeun.
- beberesih: Jaga liang ventilasi tetep bersih sareng bébas tina lebu. Anggo lawon anu lemes sarengamp lawon pikeun ngabersihan pakakas casing. Do not use solvents or abrasive cleaners.
- Perawatan batré: Nyimpen batré di tempat tiis, garing jauh tina sinar panonpoé langsung. Ulah nyimpen batré pinuh discharged pikeun période nambahan. Ngecas aranjeunna périodik lamun teu dipake.
- Panyimpenan: Store the drill driver, batteries, and charger in the provided carrying case in a dry, secure location out of reach of children.
- Pamariksaan: Regularly inspect the power tool for any signs of damage, loose screws, or worn parts. If damage is found, have it repaired by a qualified service technician.
8. Cara ngungkulan
Before attempting any repairs, ensure the battery is removed from the tool.
| Masalah | Mungkin Cukang lantaranana | Solusi |
|---|---|---|
| Bor teu ngamimitian | Battery not charged or improperly installed. Forward/Reverse switch in center (locked) position. | Charge battery fully and ensure it is securely installed. Move Forward/Reverse switch to either forward or reverse position. |
| Batré teu ngecas | Charger not plugged in. Battery or charger is faulty. | Check power connection. If problem persists, contact customer support for replacement. |
| Leungitna kakuatan nalika operasi | Batré lemah. panyalindungan overload diaktipkeun. | Recharge the battery. Reduce pressure on the tool or use a lower speed setting. |
| Bit slips dina chuck | Chuck teu tightened cukup. Bit shank kotor atawa ruksak. | Kencengkeun deui chuck-na pageuh. Bersihkeun atanapi gentos mata borna. |
9. Spésifikasi
| Fitur | Spésifikasi |
|---|---|
| Nomer modél | CT21056LBMC |
| Voltage | 18 volt |
| Jenis Batré | Litium-Ion |
| Kapasitas batré | 1.5 ahk |
| Kamampuh Chuck | 1.5 - 13 mm |
| Laju Tanpa Beban (Laju 1) | 0 - 350 rpm |
| Laju Tanpa Beban (Laju 2) | 0 - 1350 rpm |
| Max torsi | 4 Newton-Meter (Nm) |
| Posisi Kopling | 18 + 1 (Mode Bor) |
| Waktu Ngecas | Kira-kira. 45 menit |
| Dimensi produk | 20.5 x 5 x 20 cm |
| Beurat produk | 1.54 kg |
| Fitur husus | Lampu Gawé LED terpadu |
10. Garansi jeung Rojongan
For warranty information, service, or technical support, please refer to the warranty card included with your product or contact your point of purchase. Keep your purchase receipt as proof of purchase for any warranty claims.


