1. Bubuka
This manual provides essential instructions for the safe and efficient operation, setup, and maintenance of your Juki MO-1200QVP Differential Feed Serger. Please read this manual thoroughly before using the machine to ensure proper function and to prevent damage or injury. Keep this manual in a safe place for future reference.
2. Parentah Kasalametan
- Always disconnect the machine from the power supply before cleaning, oiling, or performing any maintenance.
- Keep fingers away from all moving parts, especially the needles and cutting blades, during operation.
- Paké ngan catu daya voltage.
- Ulah ngoperasikeun mesin upami kabel listrikna rusak atanapi upami mesinna henteu jalan kalayan leres.
- Tetep mesin kaluar jangkauan sahiji barudak.
- Ensure adequate lighting in your work area.
3. Produk Langkungview
Familiarize yourself with the main components and controls of your Juki MO-1200QVP serger.

Gambar 3.1: Hareupeun view of the Juki MO-1200QVP Differential Feed Serger, showing the main body, tension dials, and needle area.
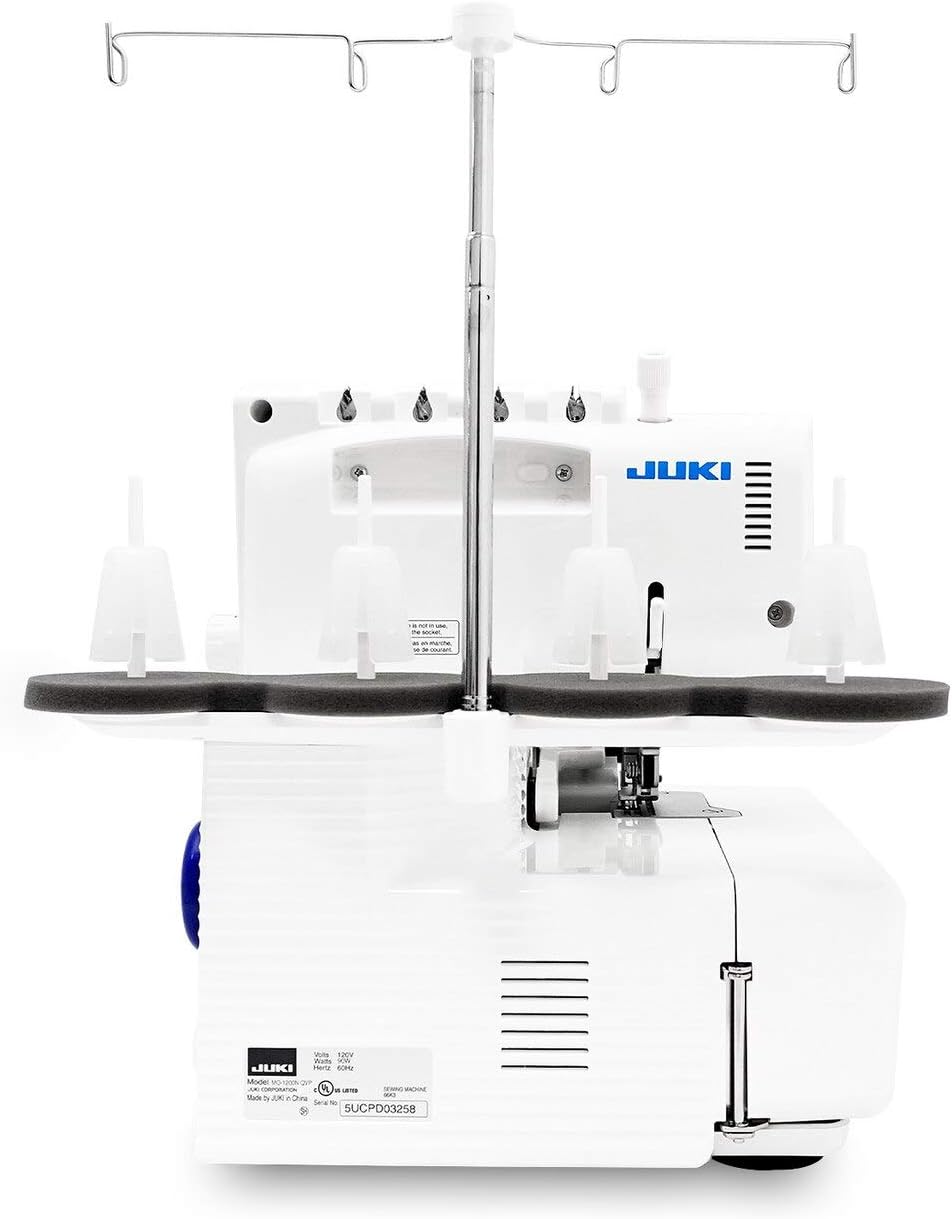
Gambar 3.2: Tukangeun view of the serger, illustrating the thread spool holder and power input port.

Gambar 3.3: Diwincik view of the color-coded tension dials, crucial for stitch formation.
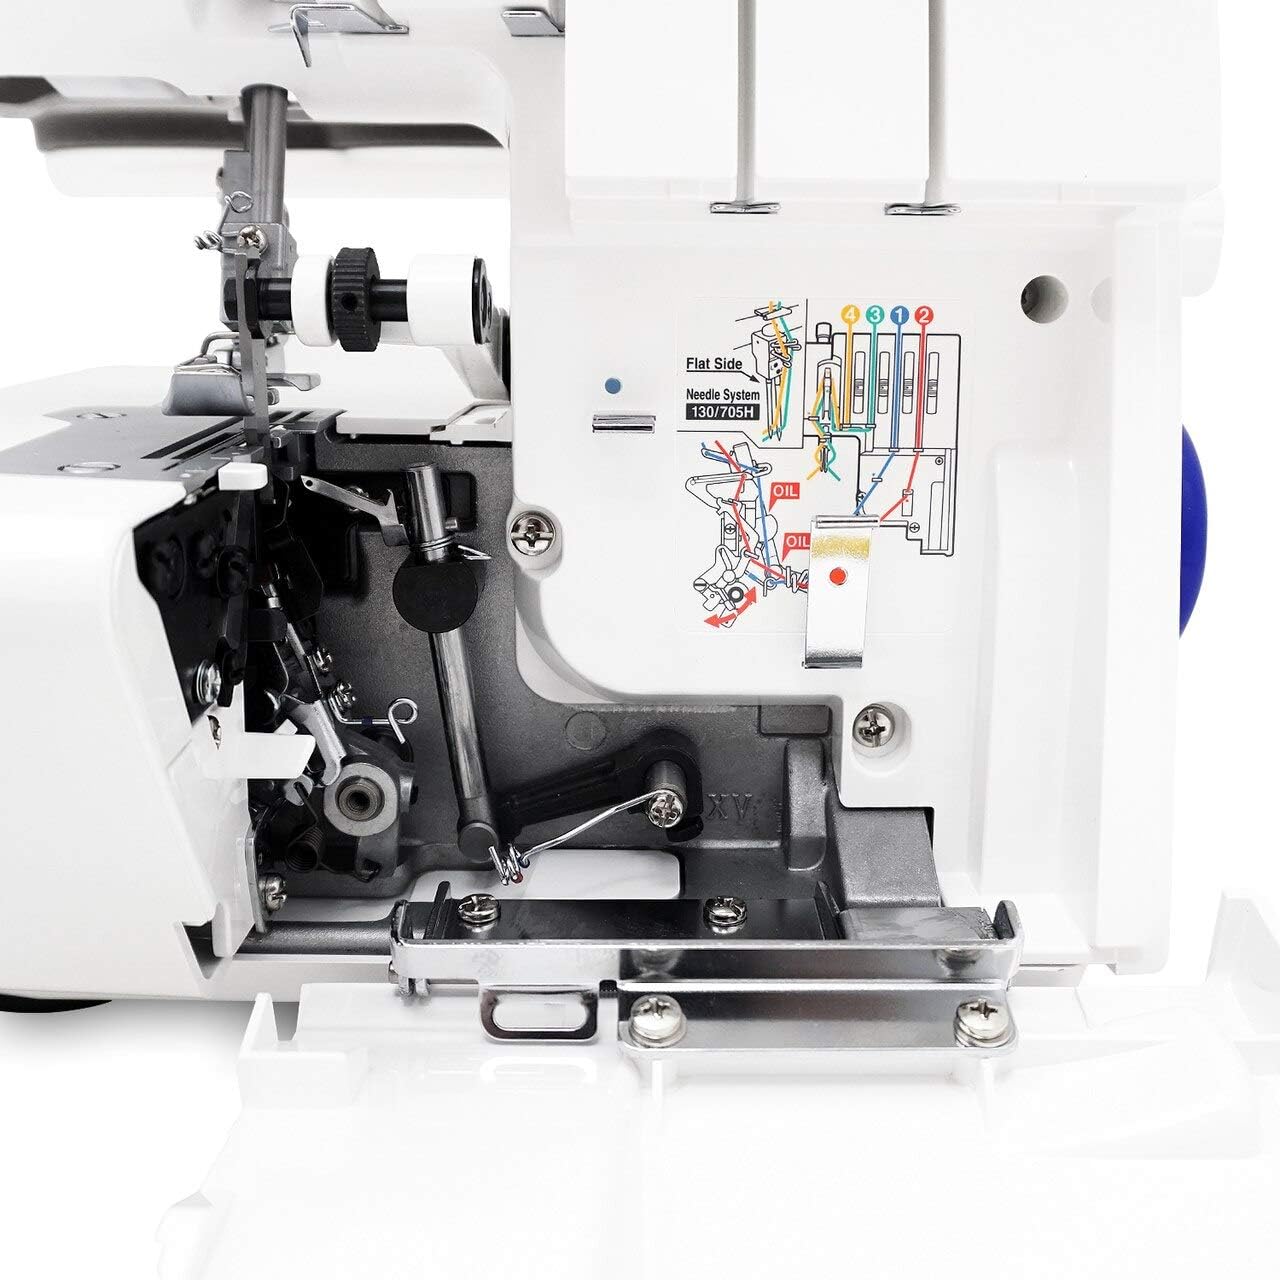
Gambar 3.4: The looper area with the front cover open, revealing the internal threading paths and a helpful diagram.

Gambar 3.5: Close-up of the needle bar, presser foot, and cutting blades.

Gambar 3.6: Samping view displaying the differential feed adjustment dial and stitch length control.
4. Setélan
4.1 Ngabongkar bungkusan
Carefully remove the serger from its packaging. Retain all packing materials for future transport or storage. Ensure all accessories listed in the packing list are present.
4.2 Sambungan Daya
- Teundeun mesin dina stabil, permukaan datar.
- Sambungkeun colokan kontroler suku kana jack kontroler suku mesin.
- Insert the power cord into the machine's power input port (refer to Figure 3.2).
- Colokkeun kabel listrik kana stop kontak listrik anu cocog.
4.3 Thread Spool Installation
Place the thread spools onto the spool pins on the thread stand (refer to Figure 3.2). Ensure the thread unwinds smoothly from each spool.
4.4 Threading Mesin
Accurate threading is critical for proper serger function. Follow the color-coded threading paths indicated on the machine and in Figure 3.4. It is recommended to thread the loopers first, then the needles.
- Raise the presser foot and turn the handwheel to raise the needles to their highest position.
- Open the front and side covers of the machine.
- Follow the color-coded guides for each thread, starting with the upper looper, then the lower looper, and finally the right and left needles.
- Ensure each thread passes through all tension discs and guides correctly.
- Close the covers securely after threading.
5. Parentah Operasi
5.1 Basic Serging
- Hurungkeun switch kakuatan.
- Place the fabric under the presser foot, aligning the edge with the cutting blade.
- Turunkeun suku presser.
- Gently press the foot controller to begin serging. Guide the fabric smoothly.
5.2 Nyaluyukeun tegangan Thread
The Juki MO-1200QVP features individual tension dials for each thread (refer to Figure 3.3). Adjust these dials to achieve a balanced stitch. A balanced stitch will have the needle threads meeting at the edge of the fabric and the looper threads interlocking smoothly.
- Increasing Tension: Turn the dial to a higher number.
- SKasing Tension: Turn the dial to a lower number.
5.3 Differential Feed Adjustment
The differential feed mechanism (refer to Figure 3.6) allows you to adjust the feeding ratio of the front and rear feed dogs. This is essential for preventing stretching on knit fabrics or gathering on fine fabrics.
- Normal Feed (N): For most woven fabrics.
- Gathering (1.5 - 2): For intentionally gathering fabric.
- Stretching Prevention (0.7 - 0.9): For preventing stretching on knit fabrics.
5.4 Stitch Length and Width
Adjust the stitch length and cutting width using the dedicated dials on the machine (refer to Figure 3.6 for stitch length). Refer to the machine's markings for recommended settings for various stitch types.
6. Pangropéa
6.1 beberesih
Regular cleaning is vital for optimal performance. Use a small brush and vacuum cleaner to remove lint and thread scraps from the looper area, under the needle plate, and around the feed dogs. Always disconnect power before cleaning.
6.2 Minyakan
Apply a small drop of high-quality sewing machine oil to the designated oiling points as indicated in the detailed diagram within your machine's internal cover or the full printed manual. Oiling should be done periodically based on usage.
6.3 Ngagantian jarum
Use only 130/705H type needles. Replace needles regularly, especially if they become bent, dull, or if you experience skipped stitches. Ensure the flat side of the needle faces the back of the machine when inserting (refer to Figure 3.5).
7. Cara ngungkulan
- Jahitan anu dilewatan: Check needle insertion, ensure it's not bent or dull. Re-thread the machine carefully.
- Pegatna Thread: Verify correct threading, check tension settings, ensure thread quality, and inspect for burrs on thread guides.
- Jahitan anu teu rata: Adjust differential feed settings according to fabric type. Check tension balance.
- Mesin teu ngamimitian: Ensure power cord is securely plugged in, power switch is on, and foot controller is connected.
For persistent issues, consult a qualified service technician.
8. Spésifikasi
| Dimensi produk | 13.8 x 15.7 x 14.7 inci |
| Item Beurat | 21 pon |
| Nomer Modél Item | MO-1200 |
| merek | JUKI |
| Nyaéta Listrik | Sumuhun |
9. Garansi jeung Rojongan
For information regarding warranty coverage, service, or technical support, please refer to the warranty card included with your product or visit the official Juki websitus. Simpen resi pameseran anjeun salaku bukti pameseran.