1. Bubuka
The Watts BT-D03 RF is a wireless digital room thermostat designed for precise temperature control in various heating and cooling installations. It features a backlit LCD screen and operates via 868 MHz radio frequency communication. This manual provides comprehensive instructions for the proper installation, operation, and maintenance of your thermostat.

Gambar 1: Hareupeun view of the Watts BT-D03 RF Thermostat, showing the display and control buttons.
2. Émbaran Kasalametan
- Baca sagala parentah taliti saméméh instalasi tur operasi.
- Installation should only be performed by a qualified electrician or heating engineer.
- Pastikeun catu daya parantos dicabut sateuacan ngalakukeun kabel atanapi pangropéa naon waé.
- Ulah ngalaan alat ka suhu ekstrim, kalembaban, atawa sinar panonpoé langsung.
- Jauhkeun alat ti barudak.
3. Eusi Paket
Pastikeun yén sadaya komponén aya dina bungkusan:
- Watts BT-D03 RF Wireless Digital Room Thermostat
- Nangtung méja
- Pamasangan screws na colokan témbok
- Manual pamaké
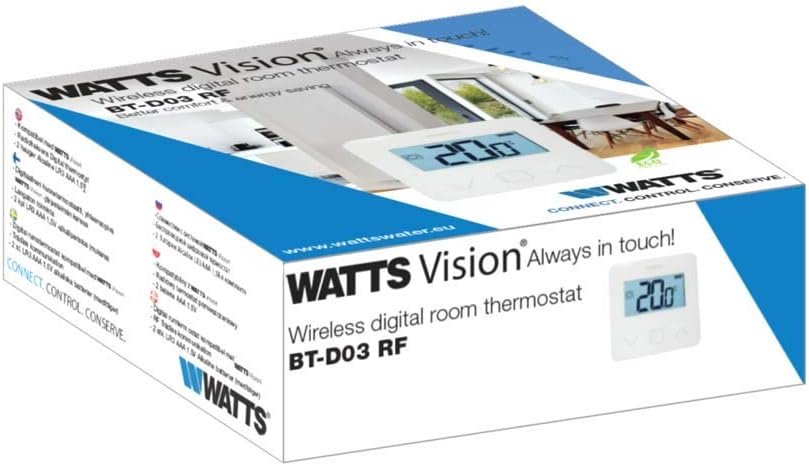
Figure 2: Product packaging of the Watts BT-D03 RF Thermostat.
4. Produk Langkungview
4.1 Komponén
- Layar LCD: Backlit screen showing temperature, battery level, and operating status.
- Tombol kontrol: Up, Down, and OK/Menu buttons for navigation and setting adjustments.
- Sénsor internal: For detecting ambient room temperature.
- External Sensor Port: For optional NTC 10 kOhm external sensor (not included).
- Indikator LED: Shows active heating/cooling signal.
- Internal Reset Button: For quick RF pairing or system reset.
- Buzzer: Provides audible feedback for certain operations.

Gambar 3: hareup lengkep view of the thermostat display.

Gambar 4: Balik view of the thermostat, showing battery compartment and mounting points.
4.2 Ukuran
The physical dimensions of the thermostat are provided below for installation planning.
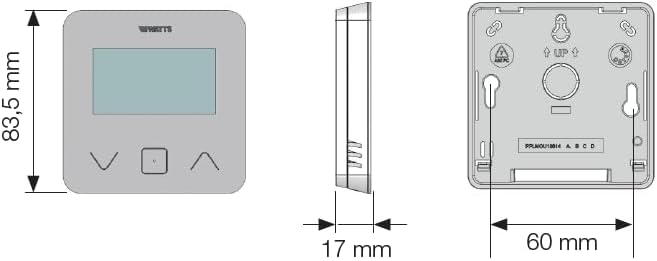
Figure 5: Dimensional drawing of the Watts BT-D03 RF Thermostat.
5. Setélan
5.1 Pamasangan batré
- Remove the back cover of the thermostat.
- Selapkeun dua batré AAA, mastikeun polaritasna bener.
- Ganti tutup tukangna.
5.2 Pilihan pamasangan
The thermostat can be installed in two ways:
- Pamasangan témbok: Use the provided screws and wall plugs to secure the thermostat to a wall at an appropriate height (typically 1.5 meters from the floor).
- Penempatan Tabletop: Attach the included stand to the back of the thermostat for placement on a flat surface.

Figure 6: Thermostat with tabletop stand attached.
5.3 RF Pairing
To establish wireless communication with the receiver unit (sold separately), follow the pairing instructions provided with your receiver. The thermostat features an internal reset button for quick RF pairing, typically requiring a short press during the receiver's pairing mode.
6. Parentah Operasi
6.1 Powering on / Pareum
The thermostat powers on automatically upon battery insertion. There is no dedicated on/off button for the thermostat unit itself; it remains active as long as batteries are present.
6.2 adjustment hawa
Use the Up and Down buttons to adjust the desired setpoint temperature. The LCD will display the current setpoint during adjustment.
6.3 Modeu Paparan
You can choose to display either the detected ambient temperature or the currently set temperature on the LCD. Refer to the full installation parameters mode for configuration details.
6.4 Keypad Lock (PIN Code)
To prevent unauthorized changes, the keypad can be locked using a PIN code. This feature is particularly useful for installations in public areas. Consult the advanced settings menu for PIN code setup and activation.
6.5 Deteksi Jandela Buka
The thermostat includes an open window detection feature. When a sudden drop in temperature is detected, the thermostat can temporarily suspend heating/cooling to conserve energy. This function can be configured in the settings.
6.6 Proportional Band Setting (PWM)
The thermostat supports proportional band setting (PWM) or configurable institutions (0.2÷3) for precise control of heating/cooling systems. This advanced setting allows for fine-tuning the system's response to temperature changes.
7. Pangropéa
7.1 Ngagantian batré
When the battery charge level indicator on the LCD shows low power, replace the two AAA batteries promptly to ensure continuous operation. Follow the battery installation steps in Section 5.1.
7.2 beberesih
Clean the thermostat's exterior with a soft, dry cloth. Do not use abrasive cleaners, solvents, or spray directly onto the device.
8. Cara ngungkulan
- Henteu aya tampilan: Pariksa pamasangan sareng tingkat ngecas batré. Ganti batré upami diperyogikeun.
- No Communication with Receiver: Ensure the thermostat and receiver are within range. Re-perform the RF pairing procedure (Section 5.3).
- Bacaan Suhu Lepat: Pastikeun termostat henteu kakeunaan sinar panonpoé langsung, angin, atanapi sumber panas.
- Keypad Teu Ngarespon: Check if the keypad lock (PIN Code) is active. Unlock the keypad as per instructions.
8.1 Reset Fungsi
If the thermostat is not functioning as expected, an internal reset button can be used. Consult the full installation parameters mode for specific reset procedures, as this may clear custom settings.
9. Spésifikasi Téknis
| merek | Watt |
| Nomer modél | BT-D03-RF-GT |
| Ukuran produk (L x W x H) | 6.2 x 1.7 x 8.35 cm |
| Item Beurat | 0.18 g |
| Voltage | 230 Volt (pikeun sistem anu nyambung, termostat dikuatkeun ku batré) |
| Sumber Daya | batré powered |
| Tipe Controller | Kontrol Manual |
| Tipe tampilan | LCD |
| Lampu tukang | Sumuhun |
| Suhu Operasi | 0 nepi ka 40 °C |
10. Émbaran minuhan
The Watts BT-D03 RF Wireless Digital Room Thermostat complies with the following directives:
- 2014/35/EU
- 2014/30/EU
- 2014/53/EU
- 2011/65/EU
- 2012/19/EU
- 2015/1188/EU


