1. Bubuka
This manual provides instructions for the installation, operation, and maintenance of the Vimar 02970 thermostat. This device is designed for controlling heating and cooling systems with ON/OFF functionality, featuring a control knob, relay output, and an LED backlight with brightness adjustment. It is compatible with Vimar Eikon, Arké, or Plana frames.
2. Émbaran Kasalametan
Pamasangan kedah dilaksanakeun ku tanaga anu mumpuni luyu sareng kode sareng peraturan listrik lokal.
Disconnect power at the main circuit breaker before installation or maintenance to prevent electric shock.
Ulah ngalaan alat ka beueus atawa suhu ekstrim.
Ensure proper wiring connections to avoid damage to the thermostat or connected systems.
3. Produk Langkungview
The Vimar 02970 thermostat offers intuitive control over your climate system. Key features include:
Kontrol Tombol: For easy temperature adjustment.
Lampu tukang LED: Adjustable brightness for clear visibility.
Modeu pemanasan sareng penyejukan: Supports both heating and cooling systems with ON/OFF control.
Friendly Programming: Designed for straightforward setup and use.
Potong kompas keyboard: Allows for quick interaction with the device.

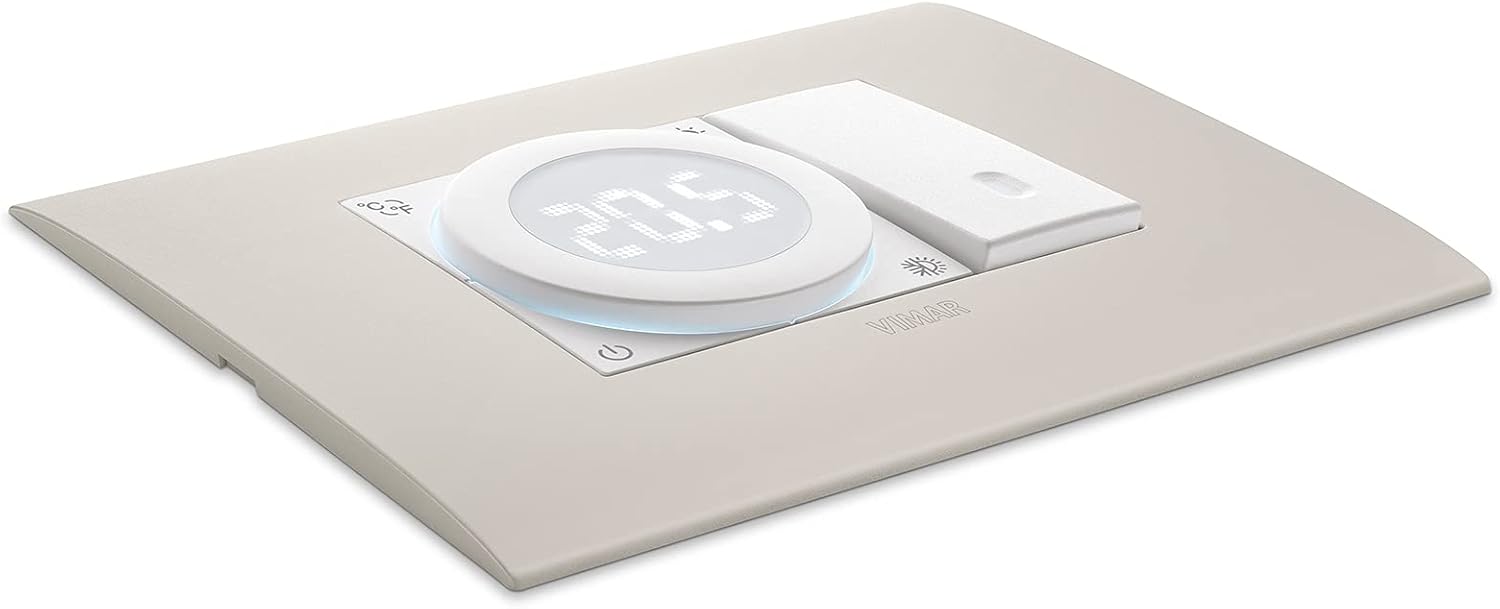
Gambar 1: Hareupeun view of the Vimar 02970 thermostat, showing the central display, control knob, and surrounding icons for temperature units, light, and mode selection.
4. Setup jeung Instalasi
4.1 Ngabongkar bungkusan
Carefully remove the thermostat and any included components from the packaging. Verify that all parts are present.
4.2 Pamasangan
The Vimar 02970 thermostat is designed to be integrated into Eikon, Arké, or Plana frames. Ensure the chosen frame is compatible.

Figure 2: The Vimar 02970 thermostat integrated into a wall frame, demonstrating its flush-mount appearance.
4.3 Kabel
Before wiring, ensure the main power supply to the circuit is disconnected.
Identify the power supply wires (Live, Neutral) and the heating/cooling system control wires (Common, Normally Open, Normally Closed).
Connect the Live (L) and Neutral (N) wires to the corresponding terminals on the thermostat. The thermostat operates on 100-240V~, 50/60Hz.
Connect the heating/cooling system control wires to the C (Common), NO (Normally Open), and NC (Normally Closed) relay output terminals as required by your system.
Ensure all connections are secure. The terminals are designed for wires up to 6 mm².

Gambar 3: Tukangeun view of the Vimar 02970 thermostat, showing the screw terminals for electrical connections (L, N, C, NO, NC).
Gambar 4: Sisi view of the Vimar 02970 thermostat, illustrating the depth and the wiring terminals with specifications (100-240V~, 5(2)A, 1B.U, -T40).
4.4 Mimiti Power-Up
After wiring, restore power at the main circuit breaker. The thermostat display should illuminate.
5. Parentah Operasi
5.1 Daya Hurung/Pareuman
Pencét ikon kakuatan (⏻) located on the bottom left of the thermostat to turn the device on or off.
5.2 Nyaluyukeun Suhu
Rotate the central control knob clockwise to increase the set temperature and counter-clockwise to decrease it. The current set temperature will be displayed on the LED screen.

Figure 5: A hand rotating the central control knob of the Vimar 02970 thermostat to adjust the temperature setting.
5.3 Changing Mode (Heating/Cooling)
The thermostat supports both heating and cooling modes. The mode can typically be switched using a dedicated button or a combination of button presses. Refer to the on-screen icons for current mode indication (e.g., snowflake for cooling, sun for heating).
5.4 Backlight Brightness Adjustment
The LED backlight brightness can be adjusted. Consult the Vimar website for specific instructions on accessing this setting, as it may involve keyboard shortcuts.
5.5 Programming (If Applicable)
The thermostat features "Friendly Programming." For detailed instructions on setting schedules or advanced programming options, refer to the comprehensive tutorials available on the official Vimar websitus.
6. Pangropéa
beberesih: Wipe the thermostat surface with a soft, dry cloth. Do not use abrasive cleaners or solvents.
Pamariksaan: Periodically check for any loose connections or signs of damage. If damage is observed, disconnect power and contact a qualified technician.
7. Cara ngungkulan
| Masalah | Mungkin Cukang lantaranana | Solusi |
|---|---|---|
| Layar termostat pareum. | Taya catu daya. | Check the main circuit breaker. Ensure wiring connections are secure. |
| System (heating/cooling) not responding. | Incorrect wiring; thermostat in wrong mode; set temperature not reached. | Verify wiring connections. Ensure the thermostat is in the correct mode (heating/cooling). Adjust the set temperature to be above/below the ambient temperature to trigger the system. |
| Pamacaan suhu sigana teu akurat. | Lokasi termostat kapangaruhan ku draf atanapi sumber panas. | Ensure the thermostat is not installed near windows, doors, or direct heat/cold sources. |
8. Spésifikasi
| Fitur | Rincian |
|---|---|
| Nomer modél | 02970 |
| merek | VIMAR |
| Voltage | 100-240V~ |
| Frékuénsi | 50/60Hz |
| Relay Kaluaran | 5(2)A, 1B.U |
| Suhu Operasi | -T40 (Specific range not provided, consult Vimar documentation) |
| Item Beurat | 70 g |
| Dimensi produk | 4.15 x 4.48 x 4.9 cm (42D x 45W x 49H millimeters) |
| Tipe Controller | Kenop mékanis |
| Fitur husus | Lighted (LED Backlight) |
| Konektipitas | Dikabel |
| Pigura cocog | Eikon, Arké, or Plana |

Figure 6: Technical diagram showing the dimensions of the Vimar 02970 thermostat (41.7mm depth, 44.8mm width, 49mm height).
9. Garansi jeung Rojongan
For warranty information, technical support, or additional tutorials, please visit the official Vimar website or contact your local Vimar distributor. The Vimar website provides comprehensive instructions and tutorials for programming and advanced features.
Vimar Websitus: www.vimar.com