1. Bubuka
This manual provides comprehensive instructions for the installation, operation, and maintenance of your MT-VIKI 8-Port 1U Rack Mount KVM HDMI Console. This integrated unit combines an 8-port KVM switch, a 17.3-inch 1080P LCD monitor, a keyboard, and a touchpad into a single 1U rack-mountable chassis, designed for efficient management of up to 8 computers or servers.
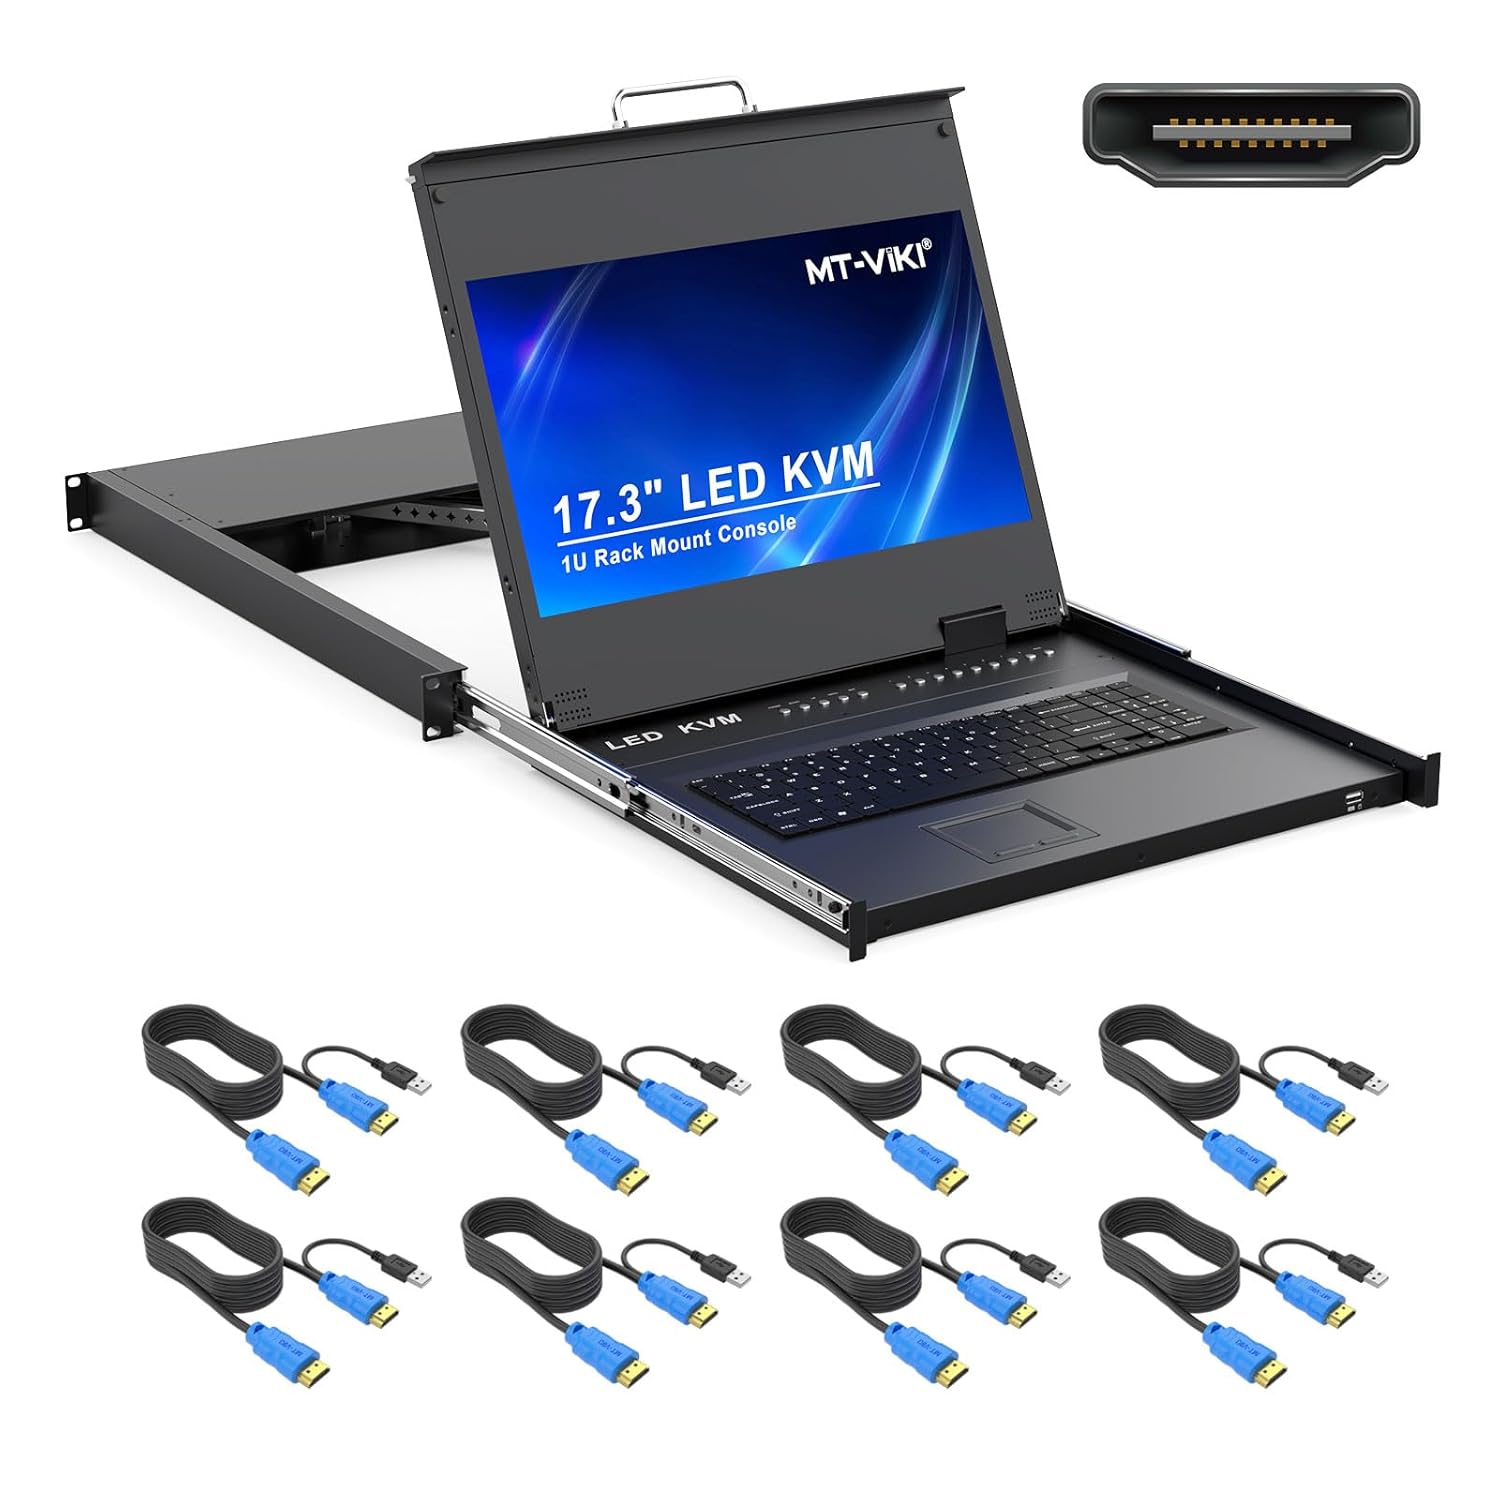
Image 1.1: MT-VIKI 8-Port 1U Rack Mount KVM HDMI Console with included KVM cables.
2. Produk Langkungview
2.1 Fitur konci
- Desain terpadu: Combines an 8-port KVM switch, 17.3-inch LCD monitor, keyboard, and touchpad in a compact 1U rack-mountable unit.
- Tampilan Résolusi Luhur: 17.3-inch LCD monitor supports 1920x1080P resolution at 60Hz.
- Konektipitas HDMI: Supports HDMI input for high-definition video.
- Sababaraha Métode Ngalihkeun: Switch between connected computers using OSD menu, keyboard hotkeys, or front panel push buttons.
- Rack Compatibility: Designed to fit standard 1U 19-inch server racks with an adjustable mounting depth range of 23.6 inches (60cm) to 31.8 inches (81cm).
- Konstruksi awét: Features an aluminum and steel chassis for reduced weight and enhanced sturdiness.
- Kasaluyuan OS Lega: Compatible with DOS, Windows, Linux, Unix, and Mac OS 8.6/9/10.
2.2 Komponén
Familiarize yourself with the various components and ports of the KVM console.
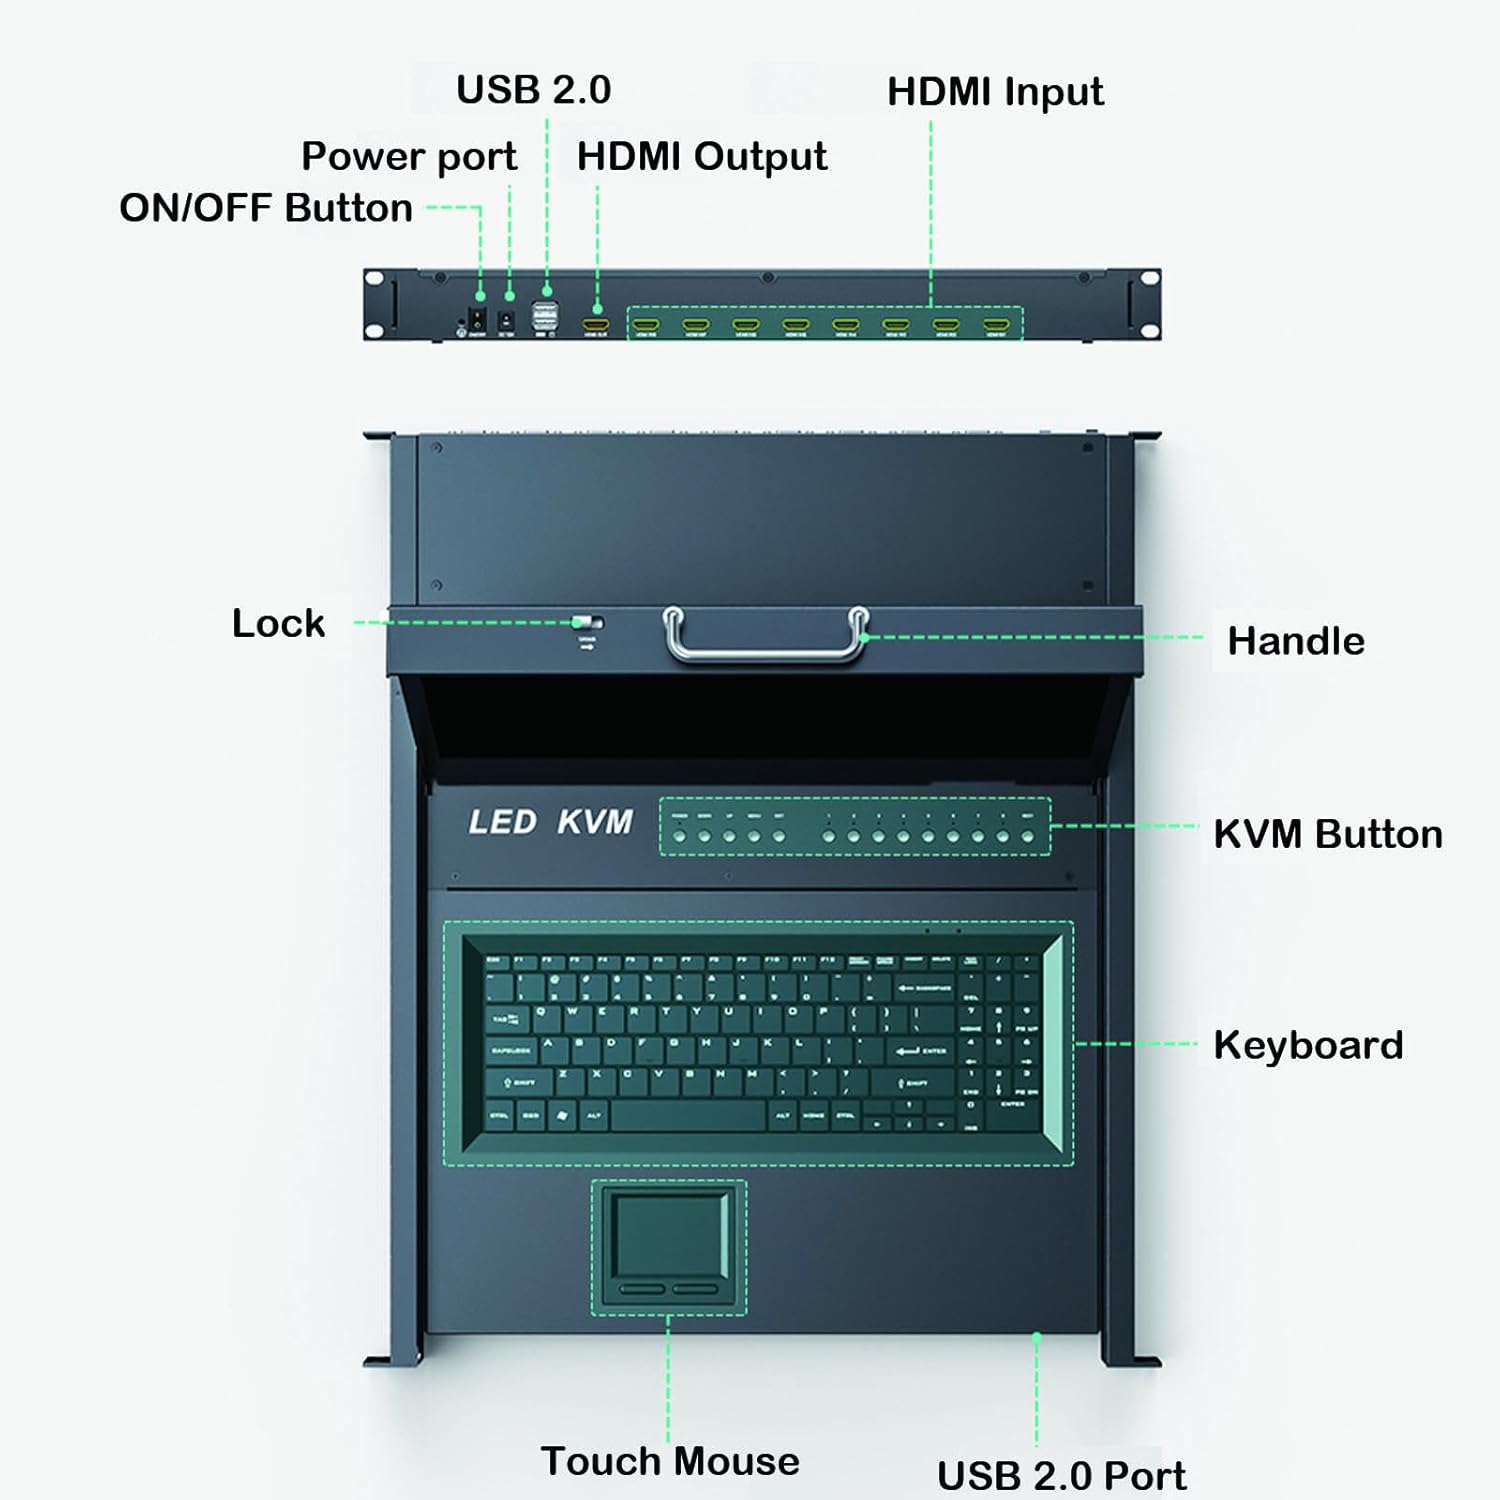
Image 2.1: Front and Rear Panel Components.
- Panel hareup: Handle, Lock, KVM Buttons (for port selection), Keyboard, Touch Mouse (Touchpad), USB 2.0 Port.
- Panel Pungkur: Power Port, ON/OFF Button, USB 2.0 Ports, HDMI Input Ports (for connecting to servers), HDMI Output (for external monitor, if supported by model).
3. Eusi Paket
Pastikeun yén sadaya item anu didaptarkeun di handap kalebet kana pakét anjeun:
- MT-VIKI 8-Port 1U Rack Mount KVM HDMI Console (VC-17308HL)
- 12V Daya adaptor
- 8 x 2-in-1 KVM Cables (HDMI + USB)
- Manual pamaké
- DVI Cable (25+4) 27" (for internal display connection)
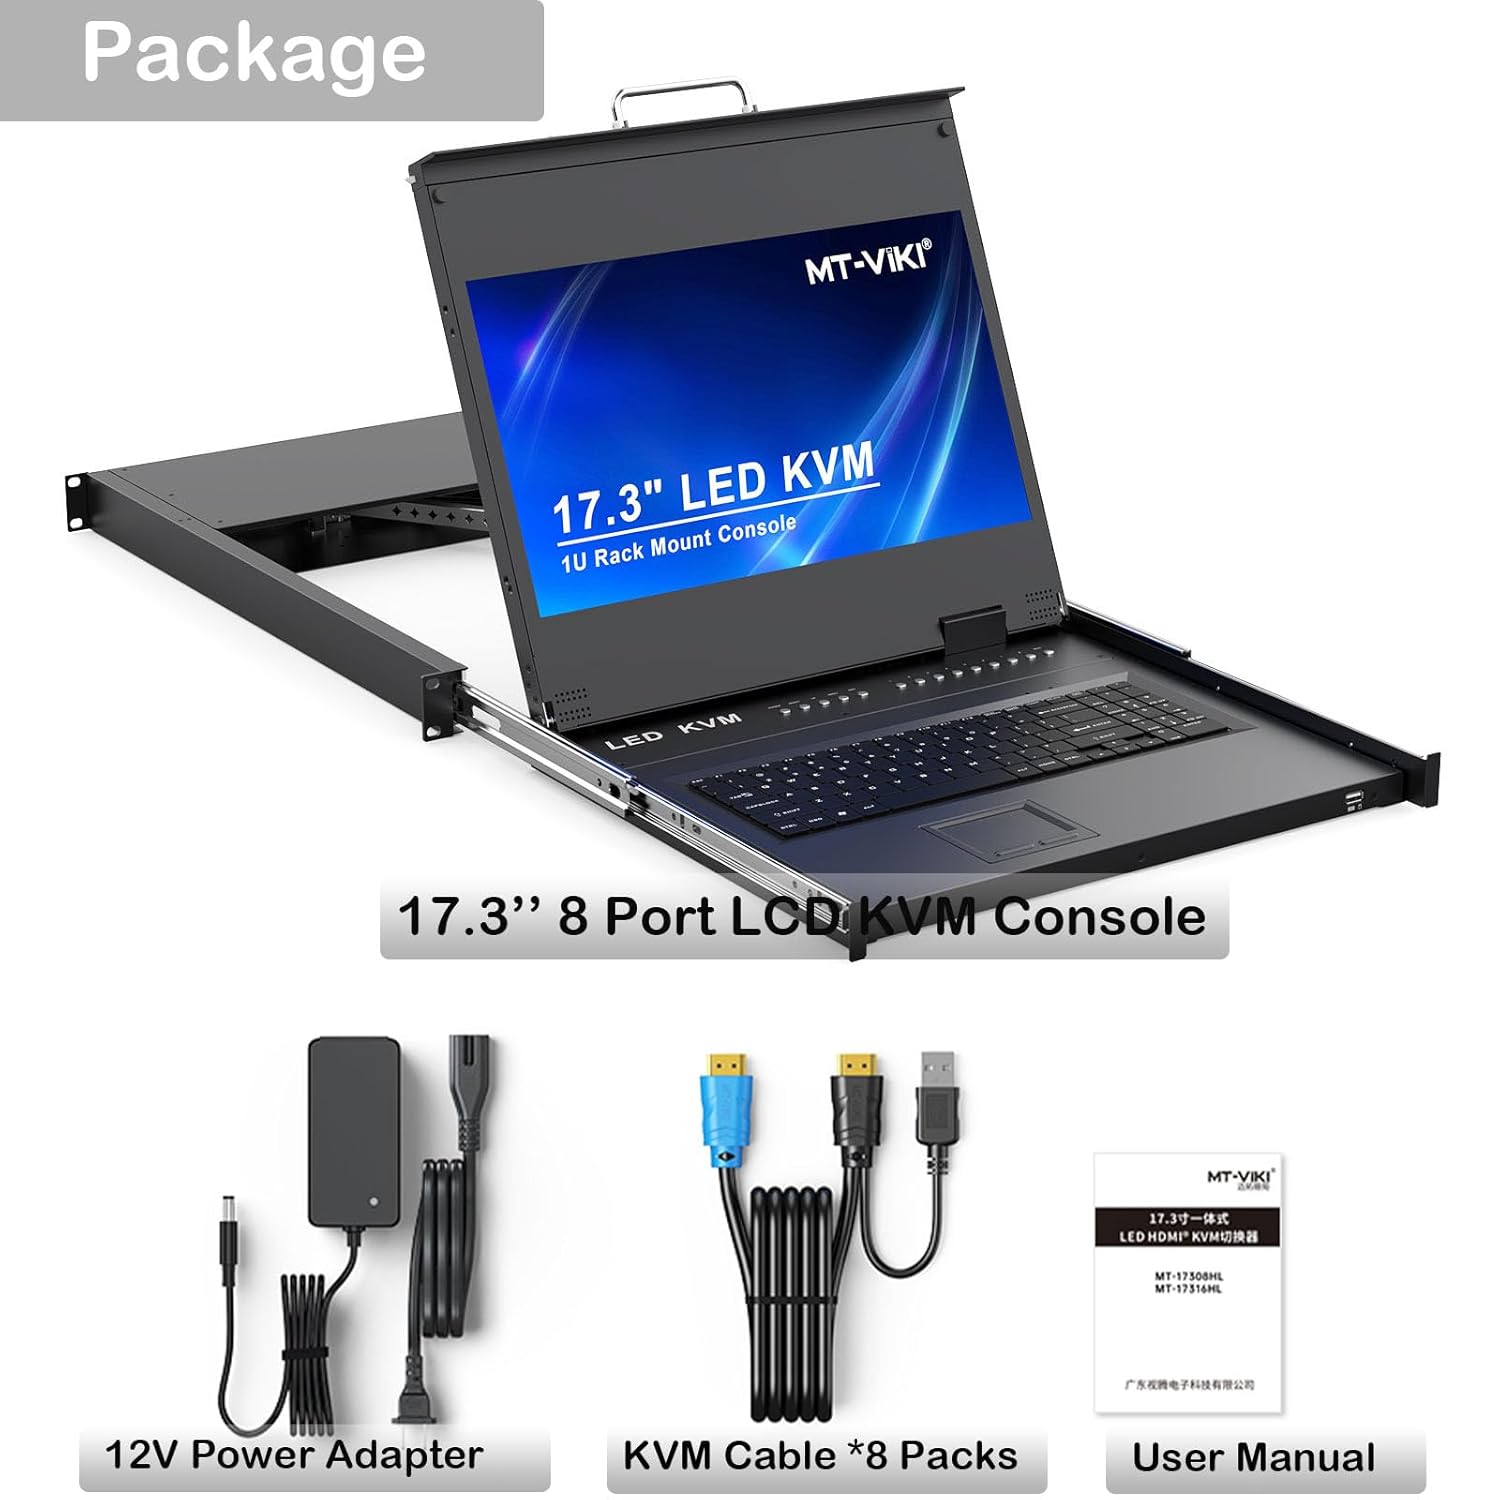
Image 3.1: Included Package Contents.
4. Pamasangan
Follow these steps to properly install your KVM console into a 19-inch server rack.
4.1 Rak Pamasangan
- Nyiapkeun Rak: Ensure your 19-inch rack has sufficient space (1U height) and the mounting depth is within the supported range of 23.6 inches (60cm) to 31.8 inches (81cm).
- Install Rear Brackets: Open the rear door of the cabinet. Select the appropriate height and install the KVM modular and bracket to the cabinet rails.
- Lebetkeun Konsol: At the front of the cabinet, carefully insert the KVM console into the installed brackets.
- Secure Console: Fix the cabinet screws to secure the KVM console firmly in place.

Image 4.1: KVM Console Mounted in a 1U Rack, illustrating mounting depth.

Image 4.2: Step-by-step installation diagram.
4.2 Sambungan kabel
- Connect Internal Display: Connect the KVM modular to the internal display via the provided DVI cable.
- Connect Servers: Use the included 2-in-1 KVM cables to connect your servers to the KVM switch. Each KVM cable has an HDMI connector for video and a USB connector for keyboard/mouse. Connect the HDMI end to the server's HDMI output and the USB end to the server's USB port. Connect the other end of the KVM cable to the corresponding HDMI input port on the KVM console.
- Sambungan Daya: Connect the 12V power adapter to the KVM console's power port and then plug it into an electrical outlet.

Image 4.3: Connection diagram for the KVM console.
5. Parentah Operasi
The MT-VIKI KVM console offers three methods for switching between connected computers.
5.1 Métode Ngaganti
- Front Panel Push Buttons: Press the corresponding numbered button on the front panel of the KVM console to switch to the desired port.
- Keyboard Hotkeys: Use specific key combinations on the integrated keyboard to switch ports. Refer to the hotkey section in the detailed user manual for specific commands.
- Menu dina Layar (OSD): Access the OSD menu on the monitor to select ports, configure settings, and manage connected devices. The OSD menu provides a graphical interface for control.

Image 5.1: Three methods for switching between KVM ports.
6. Pangropéa
To ensure the longevity and optimal performance of your KVM console, follow these maintenance guidelines:
- beberesih: Use a soft, dry cloth to clean the exterior surfaces. For the LCD screen, use a specialized screen cleaner and a microfiber cloth. Avoid abrasive cleaners or solvents.
- Ventilasi: Pastikeun liang ventilasi dina unit henteu katutup pikeun nyegah panas teuing.
- Manajemén Kabel: Keep cables neatly organized to prevent strain on connectors and improve airflow within the rack.
- Sasayogian tanaga: Use only the provided power adapter. If a replacement is needed, ensure it matches the original specifications (12V).
7. Cara ngungkulan
This section addresses common issues you might encounter with your KVM console.
7.1 Teu Aya Tampilan dina Monitor
- Pariksa kakuatan: Ensure the KVM console is powered on and the power adapter is securely connected to both the unit and a working power outlet.
- Sambungan kabel: Verify that all HDMI and DVI cables are securely connected between the KVM console, servers, and the internal display.
- Server Status: Confirm that the connected server is powered on and outputting a video signal.
- Pamilihan Palabuhan: Ensure the correct KVM port is selected using the front panel buttons, hotkeys, or OSD menu.
7.2 Kibor atanapi Mouse Henteu Ngarespon
- Sambungan USB: Check that the USB cables from the servers are properly connected to the KVM console.
- Pamilihan Palabuhan: Confirm that the correct KVM port is active.
- Reboot: Try restarting the KVM console and the connected server.
- External Mouse: If using an external USB mouse, ensure it is connected to the designated USB port.
7.3 Unit Beeping or Unresponsive
- adaptor kakuatan: A faulty power adapter can cause erratic behavior. If possible, test with a known good 12V power adapter.
- Siklus kakuatan: Turn off the unit, disconnect the power for a few minutes, then reconnect and power on.
8. Spésifikasi
| Fitur | Spésifikasi |
|---|---|
| Nomer modél | VC-17308HL |
| Ukuran tampilan | 17.3 inci |
| Resolusi | 1920 x 1080P |
| Refresh Laju | 60Hz |
| Palabuhan KVM | 8 (HDMI) |
| Ukuran Rak | 1U 19-inch |
| Pamasangan Jerona | 23.6" (60cm) to 31.8" (81cm) |
| Ukuran produk (W × D × H) | 18.9 × 23.6 × 1.77 inches (480x600x45mm) |
| Beurat | Kira-kira 30.95 Pon |
| Operasi Voltage | 12 volt |
| Tipe Panyambung | HDMI, USB |
| Métode kontrol | Push Button, Hotkey, OSD Menu, Touchpad |
| Bahan | Alloy Steel |
| Peunteun Protection Internasional | IP56 |
9. Garansi jeung Rojongan
MT-VIKI products are designed for reliability and performance. For warranty information, technical support, or service inquiries, please refer to the contact details provided with your purchase documentation or visit the official MT-VIKI websitus. Simpen resi pameseran anjeun pikeun klaim jaminan.


