1. Bubuka
The Cherry MW 8C Ergo is an ergonomic, right-handed wireless mouse designed for comfort and precision. It offers flexible connectivity options via Bluetooth or a 2.4 GHz wireless USB dongle, ensuring a stable and secure connection with AES-128 encryption. This rechargeable mouse features a high-precision sensor for accurate tracking and is built for durability and extended use. This manual provides detailed instructions for setting up, operating, maintaining, and troubleshooting your MW 8C Ergo mouse.
2. Eusi Paket
Mangga parios pakét kanggo barang-barang ieu:
- Cherry MW 8C Ergo Wireless Mouse
- USB-A ka USB-C ngecas Cable
- 2.4 GHz Wireless USB Receiver (dongle)
- Storage Pouch (fabric carry pouch)
- Manual Pitunjuk (dokumén ieu)
3. Fitur Produk
- Desain ergonomis: Shaped for comfortable right-handed use, reducing strain during long periods.
- Konektipitas Nirkabel Ganda: Seamlessly switch between Bluetooth and 2.4 GHz wireless modes.
- Batré anu tiasa dicas deui: Integrated battery provides long-lasting power and can be charged via USB-C.
- Sensor Optik Presisi Tinggi: Ensures accurate and smooth cursor control.
- AES-128 Encryption: Secure wireless transmission for data protection.
- DPI adjustable: Customize cursor speed to suit your preferences.
- Konstruksi awét: High-quality materials for reliability and longevity.
4. Setélan
4.1. Ngecas Mouse
Before first use, it is recommended to fully charge the mouse. Connect the supplied USB-A to USB-C charging cable to the USB-C port on the front of the mouse and to a USB-A port on your computer or a USB power adapter.
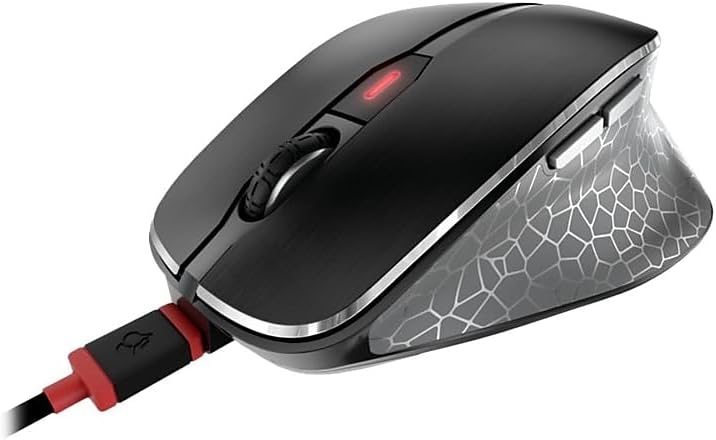
Image: The Cherry MW 8C Ergo mouse connected to its USB-C charging cable, showing the charging port and the mouse's top view.
The LED indicator on the mouse will show charging status. Once fully charged, the LED will change or turn off depending on the model's specific indicator behavior.
4.2. Connecting via 2.4 GHz Wireless (USB Receiver)
- Locate the 2.4 GHz USB receiver (dongle), usually stored magnetically in a compartment on the bottom of the mouse.
- Colokkeun panarima USB kana port USB-A anu sayogi dina komputer anjeun.
- On the bottom of the mouse, slide the 3-position switch to the "2.4 GHz" position (often indicated by a small wireless icon).
- Your computer should automatically detect and install the necessary drivers. The mouse will be ready for use.
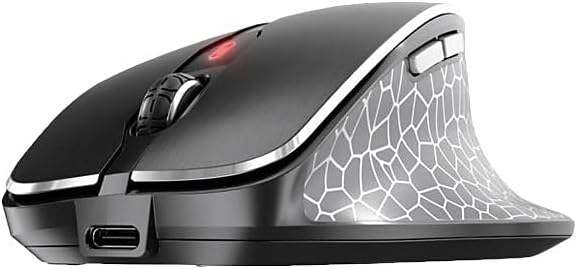
Gambar: Sisi hareup view of the Cherry MW 8C Ergo mouse, highlighting the USB-C charging port and the scroll wheel.
4.3. Nyambungkeun via Bluetooth
- On the bottom of the mouse, slide the 3-position switch to the "Bluetooth" position (often indicated by a Bluetooth icon).
- Press and hold the Bluetooth detection button on the bottom of the mouse for a few seconds until the LED indicator starts blinking, indicating pairing mode.
- Dina komputer anjeun, buka setélan Bluetooth:
- Windows: Buka Setélan > Alat > Bluetooth & alat sanésna. Klik "Tambahkeun Bluetooth atanapi alat sanésna" teras pilih "Bluetooth".
- macOS: Buka Préferénsi Sistem > Bluetooth.
- Select "Cherry MW 8C Ergo" from the list of available devices.
- Follow any on-screen prompts to complete the pairing process. The LED indicator on the mouse will stop blinking once successfully paired.
5. Ngoperasikeun Mouse
5.1. Fungsi Tombol
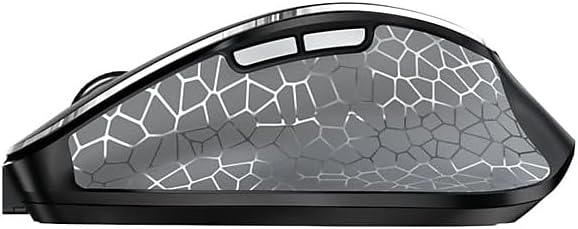
Gambar: Hiji sisi view of the Cherry MW 8C Ergo mouse, highlighting the two programmable side buttons.
- Tombol Klik Kénca: Fungsi klik primér.
- Tombol Klik katuhu: Fungsi klik sekundér, biasana muka menu kontéks.
- Gulung kabayang: Gulung ka luhur/ka handap dokumén sareng web kaca. Bisa ogé dipencet pikeun fungsi klik tengah.
- Tombol DPI: Located behind the scroll wheel, this button allows you to cycle through different DPI (Dots Per Inch) sensitivity settings.
- Kancing samping: Two buttons located on the thumb side of the mouse. By default, these often function as "Forward" and "Back" in web browser jeung file explorers. Their functions may be customizable via software (if available).
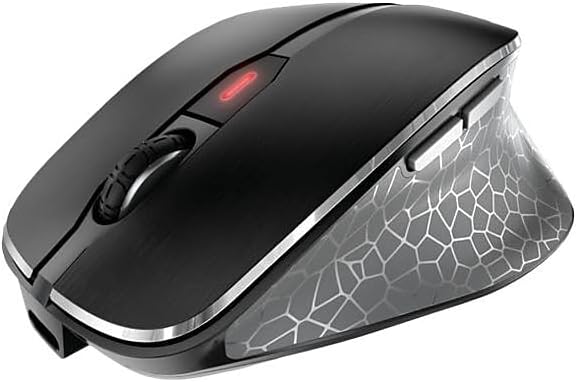
Gambar: A luhur-handap view of the Cherry MW 8C Ergo mouse, clearly showing the scroll wheel and the DPI adjustment button.
5.2. Nyaluyukeun Sensitivitas DPI
Press the DPI button (located behind the scroll wheel) to cycle through the available sensitivity settings. Each press will change the cursor speed, allowing you to find the optimal setting for your tasks. The mouse typically has multiple preset DPI levels.
5.3. Switching Connectivity Modes
To switch between 2.4 GHz wireless and Bluetooth modes, use the 3-position switch on the bottom of the mouse. Ensure the correct mode is selected for your desired connection type.
6. Pangropéa
6.1. Ngabersihan Beurit
- Disconnect the mouse from any charging cables and turn it off using the switch on the bottom.
- Make kaen nu lemes, teu aya lint rada dampku cai atawa solusi beberesih hampang pikeun ngusap beungeut beurit.
- Ulah nganggo bahan kimia anu kasar, pembersih anu abrasif, atanapi nyemprotkeun cairan langsung kana beurit.
- Pikeun sénsor optik, anggo kapas garing pikeun ngabersihkeun lebu atanapi kokotor sacara lembut.
6.2. Kaperawatan batré
- Pikeun manjangkeun umur batré, ulah sering-sering ngosongkeun batré beurit.
- Charge the mouse regularly, especially when the low battery indicator appears.
- If storing the mouse for an extended period, charge it to about 50% and turn it off. Recharge every few months to prevent deep discharge.
7. Cara ngungkulan
7.1. Beurit Teu Ngabales
- Pariksa kakuatan: Pastikeun mouse dihurungkeun sareng batréna cekap.
- Check Connectivity Mode: Verify the switch on the bottom of the mouse is set to the correct mode (2.4 GHz or Bluetooth) for your connection type.
- Sambungan 2.4 GHz:
- Pastikeun yén panarima USB tos aman dicolokkeun kana port USB anu tiasa dianggo.
- Coba colokkeun panarima kana port USB anu béda.
- Ensure the receiver is within range of the mouse (typically up to 10 meters).
- Sambungan Bluetooth:
- Pastikeun Bluetooth diaktipkeun dina komputer Anjeun.
- Try re-pairing the mouse with your computer (refer to Section 4.3).
- Ensure the mouse is within range of your computer's Bluetooth receiver.
- Uihan deui: Turn the mouse off and then on again. Restart your computer if necessary.
7.2. Gerakan Kursor Teu Ngarareunah atawa Teu Akurat
- Sensor beresih: Clean the optical sensor on the bottom of the mouse (refer to Section 6.1).
- Beungeut: Anggo beurit dina permukaan anu bersih, henteu reflektif, sareng seragam. Hindarkeun kaca atanapi permukaan anu réfléktif pisan.
- Setélan DPI: Adjust the DPI sensitivity using the DPI button to see if a different setting improves performance.
7.3. Mouse Not Charging
- Sambungan kabel: Pastikeun kabel USB-C disambungkeun pageuh kana mouse sareng kana sumber daya.
- Sumber Daya: Try a different USB port on your computer or a different USB power adapter.
- Integritas kabel: Inspect the charging cable for any damage. Try using a different USB-C charging cable if available.
8. Spésifikasi
| Fitur | Rincian |
|---|---|
| Ngaran modél | MW 8C Ergo |
| Nomer Modél Item | JW-8600US |
| merek | buah Cherry |
| Téhnologi konektipitas | Bluetooth, 2.4 GHz Wireless |
| Detéksi Gerakan | Optik |
| Sumber Daya | Ditenagakeun Batré (Bisa dieusi deui) |
| Kasaluyuan System Operasi | Windows 7, Windows 8, Windows 10, Windows 11 |
| Item Beurat | 8 ons (kira-kira 227 gram) |
| Ukuran produk (L x W x H) | 4.72 x 3.11 x 1.75 inci (kira-kira 120 x 79 x 44 mm) |
| Warna | Hideung |
| Énkripsi | AES-128 (for 2.4 GHz wireless) |
9. Garansi jeung Rojongan
9.1. Émbaran jaminan
Cherry products are manufactured to high-quality standards. This product is covered by a limited warranty against defects in materials and workmanship. Please refer to the official Cherry website or your purchase documentation for specific warranty terms and conditions applicable to your region. Keep your proof of purchase for warranty claims.
9.2. Rojongan Téknis
If you encounter any issues not covered in the troubleshooting section or require further assistance, please contact Cherry customer support. You can find contact information, FAQs, and additional resources on the official Cherry websitus:
Official Cherry Websitus: www.cherry.de/en/
Please have your product model number (JW-8600US) and proof of purchase ready when contacting support.


