1. Bubuka
The FLITI Galaxy Lights Projector 2.0 creates an immersive visual experience with its advanced nebula and galaxy projection capabilities. This device features a wide coverage area, integrated Bluetooth speaker, and various customizable settings including timing, brightness, and lighting modes. This manual provides detailed instructions for the safe and effective use of your projector.
2. Émbaran Kasalametan
- Sumber Daya: Paké ngan adaptor kakuatan disadiakeun. Pastikeun voltage cocog spésifikasi produk.
- Paparan cai: This product is not waterproof. Avoid exposure to water or high humidity to prevent electric shock or damage.
- Ventilasi: Ulah ngahalangan liang ventilasi. Pastikeun aliran hawa di sabudeureun alat cekap.
- beberesih: Pegatkeun sambungan kakuatan saméméh beberesih. Paké lawon lemes, garing. Ulah make cleaners cair.
- Barudak: Jauhkeun tina jangkauan barudak leutik. Ieu sanés cocooan.
- Pembongkaran: Ulah nyobian ngabongkar atanapi ngalereskeun unit nyalira. Hubungi petugas servis anu mumpuni pikeun bantosan.
- Paparan Panon Langsung: Hindarkeun paparan panon langsung kana sinar laser.
3. Eusi Paket
Mangga parios pakét kanggo barang-barang ieu:
- FLITI Galaxy Lights Projector 2.0 Unit
- Kadali jauh
- Kabel Daya USB
- Manual pamaké
4. Produk Langkungview
Familiarize yourself with the components of your FLITI Galaxy Lights Projector 2.0.

Figure 4.1: FLITI Galaxy Lights Projector 2.0 with remote control.

Figure 4.2: Key features of the Galaxy Projector, including adjustable rotation speed, timer, sound, and angle.
4.1. Fitur Unit Utama
- Lensa proyéksi: Projects nebula and star patterns.
- Tombol kontrol: Located on the unit for basic functions (Power, Mode, Volume, etc.).
- Palabuhan USB-C: Pikeun input kakuatan.
- Speaker: Integrated Bluetooth speaker.
- Dasar adjustable: Allows for angle adjustment of the projection.
4.2. Fungsi Jauh Jauh
The included remote control provides full functionality for operating the projector:
- Daya Hurung/Pareuman
- Nebula/Galaxy Light Mode Selection
- Star Light On/Off
- Brightness Adjustment (5 levels)
- Rotation Speed Adjustment (5 levels)
- Timer Settings (1H/2H/4H auto-off)
- Bluetooth Speaker Volume Control
- Music Playback Controls (Play/Pause, Next/Previous Track)
5. Setélan
5.1. Sambungan Daya
- Connect the provided USB power cable to the USB-C port on the projector.
- Plug the other end of the USB cable into a compatible USB power adapter (not always included) and then into a wall outlet.
- Proyektor bakal hurung sacara otomatis atanapi tiasa dihurungkeun nganggo tombol daya dina unit atanapi jarak jauh.
5.2. Panempatan
For optimal projection, place the projector on a flat, stable surface. Adjust the angle of the projector using its base to direct the light patterns onto your desired surface (ceiling, wall, etc.). The projector offers a wide coverage area, suitable for various room sizes.
6. Parentah Operasi
6.1. Daya Hurung / Pareum
Press the power button on the projector unit or the remote control to turn the device on or off.
6.2. Adjusting Light Modes

Gambar 6.1: Kelamples of various lighting effects and modes.
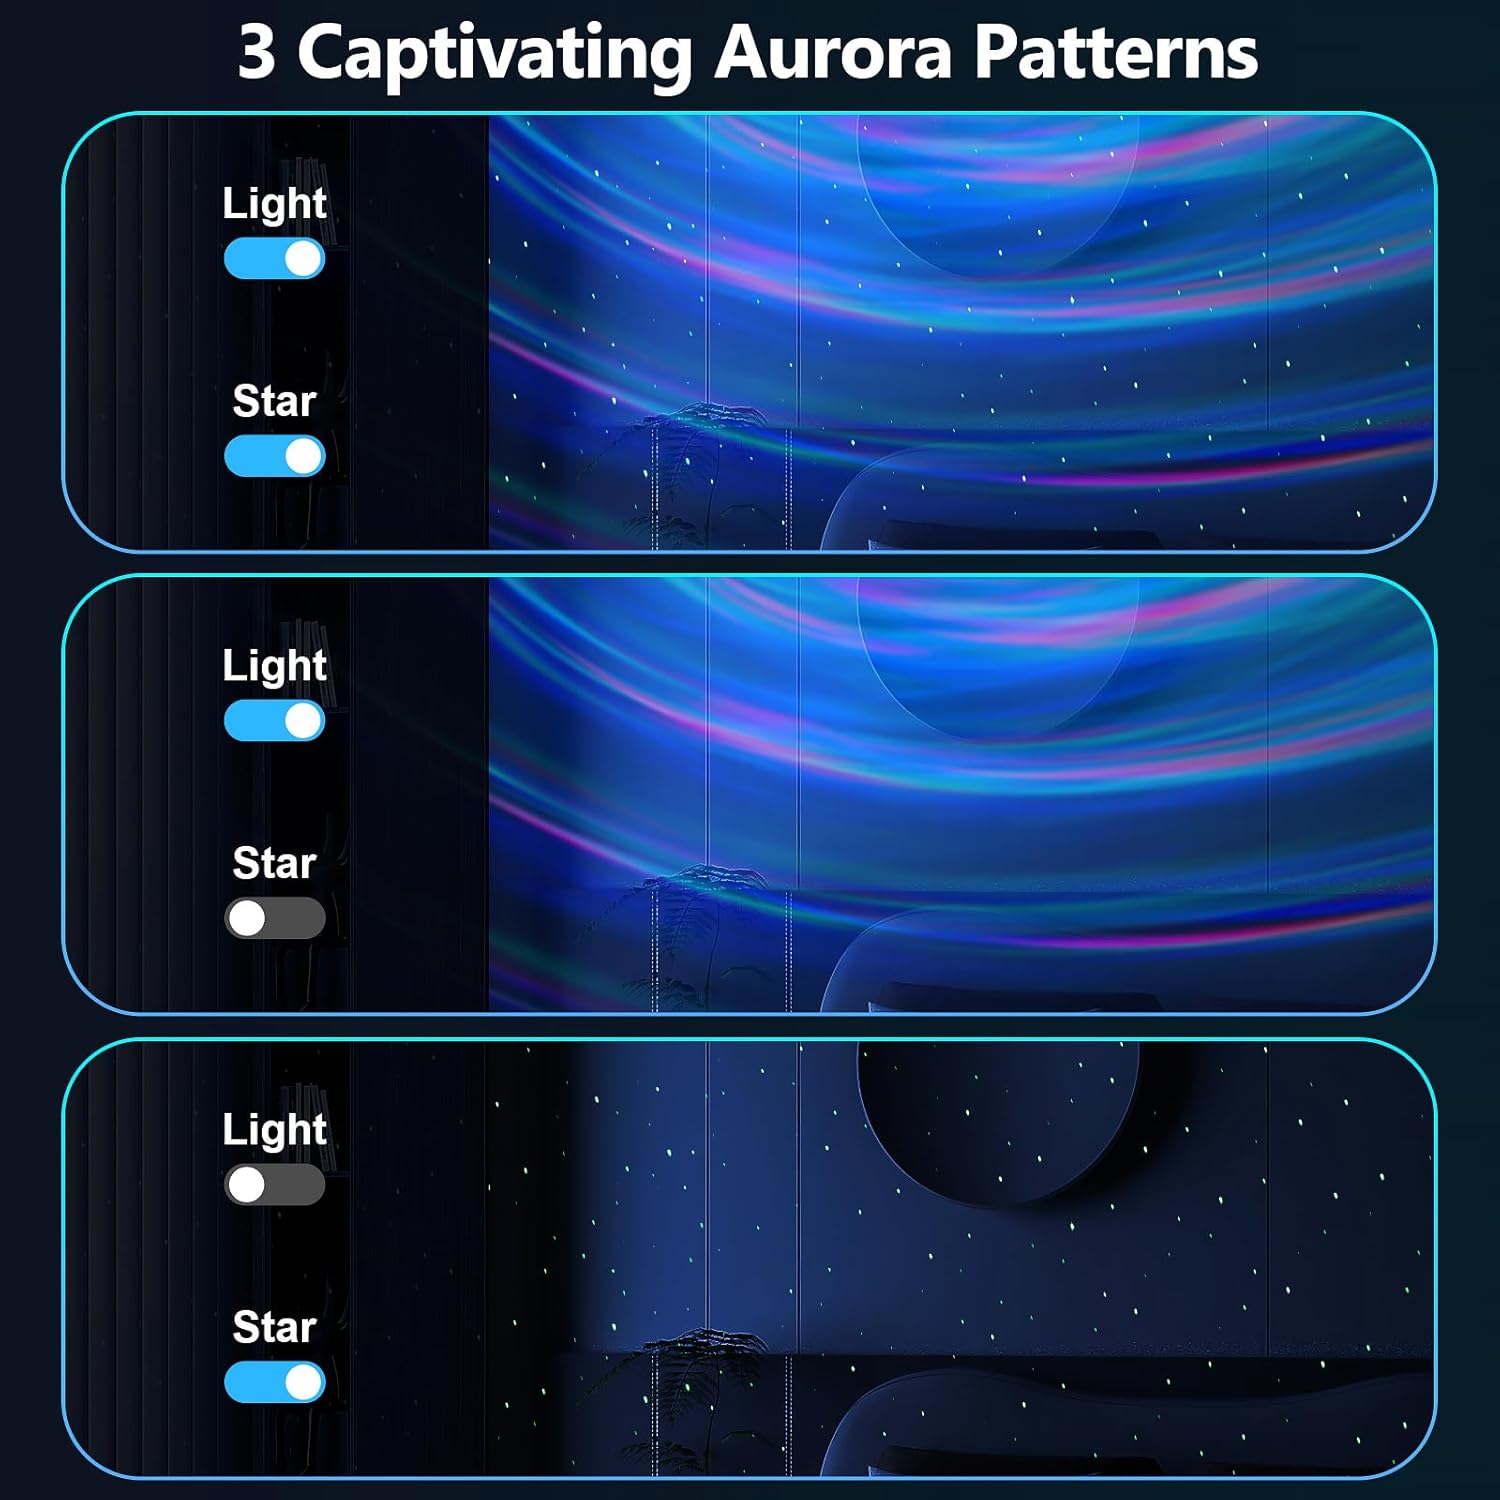
Figure 6.2: Aurora patterns with independent light and star controls.
Use the dedicated buttons on the remote control to cycle through different nebula colors, galaxy shapes, and star patterns. You can combine nebula and star effects or display them independently. The projector offers 14 lighting effects and 4 lighting modes.
6.3. Brightness and Rotation Speed

Figure 6.3: Brightness and flow speed adjustment controls.
- Caang: Use the brightness adjustment buttons on the remote to select from 5 levels of light intensity.
- Laju Rotasi: Adjust the rotation speed of the nebula effects using the corresponding buttons on the remote. There are 5 speed levels available.
6.4. Fungsi Timer
The projector includes a timer function for automatic shut-off. Use the timer buttons on the remote control to set the device to turn off after 1 hour, 2 hours, or 4 hours. If no timer is set, the device will automatically turn off after approximately 4 hours.
6.5. Speaker Bluetooth
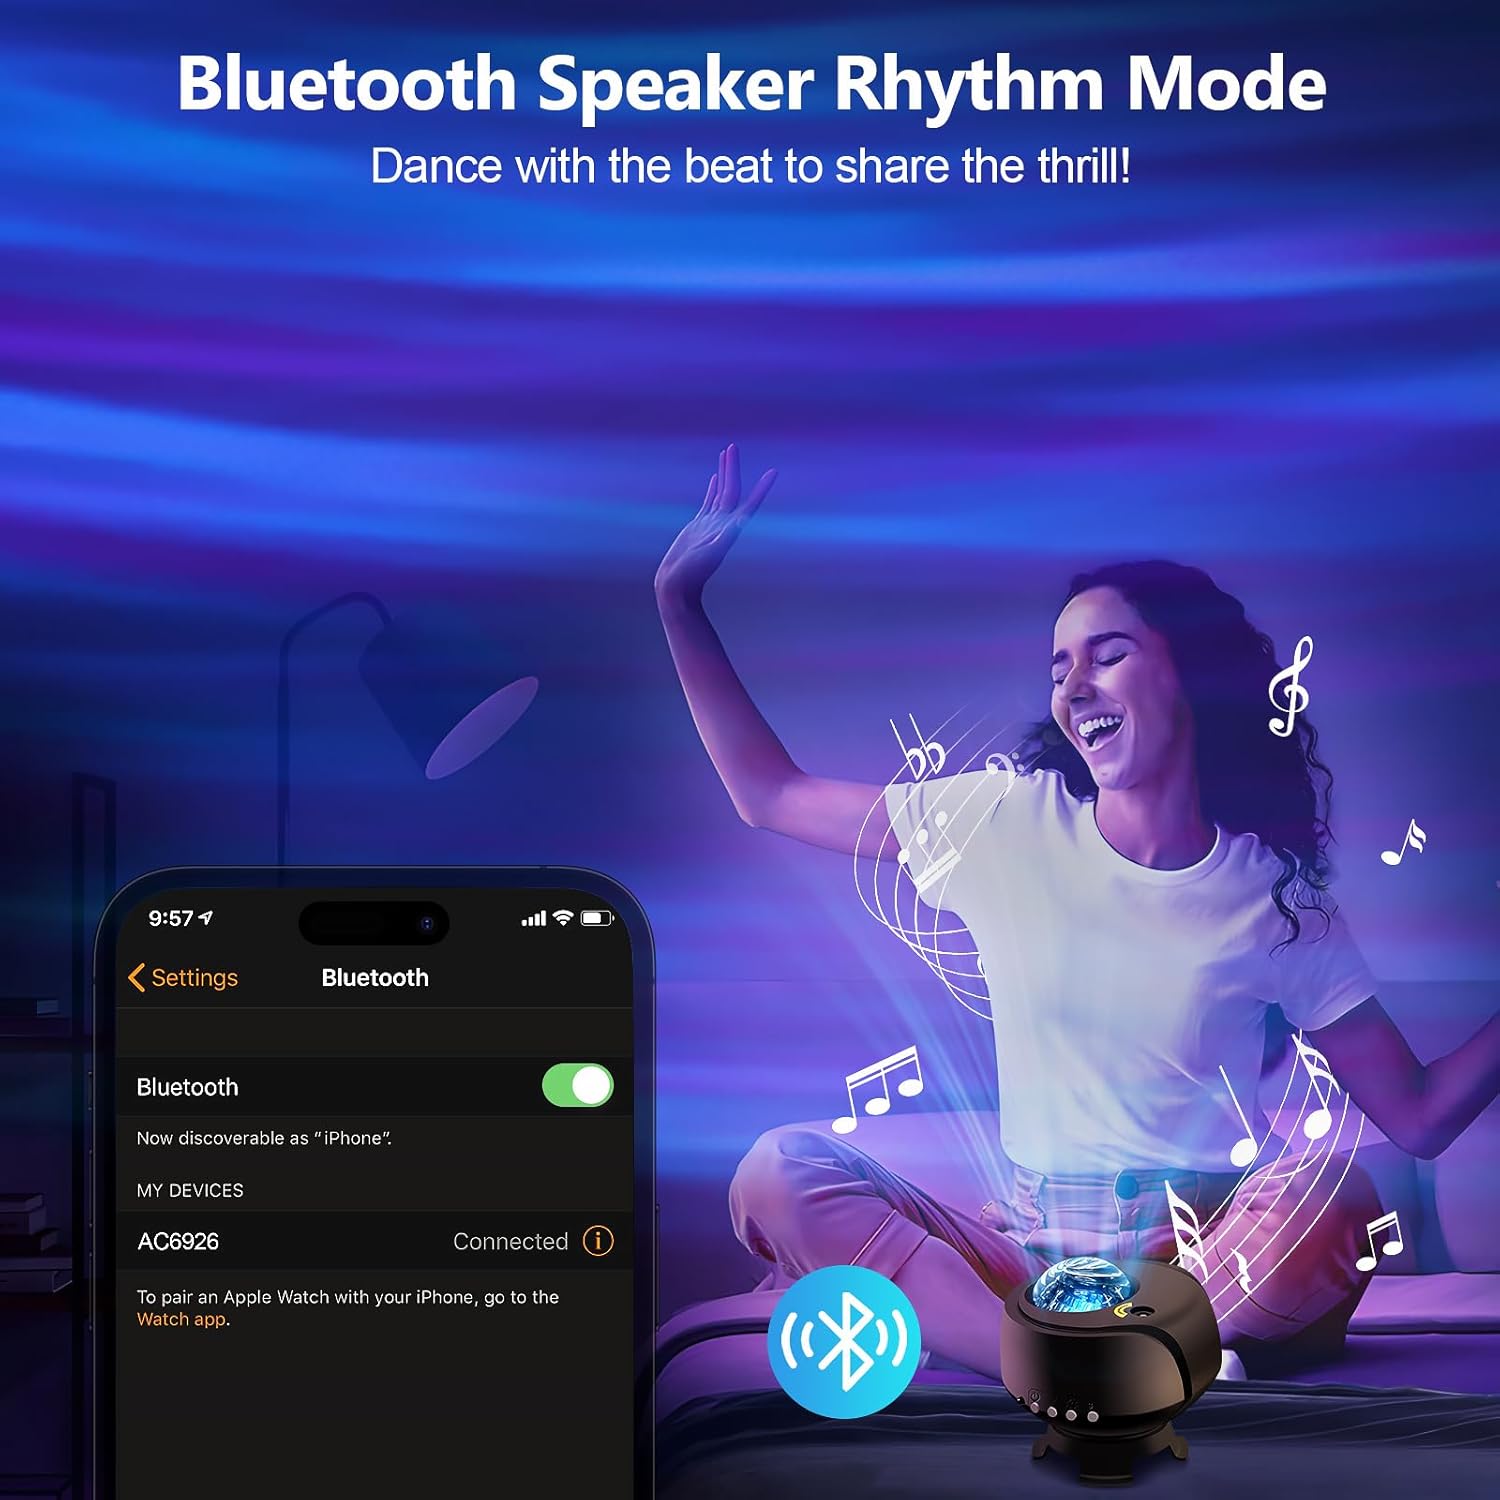
Figure 6.4: Bluetooth speaker connection interface.
- Pastikeun proyektor diaktipkeun.
- On your smartphone or other Bluetooth-enabled device, search for available Bluetooth devices.
- Select "AC6926" (or similar device name) from the list to pair.
- Once paired, you can play audio through the projector's speaker.
- Use the remote control to adjust volume and control music playback (play/pause, next/previous track).
7. Pangropéa
7.1. beberesih
To clean the projector, first ensure it is unplugged from the power source. Use a soft, dry, lint-free cloth to wipe the exterior surfaces. Do not use abrasive cleaners, solvents, or chemical sprays, as these can damage the finish or internal components. Keep the projection lens clean for clear images.
7.2. Panyimpenan
When not in use, store the projector in a cool, dry place, away from direct sunlight and extreme temperatures. Keep it in its original packaging or a protective case to prevent dust accumulation and damage.
8. Cara ngungkulan
| Masalah | Mungkin Cukang lantaranana | Solusi |
|---|---|---|
| Proyéktor teu tiasa dihurungkeun. | Teu aya sambungan listrik atanapi kabelna rusak. | Ensure the USB power cable is securely connected to both the projector and a working power outlet. Try a different USB adapter or cable. |
| Lights are dim or not projecting clearly. | Brightness setting is low; lens is dirty; room is too bright. | Increase brightness using the remote. Clean the projection lens with a soft cloth. Use in a darker environment for best results. |
| Bluetooth teu nyambung. | Projector not in pairing mode; device not discoverable; incorrect device selected. | Ensure the projector is on. Check your device's Bluetooth settings and ensure it's discoverable. Select the correct device name (e.g., "AC6926"). Restart both devices if necessary. |
| Projector turns off unexpectedly. | Timer function is active; automatic shut-off. | Check if a timer (1H/2H) is set. The projector has an automatic 4-hour shut-off feature if no timer is manually set. This is a design feature and not a malfunction. |
| Kadali jauh teu jalan. | Battery depleted; obstruction; not pointed correctly. | Replace the remote control battery. Ensure there are no obstructions between the remote and the projector. Point the remote directly at the projector's sensor. |
9. Spésifikasi
| Fitur | Rincian |
|---|---|
| Nomer modél | cahaya galaksi-1 |
| merek | FLITI |
| Warna | Hideung-A |
| Wangun | Buleud |
| Bahan | Acrylonitrile Butadiene Styrene (ABS) |
| Tipe rengse | Dipoles |
| Tipe Sumber Cahaya | Projector |
| Sumber Daya | Kabel Listrik |
| Voltage | 240 volt |
| Item Beurat | 1.07 pon (0.49 Kilogram) |
| Dimensi produk | 4.5 "L x 4" W x 4.5" H |
10. Jaminan & Dukungan
FLITI products are designed for quality and reliability. For specific warranty details and customer support, please refer to the warranty card included with your product or visit the official FLITI website. If you encounter any issues or have questions regarding your FLITI Galaxy Lights Projector 2.0, please contact our customer service team for assistance.


