1. Bubuka
Thank you for choosing the SCOORNEST A9 Wireless Mini Security Camera. This manual provides essential information for the safe and effective use of your device. Please read it thoroughly before operation and retain it for future reference. This camera is designed for indoor surveillance, offering features such as 1080P video, motion detection, and mobile app connectivity.
2. Produk Langkungview
2.1 Eusi pakét
Pastikeun yén sadaya item aya dina pakét anjeun:
- 1 x SCOORNEST A9 Mini Camera
- 1 x Bracket magnét
- 1 x Kabel Ngecas USB
- 1 x Manual Pamaké

Image: The package includes one mini camera, one magnetic bracket, and one USB charging cable.
2.2 Camera Components and Features
The SCOORNEST A9 camera is a compact device with essential features for home security.

Image: The SCOORNEST A9 Mini Camera shown next to a smartphone displaying its live video feed.
fitur konci ngawengku:
- Video HD lengkep 1080P: Provides clear and smooth video recording.
- Deteksi gerak: Automatically detects movement and can trigger recording or alerts.
- Konektipitas WiFi: Connects to your 2.4GHz Wi-Fi network for remote viewing.
- Wireless Battery Operated: Allows flexible placement without constant power connection.
- Visi Peuting: Enables monitoring in low-light conditions.
- Ngarekam loop: Supports Micro SD card storage up to 128GB (not included).

Image: Visual representation of the camera's main features: 1080P resolution, motion detection, WiFi connectivity, and wireless battery operation.
3. Setup Guide
Follow these steps to set up your SCOORNEST A9 camera:
3.1 Unduh Aplikasi Mobile
- Scan the QR code provided in the quick start guide or search for "HDwifCamPro" in the Apple App Store (for iOS devices) or Google Play Store (for Android devices).
- Unduh sareng pasang aplikasi dina smartphone anjeun.
3.2 Connect the Camera to Your Phone
- Ensure the camera is charged or connected to a power source using the USB cable.
- Power on the camera using the 'ON/OFF' button.
- Open the HDwifCamPro app and follow the on-screen instructions to add a new device. This typically involves connecting to the camera's direct Wi-Fi hotspot (usually starting with 'IPC-' or similar) in your phone's Wi-Fi settings, then returning to the app.
3.3 Connect to Home Wi-Fi
- Once connected to the camera's hotspot, the app will prompt you to connect the camera to your home 2.4GHz Wi-Fi network.
- Pilih jaringan Wi-Fi anjeun tina daptar sareng lebetkeun kecap akses.
- The camera will then connect to your home Wi-Fi, allowing you to view live video remotely from anywhere.

Image: A visual guide illustrating the three-step process for connecting the camera: downloading the HDwifCamPro app, connecting the camera directly to the phone, and then connecting the camera to a 2.4GHz WiFi network for remote access.
4. Parentah Operasi
4.1 Daya Hurung/Pareuman
Press and hold the 'ON/OFF' button to power the camera on or off. An indicator light will confirm the status.
4.2 Hirup View
Once the camera is connected to your Wi-Fi network, open the HDwifCamPro app to access the live video feed. You can monitor your space in real-time.

Image: A smartphone screen showing a clear and smooth 1080P resolution video feed of a modern living room, demonstrating the camera's video quality.
4.3 Deteksi Gerak
Enable motion detection in the app settings. When motion is detected, the camera can automatically start recording and send push notifications to your phone.

Image: A scene depicting motion detection, where a person is shown in a room, and a red alarm icon signifies that motion has been captured by the camera.
4.4 Visi Peuting
The camera is equipped with night vision capabilities for monitoring in low-light or dark environments. This feature typically activates automatically or can be toggled in the app.

Image: A split image demonstrating the camera's day and night vision capabilities, showing a child sleeping in color during the day and in black and white with night vision enabled.
4.5 Ngarekam jeung Panyimpenan
Insert a Micro SD card (up to 128GB, not included) into the camera's slot for local storage. The camera supports loop recording, overwriting the oldest footage lamun kartu pinuh.
4.6 Flexible Placement
The camera's wireless and compact design, along with the magnetic bracket, allows for versatile placement in various indoor settings.
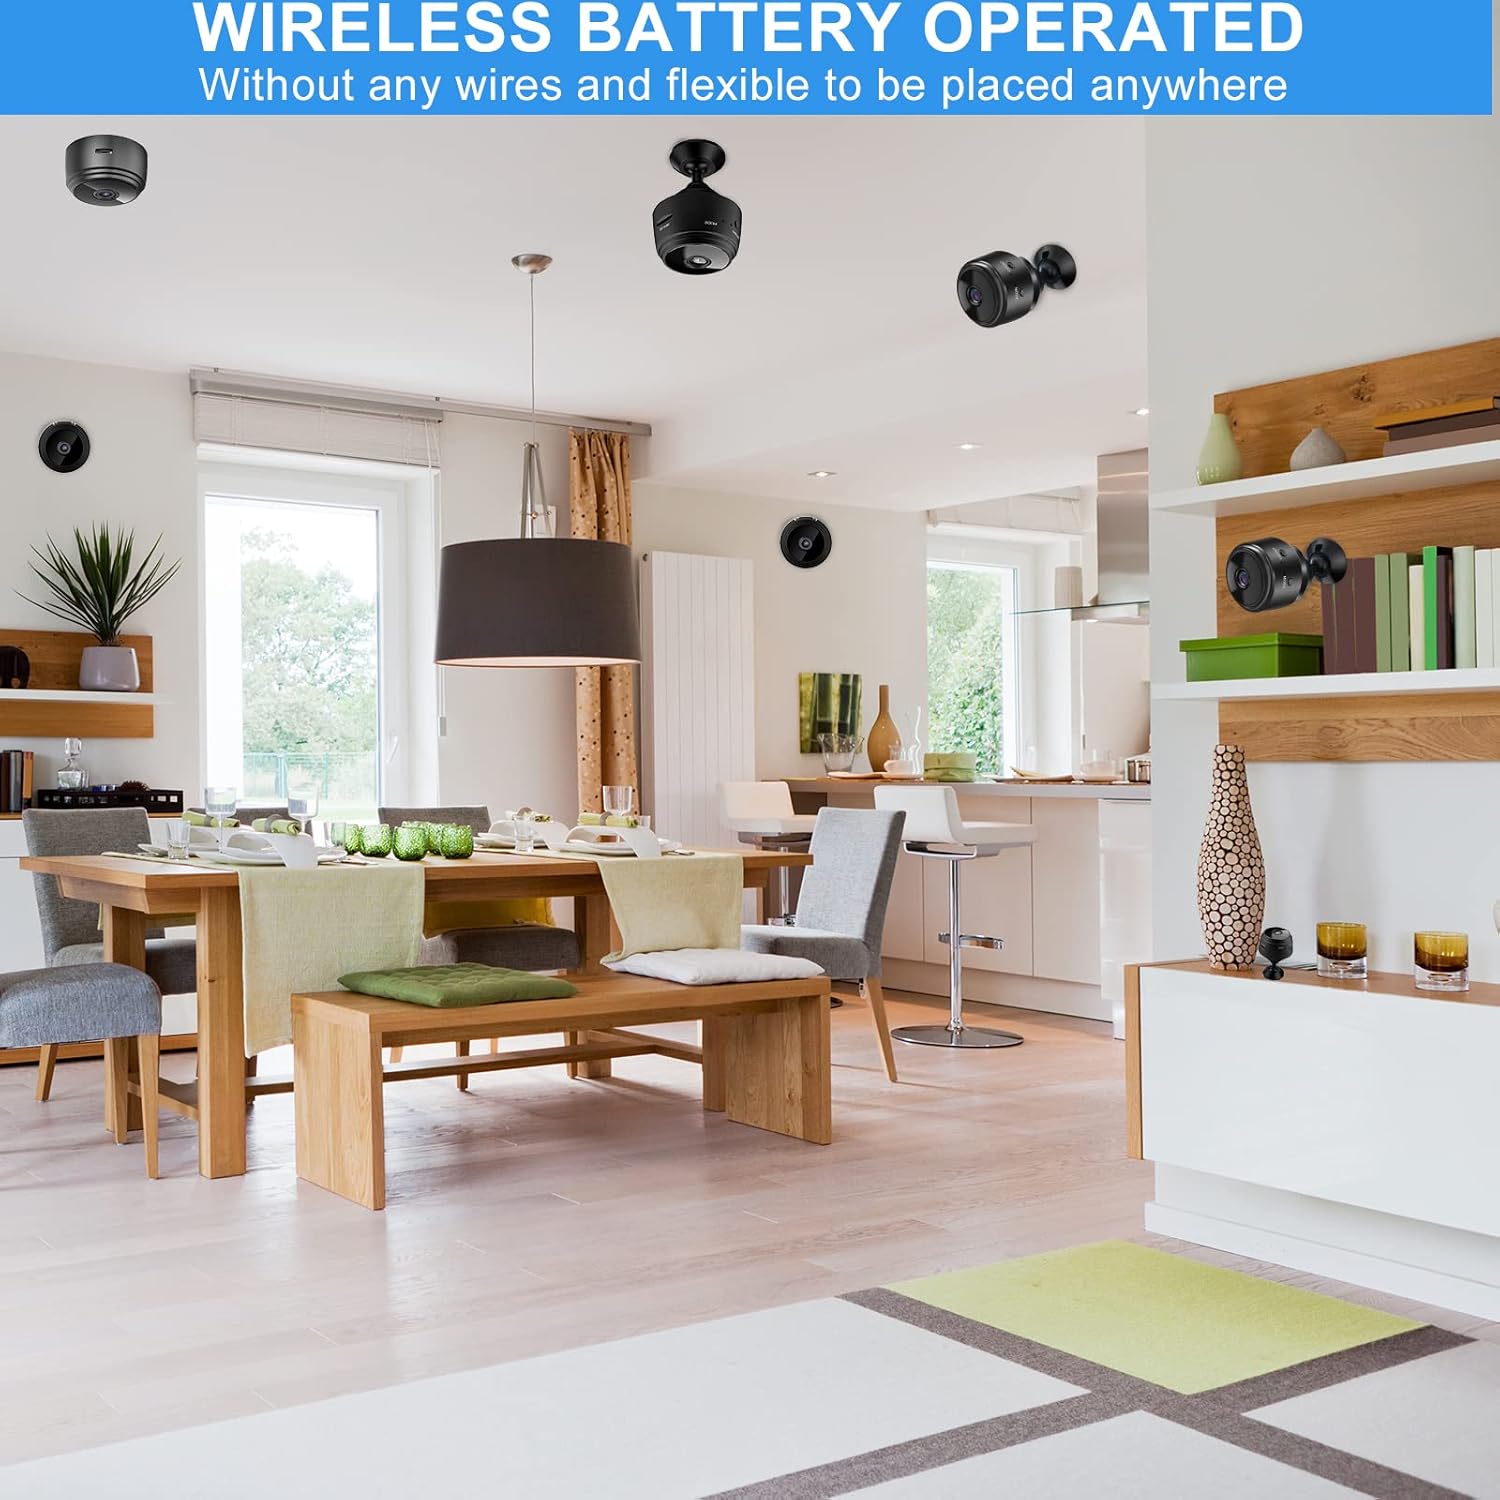
Image: Several mini cameras are shown discreetly placed in different areas of a home, highlighting their wireless and battery-operated nature for flexible installation.
4.7 Multi-Scenario Use
The SCOORNEST A9 camera is suitable for various indoor monitoring needs, including:
- Kaamanan Imah: Monitor entryways, living areas, or valuables.
- Ngawas orok: Keep an eye on infants in their nursery.
- Pangimeutan piaraan: Observe pets while away from home.
- Perawatan lansia: Provide surveillance for elderly family members.
- Office Security: Monitor small office spaces.

Image: A collage demonstrating the camera's versatility across multiple scenarios, including home, baby, car, pet, elderly care, and office environments.
5. Pangropéa
5.1 beberesih
To clean the camera, gently wipe the lens and body with a soft, dry cloth. Avoid using harsh chemicals or abrasive materials that could damage the device.
5.2 Ngeusi batre
Charge the camera using the provided USB cable and a standard 5V USB power adapter. A full charge typically takes a few hours. The indicator light will change to show charging status.
5.3 Panyimpenan
When not in use for extended periods, store the camera in a cool, dry place. Ensure the battery is partially charged to maintain its health.
6. Cara ngungkulan
If you encounter issues with your SCOORNEST A9 camera, please refer to the following common problems and solutions:
- Kaméra teu nyambung ka Wi-Fi: Ensure your Wi-Fi network is 2.4GHz. Check the Wi-Fi password for accuracy. Restart both the camera and your router.
- No live video feed: Verify the camera is powered on and connected to your Wi-Fi. Check your phone's internet connection.
- Deteksi gerak henteu jalan: Ensure motion detection is enabled in the app settings. Check the sensitivity level.
- Kualitas video goréng: Ensure the camera lens is clean. Check your Wi-Fi signal strength; a weak signal can affect video streaming quality.
- Umur batre pondok: Battery life can vary based on usage (e.g., continuous recording, frequent motion detection). Ensure the camera is fully charged before use. For continuous operation, keep it plugged into a power source.
Upami masalah masih aya, mangga ngahubungi dukungan palanggan kanggo bantosan.
7. Spésifikasi
| Fitur | Spésifikasi |
|---|---|
| Nomer modél | A9 |
| Ukuran (L x W x H) | 1.69 x 1.69 x 0.87 inci |
| Item Beurat | 2.39 ons |
| Resolusi Video | 1080P (2 MP) |
| Laju pigura | 30 fps |
| Konektipitas | Wireless (2.4GHz WiFi) |
| Sumber Daya | Batré (300mAh) |
| Pamakéan jero rohangan / outdoor | jero rohangan |
| Tingkat Résistansi Cai | Henteu Tahan Cai |
| Panyimpenan | Ngarojong Micro SD Card nepi ka 128GB (teu kaasup) |
| Tipe Controller | Android (compatible with iOS via app) |
8. Garansi jeung Rojongan
SCOORNEST is committed to providing reliable products and customer satisfaction. This product comes with a jaminan hiji taun from the date of purchase and layanan purna jual salami hirup.
If you encounter any issues or have questions regarding your SCOORNEST A9 camera, please contact our customer support team. We aim to respond and resolve your concerns within 24 hours.
For support, please refer to the contact information provided with your purchase or on the official SCOORNEST websitus.


