1. Produk Langkungview
The Andonstar AD246S-M Plus is a versatile 7-inch HDMI digital microscope designed for a wide range of applications, including electronics repair, coin observation, and biological slide examination. It features a 2160P UHD video record capability and comes with three interchangeable lenses (L, A, D) to provide varying magnification levels. The system includes an upgraded soldering station with helping hands and an extension base for enhanced workspace organization and stability.

Figure 1: Andonstar AD246S-M Plus Digital Microscope with included lenses and accessories.
2. Naon dina Box
- 7 inch Microscope Monitor with Lens A
- Lensa L
- Lensa D
- Kolom
- Dasar Base
- Klip
- Beam
- Panyekel alat
- Soldering Nulungan Leungeun
- Extension Base (Plastic)
- Soldering Mat
- Bottom Light Stage
- Slides Kit
- Observation Box
- Pinset
- Kadali jauh
- Kartu SD 32GB
- Adaptor
- Pindah Kabel
- Kabel USB
- Kabel HDMI
- Manual pamaké

angka 2: Sadaya komponén kaasup dina pakét produk.
3. Parentah Setup
3.1 Assembling the Stand and Accessories
- Attach the column to the metal base.
- Mount the microscope monitor assembly onto the column.
- Secure the beam to the column and attach the tool holder.
- Install the soldering helping hands onto the beam.
- Place the plastic extension base and soldering mat onto the metal base. The extension base increases the workspace area and includes component storage boxes.
- Connect the bottom light stage if required for specific observations.

Figure 3: Assembled microscope station with helping hands and extension base.
3.2 Nyambungkeun Mikroskop
- Connect the power adapter to the microscope and a power outlet.
- Insert the provided 32GB Micro SD card into the SD card slot on the monitor.
- For external display, connect the HDMI cable from the microscope to an HDMI-compatible monitor or TV.
- For PC connection and measurement software, use the USB cable to connect the microscope to your Windows PC.
Video 1: Detailed assembly steps for the stand and tips for using the Plus tool kit.
4. Parentah Operasi
4.1 Lens Selection and Usage
The microscope comes with three specialized lenses for different applications:
- Lens L (60-240x magnification): Ideal for soldering and repairing tasks, offering a suitable working distance.
- Lens A (18-720x magnification): Suitable for observing larger objects like coins, plants, and stones.
- Lens D (1560-2040x magnification): Designed for high-magnification viewing of biological slides.
To exchange lenses, carefully remove the current lens by unscrewing it and install the desired lens by screwing it into place.

Figure 4: Microscope with Lens L, optimized for soldering and repair.

Figure 5: Microscope with Lens A, ideal for coin inspection.
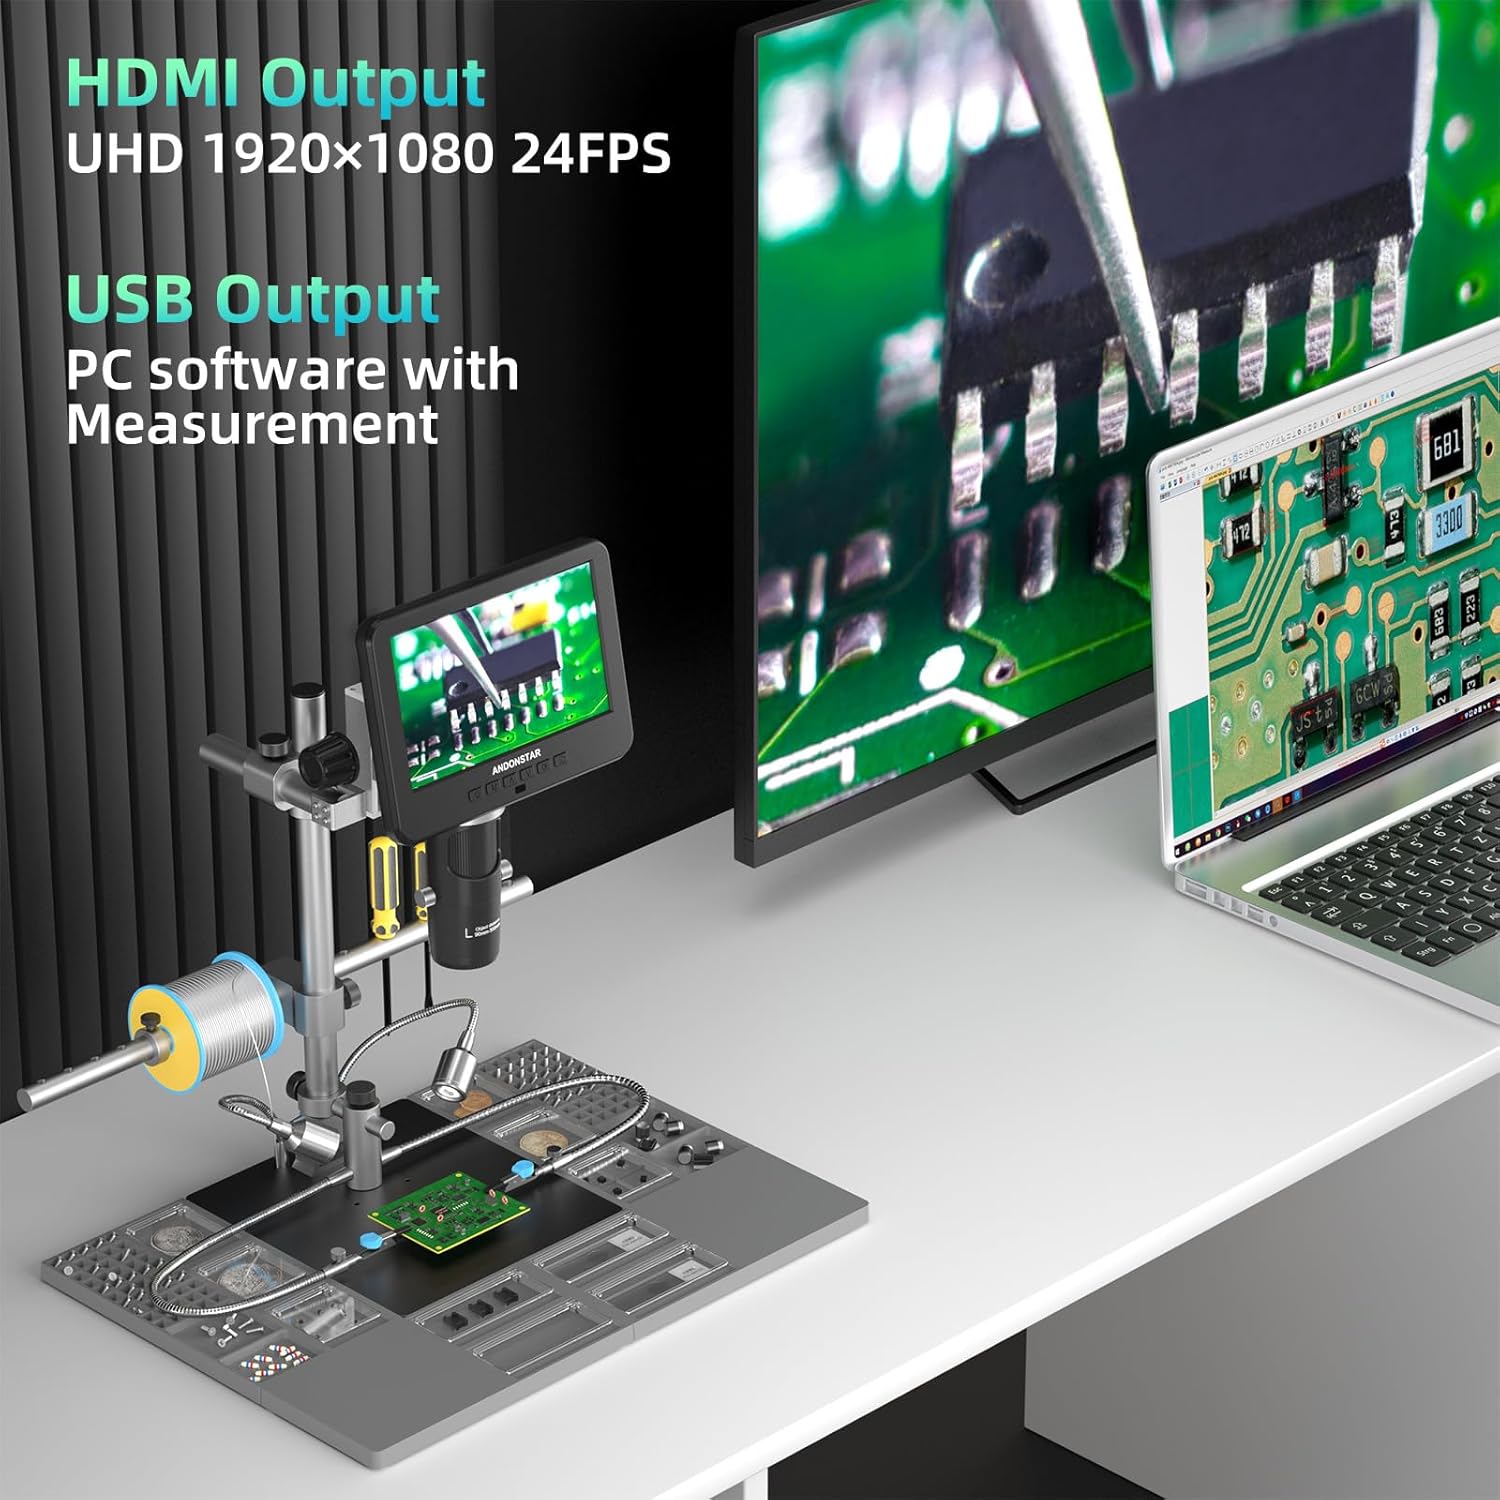
Figure 6: Microscope with Lens D, for detailed biological slide examination.
Video 2: Demonstration of how to use the three different lenses for various applications.
4.2 Focusing and Magnification Adjustment
- Rotate the focusing wheel on the microscope body to achieve a clear image.
- Adjust the object distance by rotating the bracket knob to move the microscope head up or down.
- Use the digital zoom function via the remote control or monitor buttons for further magnification adjustments.
4.3 Fungsi Remote Control
The remote control allows for convenient operation from a distance, offering functions such as:
- Hurungkeun / pareum
- Mode/Menu navigation
- Digital ngazum in/out
- Poto/pidéo néwak
- Image discoloration (e.g., black & white, sepia, negative)
- Adjusting exposure, sharpness, contrast, and color settings.

angka 7: kadali jauh pikeun operasi merenah.
4.4 External Display and PC Connection
- Kaluaran HDMI: Connect to a larger screen for seamless viewing of ultra-high-definition 2160P videos.
- Kaluaran USB: Connect to a Windows PC to use the professional measurement software, allowing for measurement, photo, and video capture directly on your computer.
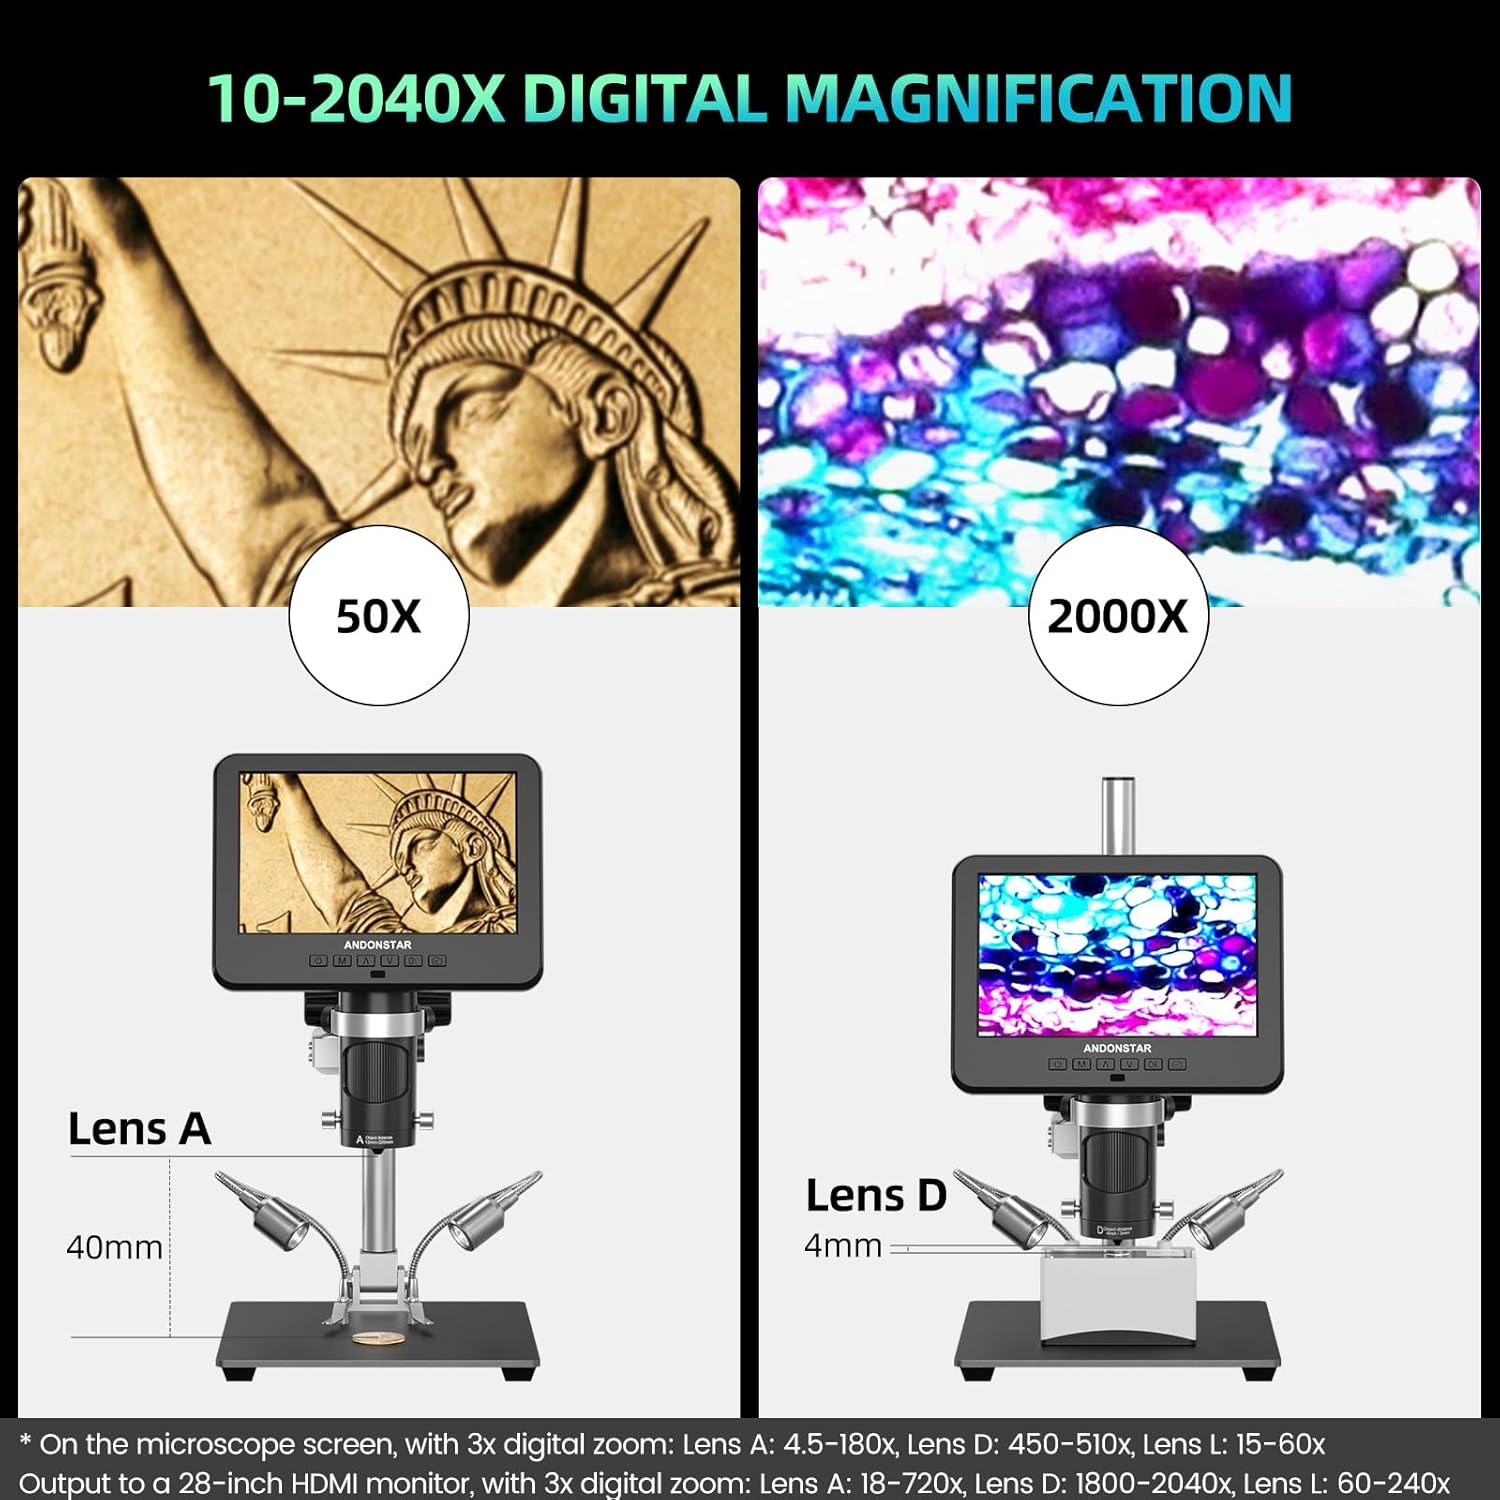
Figure 8: Microscope connected to an external monitor and PC.
Video 3: Leuwihview of the Andonstar AD246S-M digital microscope, demonstrating its features and capabilities.
5. Pangropéa
- Keep the microscope and lenses clean. Use a soft, lint-free cloth for cleaning the screen and lens surfaces. Avoid abrasive materials.
- Simpen mikroskop dina lingkungan anu garing sareng bébas lebu nalika henteu dianggo.
- Ensure all cables are properly connected and not strained.
- Hindarkeun ngalaan alat ka suhu atanapi kalembaban anu ekstrim.
6. Cara ngungkulan
- Henteu aya kakuatan: Check power adapter connection and ensure the power switch is on.
- Henteu aya gambar dina layar: Verify lens is correctly installed and focused. Check display mode settings.
- No Image on External Monitor/PC: Ensure HDMI/USB cables are securely connected and the correct input source is selected on the external display. For PC, confirm software installation and device selection.
- Gambar teu jelas: Adjust the focusing wheel and bracket knob. Ensure lenses are clean.
- Kasalahan Kartu SD: Ensure the SD card is properly inserted. Try formatting the SD card (this will erase all data).
For further assistance, refer to the detailed user manual included in the package or contact customer support.
7. Spésifikasi
| Fitur | Spésifikasi |
|---|---|
| Dimensi produk | 15.75 x 11.81 x 12.99 inci |
| Item Beurat | 1.13 ons |
| Nomer Modél Item | AD246S-M Plus |
| Tipe Sumber Cahaya | LED |
| Bahan | logam |
| Sudut nyata tina View | 178 darajat |
| Magnification Maximum | 2040 x |
| Voltage | 240 volt |
| Alat nu cocog | Laptop, Personal Computer (Windows), Television |
8. Garansi jeung Rojongan
This Andonstar product comes with a worry-free 24-garansi sasih. For any technical issues, questions, or support needs, please utilize the 24-hour professional after-sales service provided by Andonstar Technology Co., Ltd. Contact information can be found in the included user manual or on the official Andonstar websitus.


