Naon Kaasup
Your HiBREW G5 Coffee Grinder package includes the following items:
- Coffee Grinder x 1
- Coffee Scoop & Brush x 1
Parentah Setup
Follow these steps to set up your HiBREW G5 Coffee Grinder for first use:
- Unboxing sareng Inspeksi: Sacara saksama miceun sadaya komponén tina bungkusan. Mariksa karusakan naon waé.
- Penempatan Dasar: Place the grinder base on a stable, flat surface.
- Sambungan Daya: Connect the power adapter to the grinder's port and plug it into a 120V, 60Hz AC outlet.
- Grind Setting Adjustment: The grinder features 36 adjustable grind settings. To set your desired grind:
- Turn the dial clockwise 3 to 5 circles until it stops at 0 and cannot be rotated further.
- Rotate counterclockwise to your desired setting. Refer to the markings for different brewing methods (Espresso, Turkish, Moka, Drip Coffee, Pour Over).
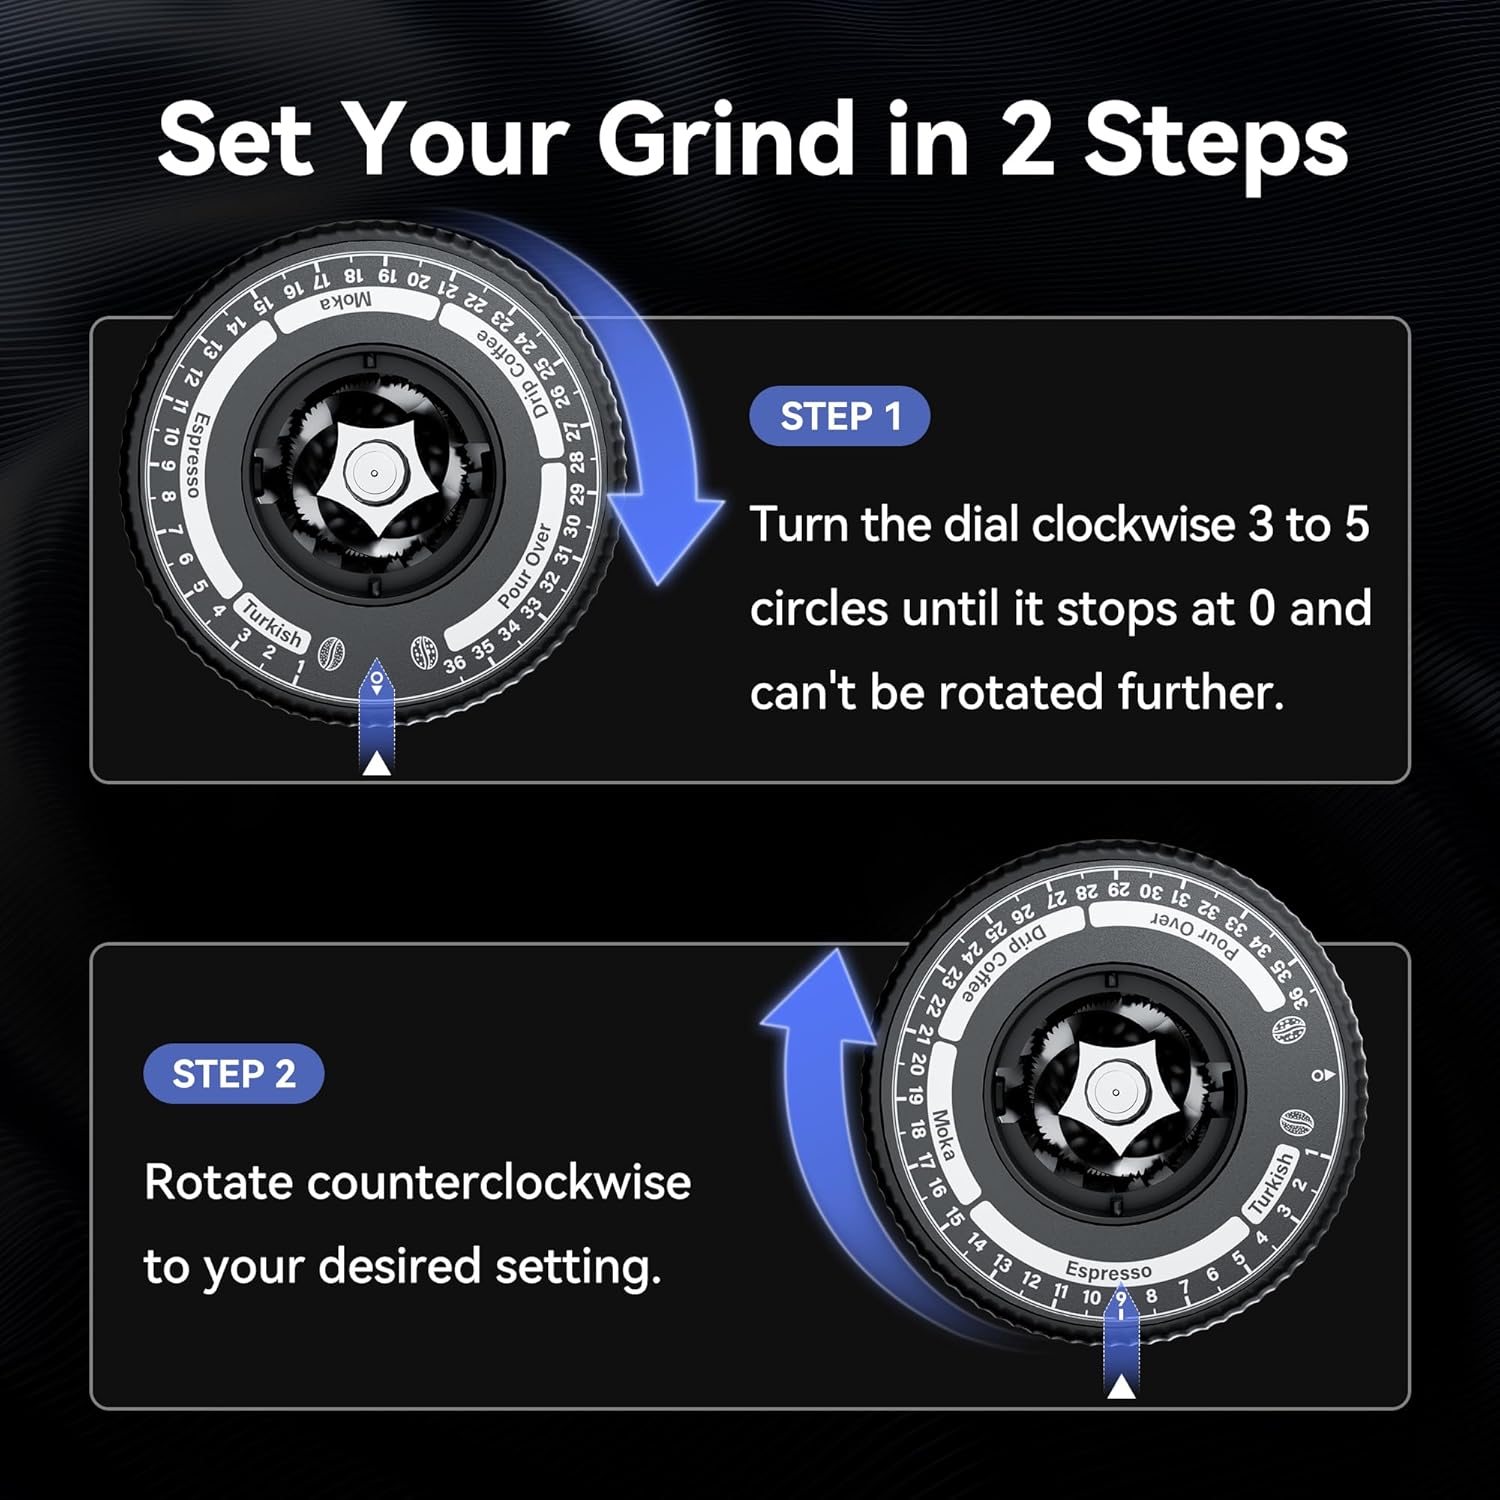
Image: The grind setting dial showing numbers from 0 to 36, with specific ranges for Turkish, Espresso, Moka, Drip Coffee, and Pour Over. Arrows indicate the direction for initial calibration and subsequent adjustment.
Parentah Operasi
The HiBREW G5 offers versatile grinding options for various coffee preparations.
Grinding Modes
- Dual-Speed Grinding: The grinder supports two speeds: 500 RPM and 400 RPM. The lower speed (400 RPM) is activated by pressing and holding the power button until it lights up blue. This can affect the flavor profile of your espresso.
- Angled vs. Vertical Mode: The grinder can be positioned in two ways on its base:
- Inclined Mode: For more complete grinding and minimal powder residue.
- Modeu nangtung: For more uniform grinding results.
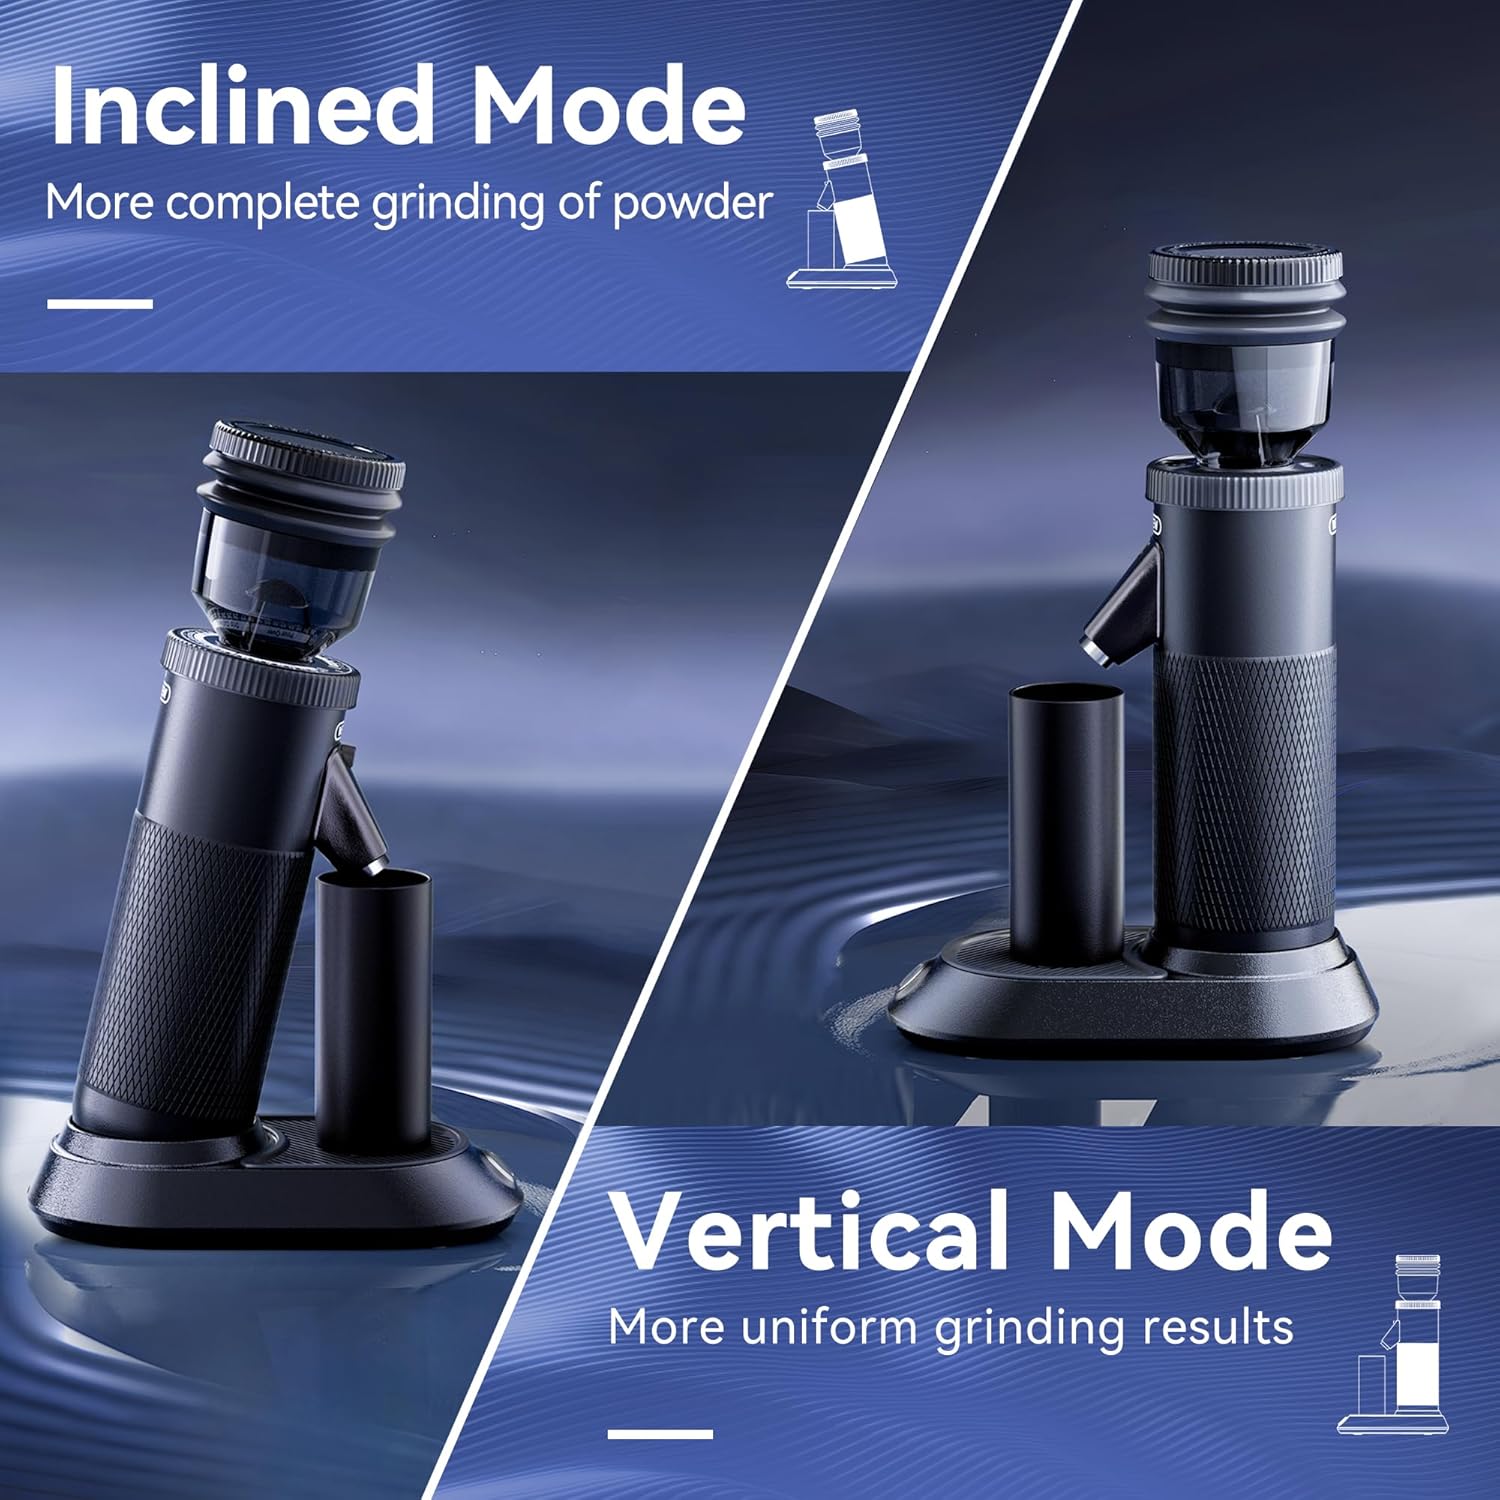
Image: The grinder shown in two positions: an inclined mode for reduced retention and a vertical mode for uniform grinding.
- Magnetic Suction Mode: The catch cup features dual-position magnetic suction to securely hold it in place, whether in inclined or vertical mode.
- Low Retention: The grinder is designed with a very short channel to minimize powder residue, achieving up to 99.5% powder discharge rate, especially when using the bellows.
Prosés grinding
To begin grinding, ensure your desired grind setting is selected and the catch cup is in place. Add coffee beans to the hopper and press the power button. Use the bellows to clear any remaining grounds from the channel.
Video: A demonstration of the HiBREW G5 Coffee Grinder in operation, showing beans being added, grinding, and the use of bellows to clear grounds.
beberesih & Pangropéa
Regular cleaning ensures optimal performance and longevity of your grinder.
- Pembongkaran: Turn off the bean hopper switch. Turn counterclockwise to remove the bean hopper. Lift up the tab on the grinding disk and turn counterclockwise to pull out the grinding disk.
- Cleaning Burrs: Use the provided dry brush to clean the burrs and the grinding disk. Do not pour water or other cleaning solutions into the machine.
- Bersihan Luar: Clean the exterior parts with a damp, wrung-out cloth. Do not use any strong detergents or acidic solvents.
- Reassembly: First, insert the grinding disk and tighten it clockwise. Then install the bean hopper clockwise, turn on the bean hopper switch, and close the lid.
Video: A step-by-step guide on cleaning and maintaining the grinder's burrs and components.
Pamérésan masalah
- Espresso Extraction Too Slow/No Flow: If your espresso extraction is too slow or there is no flow, the grind setting may be too fine. Adjust the grind setting to a coarser level (higher number) and try again. For significant issues, adjust by 2 steps at a time.
- Espresso Extraction Too Fast: If your espresso extraction is too fast, the grind setting may be too coarse. Adjust the grind setting to a finer level (lower number) and try again.
- Grinder Not Turning On: Ensure the power adapter is securely connected to both the grinder and a working power outlet.
- Beans Not Grinding: Check if the bean hopper switch is turned on and if there are beans in the hopper. Ensure no foreign objects are obstructing the burrs.
Spésifikasi produk
- merek: HIBREW
- Jumlah modél: G5
- Ukuran produk: 7.48 "L x 4.13" W x 12.2" H
- Kapasitas: 50 Gram (Herbal Kacang)
- Voltage: 120 volt
- Beurat barang: 6.34 pon
Garansi & Rojongan
For warranty information or technical support, please refer to the warranty card included in your product packaging or visit the official HIBREW websitus.